Unlocking the Art of Homemade Pie Recipes
Baking homemade pies often feels like an intimidating craft reserved for seasoned bakers, but it doesn’t have to be. At its core, mastering pie recipes comes down to understanding simple pastry science: managing flour hydration, maintaining temperature control, and balancing moisture within your fillings. Whether you are baking for a holiday table or preparing a weekend dessert, making your own pie from scratch delivers a texture and depth of flavor that store-bought crusts simply can’t replicate.
While modern stores stock pre-made doughs and canned fillings, starting from scratch gives you complete control over your ingredients. You get to choose crisp, tart apples, adjust the sugar level to your preference, and build a pastry that yields distinct, buttery layers. In this comprehensive guide, we will break down the essential steps for baking memorable fruit pies, focus on a foolproof all-butter double-crust apple pie recipe, and examine how simple tweaks in technique can transform your home baking.
Key Takeaways
- Temperature is everything: Keep your butter and water ice-cold to ensure distinct, flaky pastry layers.
- Balance your fruit selection: Combine sweet and tart apple varieties for optimal flavor complexity and structural integrity.
- Prevent soggy bottoms: Bake on the lowest oven rack or use a preheated baking sheet to set the bottom crust quickly.
- Thicken with precision: Tapioca or cornstarch requires full boiling temperatures inside the pie to properly activate its thickening power.
- Rest your dough: Always chill pastry dough for at least two hours before rolling to relax gluten and prevent shrinking during baking.
Understanding Pie Pastry: Fats and Chemistry
The foundation of all classic double-crust pie recipes is the pastry. Achieving a tender, flaky crust requires a basic understanding of how fat, water, and flour interact. When flour combines with water, gluten proteins link together to form an elastic network. While gluten gives bread its structural chew, too much gluten development in pie dough makes the crust tough and leathery.

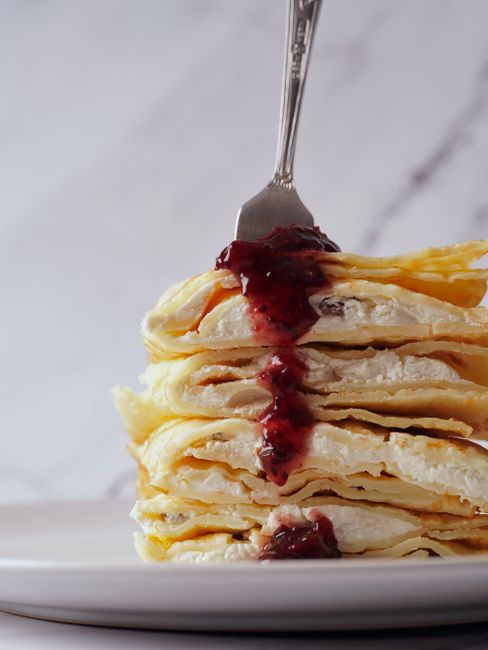
Fat acts as a barrier to gluten development. As you coat flour particles with fat, you coat the proteins and restrict their ability to bond with water. Furthermore, during baking, the tiny pockets of solid fat melt inside the oven. As the butter melts, the water content inside the butter converts to steam. This steam expands rapidly, pushing apart the delicate layers of flour and creating thin, crispy leaves of pastry.
| Fat Type | Flavor Profile | Texture Result | Workability |
|---|---|---|---|
| Unsalted Butter | Rich, creamy, and aromatic | Flaky with crisp tender layers | Requires strict temperature control |
| Vegetable Shortening | Neutral flavor | Extremely tender, high rise | Very easy to roll; high melting point |
| Rendered Leaf Lard | Savory, light flavor | Exceptionally flaky and traditional | Easy to handle; creates distinct flakes |
| Butter & Shortening Blend | Balanced dairy flavor | Combines flakiness with tenderness | Forgiving for novice bakers |
While vegetable shortening yields high rise and tenderness due to its higher melting point, pure unsalted butter delivers unmatched flavor. An all-butter crust takes a bit more care to keep cold, but the resulting taste makes it the absolute gold standard for sweet pie recipes.
Selecting the Best Apples for Baking
Not all apples behave the same way when exposed to oven heat. Some apples turn to mush rapidly, while others retain their shape but lack sufficient flavor. The best apple pie recipes rely on a mix of texturally firm apples that hold up during a long bake, paired with aromatic varieties that supply tartness and natural sweetness.
For optimal results, aim for a 50/50 mix of tart and firm-sweet apples. Firm, tart options like Granny Smith or Bramley provide a bright acid backbone that cuts through the rich pastry, while varieties like Honeycrisp, Braeburn, Pink Lady, or Northern Spy offer structural crispness and floral sugar notes. Avoid soft eating apples like Red Delicious or McIntosh for baked pies, as their cellular structure breaks down quickly into applesauce, leaving empty air pockets beneath your top crust.
Ingredients for Master Double-Crust Apple Pie
Before beginning your prep work, gather your ingredients and ensure your cold items are thoroughly chilled. Precision in measuring and temperature control is crucial for consistent success.
For the All-Butter Crust:
- All-purpose flour: Provides the ideal protein balance (around 10-11%) for structure without toughness.
- Unsalted butter: High-quality butter (80-82% butterfat), diced into small cubes and chilled in the freezer for 15 minutes before use.
- Fine sea salt: Enhances the natural buttery flavor of the pastry.
- Granulated sugar: A small amount adds subtle sweetness and aids in crust browning.
- Ice water: Keeps the butter from melting while bringing the dough together.
For the Apple Filling:
- Fresh apples: Peeled, cored, and sliced 1/4-inch thick.
- Fresh lemon juice: Prevents browning and provides acidity to balance the sugar.
- Granulated & dark brown sugar: Granulated sugar adds clean sweetness, while brown sugar brings warm molasses depth.
- Tapioca starch (or cornstarch): Binds the apple juices into a silky, sliced-worthy gel without turning gummy.
- Ground cinnamon & nutmeg: Warm spices that enhance without overpowering the natural fruit flavor.
- Egg wash & coarse sugar: One beaten egg mixed with water for a golden finish, topped with turbinado sugar for crunch.
Step-by-Step Cooking Instructions
Step 1: Prepare the Pastry Dough
In a large bowl, whisk together the all-purpose flour, fine sea salt, and one tablespoon of granulated sugar. Add the frozen, cubed butter to the flour mixture. Using a pastry cutter or two knives, cut the butter into the flour until the mixture resembles coarse meal with some pea-sized pieces of butter remaining. These distinct pieces of butter are essential for flakiness.
Drizzle four tablespoons of ice water over the mixture. Gently toss the dough with a fork to distribute the moisture. Continue adding ice water, one tablespoon at a time, just until the dough holds together when squeezed. Divide the dough into two equal disks, wrap each tightly in plastic wrap, and refrigerate for at least two hours (or up to two days).
Step 2: Mix the Apple Filling
Place your sliced apples in a large mixing bowl. Drizzle with fresh lemon juice and toss gently. In a small bowl, whisk together the granulated sugar, dark brown sugar, tapioca starch, ground cinnamon, and ground nutmeg. Pour the dry spice mixture over the apples and toss until every slice is evenly coated. Let the apples sit at room temperature for 15-20 minutes to draw out excess juices.
Step 3: Roll out the Bottom Crust
Lightly flour your work surface and rolling pin. Remove one disk of dough from the refrigerator. Roll the dough from the center outward, rotating it frequently to prevent sticking, until you have a circle roughly 12 inches in diameter and 1/8-inch thick. Gently transfer the dough into a 9-inch pie dish, pressing it soft into the bottom and sides without stretching it. Trim any excess dough hanging more than 1/2 inch beyond the rim.
Step 4: Assemble the Pie
Pour the apple filling into the prepared bottom crust, piling the fruit slightly higher in the center to support the top crust. If there is an excessive amount of liquid drawn out at the bottom of your bowl, leave behind the last few tablespoons to avoid an overly liquid pie.
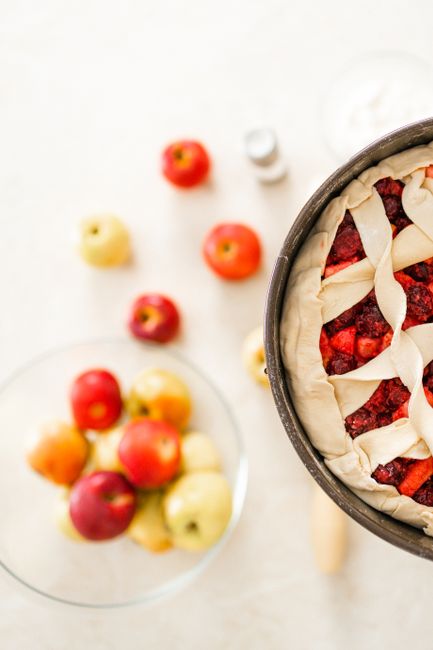
Roll out the second dough disk to a 12-inch circle. Place the top crust over the apple filling. Trim the top crust edge to match the bottom crust, then fold the edges under themselves to form a thick seal around the rim. Crimp the edges using your fingers or a fork to seal tightly. Cut 4 to 5 ventilation slits in the top crust to allow steam to escape.
Editorial Tip: Always ensure the liquid inside your fruit pie reaches an active boil through the ventilation slits before taking it out of the oven. Starch thickeners like tapioca and cornstarch require full boiling temperatures (212°F) to hydrate and set properly. If you pull the pie early, your filling will remain liquid regardless of how long it cools.
Step 5: Bake to Golden Perfection
Preheat your oven to 400°F (200°C) and place a rimmed baking sheet on the lowest rack. Brush the top of the pie evenly with the egg wash and sprinkle generously with turbinado sugar. Place the pie directly onto the preheated baking sheet. Bake at 400°F for 20 minutes, then lower the oven temperature to 375°F (190°C) and continue baking for another 35 to 45 minutes. The pie is done when the crust is deep golden brown and thick juices are actively bubbling through the vents.
Troubleshooting Common Baking Pitfalls
Even seasoned bakers encounter occasional issues when attempting complex pie recipes. Understanding why mistakes happen allows you to adjust your approach for future bakes.
Soggy Bottom Crust
A wet, undercooked bottom crust is usually caused by insufficient heat reaching the base of the pie dish during early baking, or excess liquid in the filling. To prevent this, always bake your pie on a preheated baking sheet or baking stone placed on the lowest oven rack. Glass pie pans are also helpful because they allow you to visually inspect the bottom crust’s color while baking.
Shrinking Pastry
If your dough pulls away from the edges of the pan and shrinks significantly in the oven, gluten overdevelopment is usually to blame. Stretching the dough when fitting it into the pan creates tension; as the heat hits the pastry, that tension releases and the dough pulls back. Allow the dough to rest properly in the fridge, and gently lay the pastry into the pan rather than pulling or stretching it.
Runny Fruit Filling
If your filling spills out like soup when sliced, either the starch amount was insufficient for the juiciness of the fruit, or the pie was cut while still warm. Fruit pies require hours to cool down completely so the natural pectins and added starches can firm up. Allow your pie to cool at room temperature for at least 4 hours before slicing.
Ingredient Substitutions & Recipe Variations
- Gluten-Free Option: Substitute the all-purpose flour with a high-quality 1:1 gluten-free baking flour containing xanthan gum. Gluten-free dough breaks easily, so roll it between sheets of parchment paper for easier handling.
- Pear and Cardamom Swap: Replace half of the apples with firm Bosc or Anjou pears. Add 1/2 teaspoon of freshly ground cardamom to the spice mixture for a fragrant variation.
- Cheddar Crust Variation: Fold 1/2 cup of finely shredded sharp white cheddar cheese into the flour mixture before adding the butter for a classic savory-sweet combination.
- Vegan Pastry: Replace the butter with high-quality plant-based butter sticks that stay firm when chilled, and swap the egg wash for maple syrup mixed with almond milk.
Serving and Storage Guidelines
Serving a homemade fruit pie at the right temperature ensures you experience the ideal balance of crispy crust and set filling. Allow the pie to rest on a wire cooling rack for a minimum of 4 hours after baking. Slicing too early causes the warm, liquid filling to run out, leaving the slice dry and the remaining pie soggy.
For storage, keep the pie at room temperature, loosely covered with foil or plastic wrap, for up to 2 days. If keeping it longer, store it in the refrigerator for up to 5 days. Reheat individual slices in a 350°F (175°C) oven for 8-10 minutes to crisp up the crust before serving. Avoid microwaving slices, as this turns the flaky crust soft and rubbery.
Nutritional Overview
| Nutrient | Amount Per Serving (1 Slice) |
|---|---|
| Calories | 420 kcal |
| Total Fat | 20 g |
| Saturated Fat | 12 g |
| Cholesterol | 50 mg |
| Sodium | 310 mg |
| Total Carbohydrates | 58 g |
| Dietary Fiber | 4 g |
| Sugars | 28 g |
| Protein | 4 g |
Frequently Asked Questions
Why is my pie crust tough instead of flaky?
Tough crusts are usually caused by overworking the dough or adding too much water. Overworking develops the gluten proteins in the flour, while excess water makes the pastry dense. Work quickly, keep ingredients cold, and handle the dough as little as possible.
Can I make pie dough in advance and freeze it?
Yes, pie dough freezes exceptionally well. Wrap the formed disks tightly in two layers of plastic wrap and freeze for up to 3 months. Thaw the disk overnight in the refrigerator before rolling it out.
How do I prevent a soggy bottom crust in fruit pie recipes?
Bake your pie on the lowest rack of your oven on a preheated baking sheet. The direct heat ensures the bottom crust sets and browns quickly before fruit juices can saturate the unbaked pastry.
What are the best apples for fruit pie recipes?
A combination of firm, tart apples like Granny Smith and sweet, firm apples like Honeycrisp or Braeburn yields the best balance of structure and flavor. Avoid soft varieties like McIntosh or Red Delicious.
Do I need to pre-cook the apple filling before baking?
Pre-cooking is optional. While raw apples baked directly in the crust give a classic texture, pre-cooking the filling slightly reduces volume shrinkage, preventing a gap between the top crust and the filling.
How do I know when a fruit pie is completely finished baking?
A fruit pie is done when the crust is deep golden brown and the fruit juices are visibly bubbling through the top vents. The bubbles should be slow and thick, indicating that the starch thickener has fully activated.
Final Thoughts on Masterful Pie Baking
Baking exceptional pie recipes at home is a rewarding culinary skill that combines simple ingredients with fundamental techniques. By maintaining cold temperatures for your pastry, choosing the right combination of fresh fruit, and allowing your pie to bake and cool completely, you guarantee a beautiful result every time. Embrace the process, take your time with the dough, and enjoy sharing a delicious slice of classic, homemade pie with family and friends.