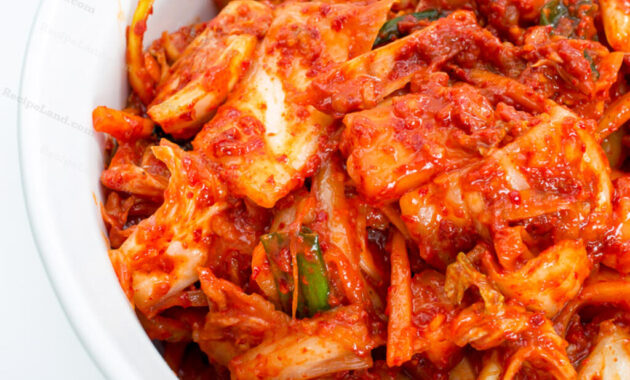
Kimchi, Korea’s iconic fermented side dish, is a culinary powerhouse packed with flavor and health benefits. This spicy kimchi recipe delivers a bold, tangy, and deeply satisfying experience that will tantalize your taste buds and leave you craving more. Whether you’re a seasoned kimchi connoisseur or a curious beginner, this guide will walk you through every step of the process, ensuring a delicious and authentic result. Get ready to embark on a flavorful journey into the world of spicy kimchi!
This Spicy Kimchi recipe is more than just a side dish; it’s a cultural staple and a testament to the art of fermentation. The vibrant red color, the pungent aroma, and the complex flavors all contribute to a truly unique culinary experience. This recipe is designed to be approachable and adaptable, allowing you to customize the spice level and ingredient preferences to your liking. Prepare to unleash your inner kimchi artisan and create a batch of this fermented delight that will impress your friends and family.
Kimchi is not only delicious but also incredibly good for you. The fermentation process creates beneficial probiotics that promote gut health and boost your immune system. It’s also a rich source of vitamins, minerals, and antioxidants. Adding spicy kimchi to your diet is a simple and delicious way to improve your overall well-being. So, let’s dive in and discover the secrets to making the best spicy kimchi you’ve ever tasted!

Recipe Overview
| Category | Value |
|---|---|
| Preparation Time | 30 minutes (plus salting time) |
| Fermentation Time | 1-5 days (or longer, depending on taste) |
| Yields | About 2 quarts of Spicy Kimchi |
| Difficulty | Medium |
Nutrition per Serving (approximate)
| Nutrient | Amount |
|---|---|
| Calories | 35-50 kcal |
| Protein | 1-2g |
| Carbohydrates | 5-8g |
| Fat | 1-2g |
| Sodium | Varies greatly depending on salt used |
Ingredients for Spicy Kimchi
| Ingredient | Quantity |
|---|---|
| Napa Cabbage | 2 lbs, quartered and cored |
| Kosher Salt | 1/2 cup |
| Water | 6 cups, divided |
| Korean Radish (Mu) | 1 cup, julienned |
| Green Onions | 1 cup, cut into 1-inch pieces |
| Korean Chili Powder (Gochugaru) | 1/2 – 1 cup (adjust to your spice preference) |
| Garlic | 1/2 cup, minced |
| Ginger | 2 tablespoons, minced |
| Fish Sauce | 1/4 cup |
| Sugar | 1 tablespoon |
| Glutinous Rice Flour (Sweet Rice Flour) | 2 tablespoons |
| Water (for rice paste) | 1/2 cup |
| Optional: Carrots, julienned | 1/2 cup |
Cooking Instructions
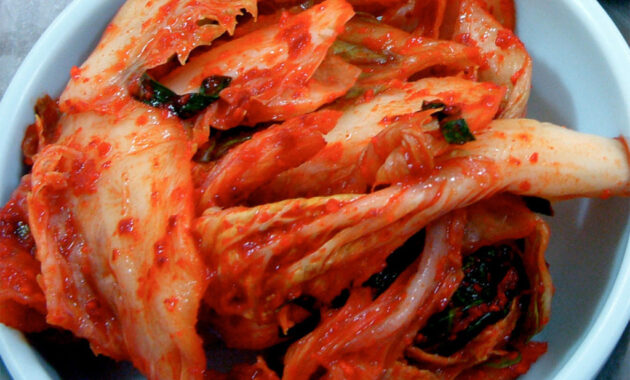
- Prepare the Cabbage: In a large bowl, dissolve the salt in 4 cups of water. Submerge the quartered cabbage in the salt water, ensuring it’s fully covered. Place a plate or weight on top to keep the cabbage submerged. Let it sit for at least 2 hours, or up to 4 hours, flipping the cabbage halfway through. The cabbage should be wilted and pliable.
- Make the Rice Paste: While the cabbage is salting, prepare the rice paste. In a small saucepan, whisk together the glutinous rice flour and 1/2 cup of water. Cook over medium heat, stirring constantly, until the mixture thickens into a smooth paste. This should take about 5-7 minutes. Remove from heat and let it cool completely. This is crucial for the fermentation process and adds a subtle sweetness.
- Rinse the Cabbage: After the cabbage has salted, rinse it thoroughly under cold running water at least three times to remove excess salt. Gently squeeze out any excess water. This step is vital to prevent overly salty kimchi.
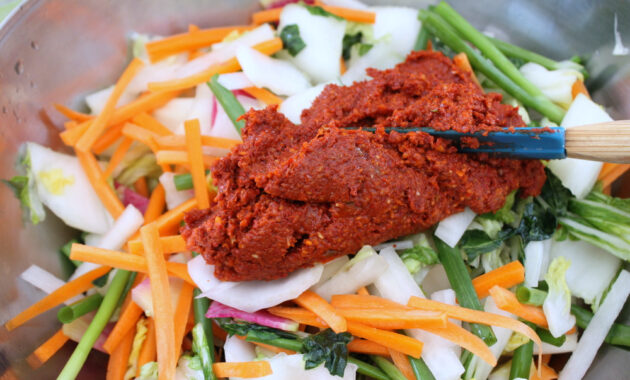
- Prepare the Kimchi Paste: In a large bowl, combine the cooled rice paste, Korean chili powder (gochugaru), minced garlic, minced ginger, fish sauce, and sugar. Mix well to form a thick, vibrant red paste. Adjust the amount of chili powder to your preferred level of spiciness.
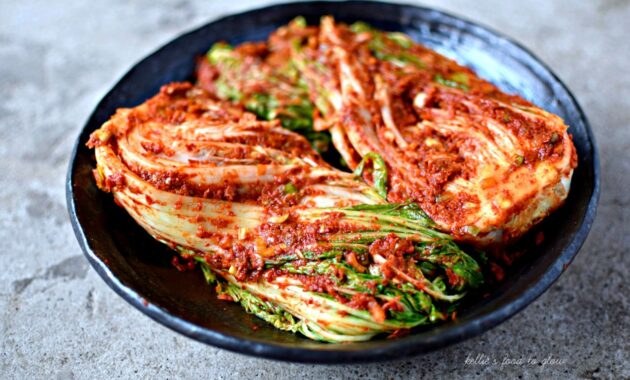
- Combine Ingredients: Add the drained cabbage, Korean radish, green onions, and optional carrots to the bowl with the kimchi paste. Put on gloves (to protect your hands from the chili powder!) and thoroughly massage the paste into the cabbage and vegetables, ensuring every piece is well coated. This is where the magic happens! The more thoroughly you massage the paste, the better the flavors will meld.
- Pack the Kimchi: Pack the spicy kimchi tightly into clean glass jars or containers, leaving about an inch of space at the top. Press down on the kimchi to release any trapped air. Pour any remaining paste over the top.
- Ferment the Kimchi: Seal the jars loosely (the fermentation process creates gases, so tight sealing can cause the jars to explode). Leave the jars at room temperature (ideally around 68-72°F or 20-22°C) for 1-5 days, or longer, depending on your taste preference. Check the kimchi daily. You should see bubbles forming, which indicates fermentation is taking place. Taste the kimchi after a day or two. When it reaches your desired level of sourness, transfer the jars to the refrigerator. Refrigerating the kimchi will slow down the fermentation process.
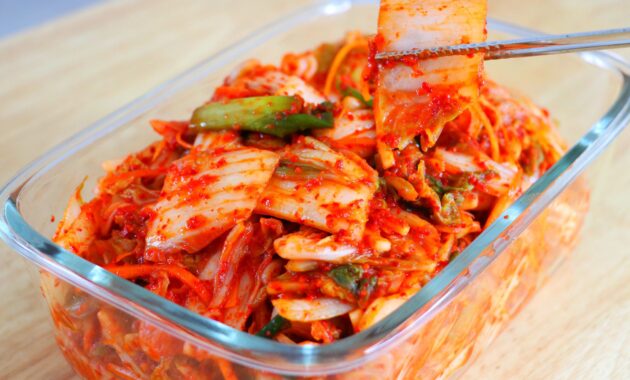
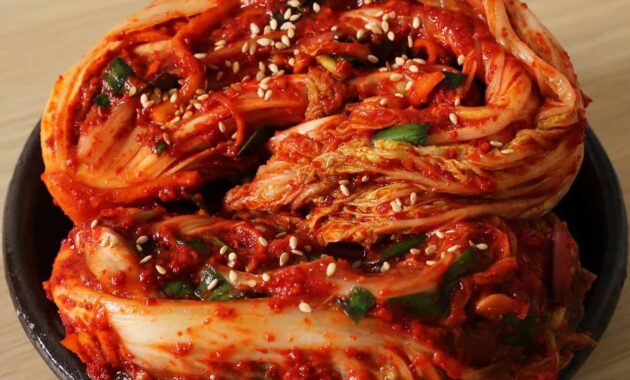
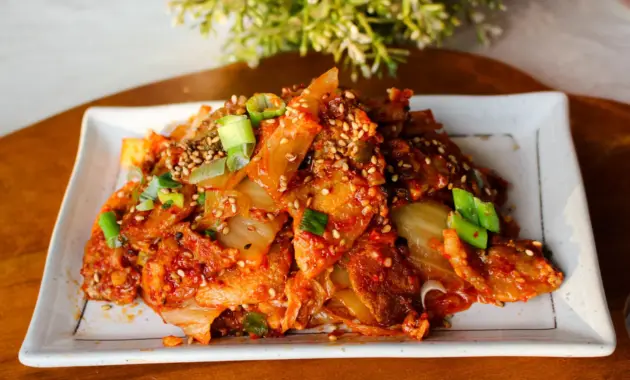
- Enjoy Your Spicy Kimchi: The kimchi will continue to ferment slowly in the refrigerator. It’s best enjoyed after a few days of refrigeration, allowing the flavors to fully develop. Serve it as a side dish, use it as an ingredient in stews, fried rice, or pancakes, or enjoy it straight from the jar!
Serving Suggestions
Spicy kimchi is incredibly versatile and can be enjoyed in countless ways:
- As a Side Dish: Serve it alongside grilled meats, rice dishes, or noodle soups.
- Kimchi Fried Rice: Stir-fry cooked rice with kimchi, vegetables, and your choice of protein.
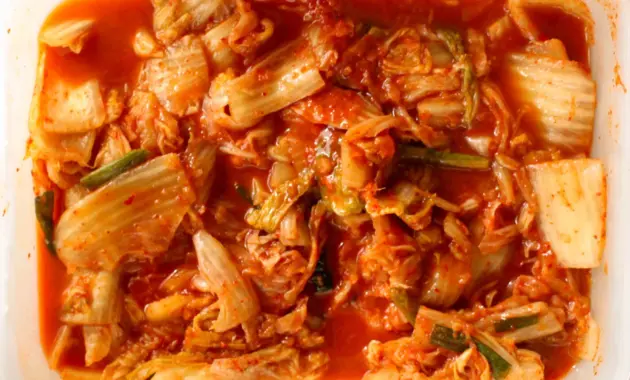
- Kimchi Stew (Kimchi Jjigae): A hearty and flavorful stew made with kimchi, tofu, pork (or other protein), and vegetables.
- Kimchi Pancakes (Kimchi Jeon): Crispy and savory pancakes made with kimchi, flour, and egg.
- Kimchi Ramen: Add kimchi to your favorite ramen recipe for a spicy and tangy kick.
- On Tacos or Sandwiches: Add a layer of Spicy Kimchi for a flavorful, tangy addition.
Tips and Notes for Perfect Spicy Kimchi
- Salt Quality: Using high-quality kosher salt is recommended for the best results. Avoid using iodized salt, as it can interfere with the fermentation process.
- Spice Level: Adjust the amount of Korean chili powder (gochugaru) to your preferred level of spiciness. Start with 1/2 cup and add more to taste. Gochugaru comes in different levels of heat, so experiment to find your favorite.
- Fermentation Time: The fermentation time will vary depending on the temperature and humidity of your environment. Taste the kimchi daily to monitor its progress. The longer it ferments, the sourer it will become.
- Storage: Store the spicy kimchi in the refrigerator for up to several months. As it continues to ferment, it will become more sour over time.
- Vegetarian Option: To make this recipe vegetarian, substitute the fish sauce with a vegetarian fish sauce alternative or omit it altogether. You can also add a tablespoon of soy sauce for extra umami flavor.
- Gochugaru Substitutes: While Gochugaru provides the best flavor, if you can’t find it, you can use a mixture of regular chili powder and a pinch of smoked paprika. The flavor won’t be exactly the same, but it will still be delicious.
- Don’t Overfill Jars: Kimchi produces gas as it ferments, so it’s important to leave some headspace in the jars to prevent them from exploding. Loosely seal the lids during the initial fermentation period.
- Cleanliness is Key: Ensure all your equipment and jars are clean and sanitized to prevent the growth of unwanted bacteria.
- Experiment with Ingredients: Feel free to add other vegetables to your kimchi, such as daikon radish, carrots, or mustard greens.
- Dealing with Mold: If you see any mold forming on the surface of the kimchi, discard that layer and the kimchi underneath it. However, if the kimchi smells and tastes fine, it is likely still safe to eat.
This spicy kimchi recipe is a rewarding culinary project that will yield a delicious and versatile condiment. With a little patience and attention to detail, you can create a batch of homemade kimchi that will rival any store-bought variety. Enjoy the process, experiment with flavors, and savor the fruits of your labor!
Making your own Spicy Kimchi allows you to control the ingredients and adjust the flavors to your liking. You can also customize the spice level, ensuring that it’s perfectly suited to your taste buds. This recipe is a starting point, so feel free to experiment and create your own unique version of this Korean classic.
The key to great spicy kimchi is the quality of the ingredients and the patience to allow it to ferment properly. Use fresh, high-quality vegetables and don’t rush the fermentation process. The longer it ferments, the more complex and flavorful it will become. So, embrace the art of fermentation and enjoy the delicious results!
Spicy Kimchi is a fantastic addition to any refrigerator. Its unique flavors and health benefits make it a true culinary gem. This Spicy Kimchi recipe is a great starting point to learn how to make kimchi at home. Once you try your own home made Spicy Kimchi, you may never buy the store bought again!
Now, go forth and create your own batch of fiery and fermented spicy kimchi! Your taste buds (and your gut) will thank you!