Imagine the rich, nutty, and slightly tangy flavor of Asiago cheese melting in your mouth. Now, imagine crafting that very cheese in your own kitchen! This isn’t some far-fetched culinary dream; it’s an achievable reality with our comprehensive guide to making Asiago cheese at home. Whether you’re a seasoned cheesemaker or a curious beginner, this recipe will walk you through each step, ensuring a delicious and rewarding experience. Asiago cheese, traditionally from the Veneto region of Italy, is celebrated for its versatility. It can be enjoyed on its own, grated over pasta, melted into sandwiches, or used as a key ingredient in countless dishes. This recipe focuses on creating a fresh Asiago cheese, offering a delightful introduction to the world of homemade cheese.

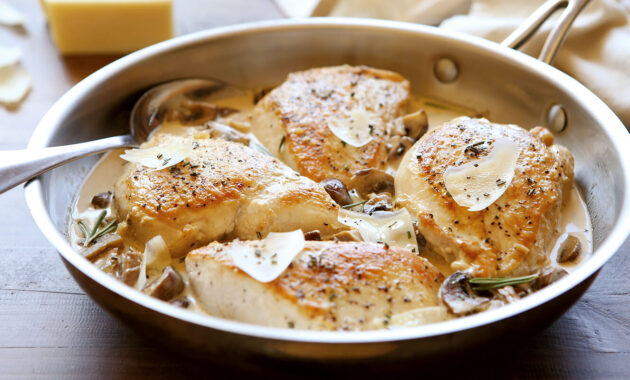
[Placeholder Image of Homemade Asiago Cheese]
Before we dive into the detailed instructions, let’s get a quick overview of what’s involved.

| Category | Value |
|---|---|
| Preparation Time | 30 minutes |
| Cooking Time | 60-90 minutes (plus aging) |
| Servings | Approximately 1 pound of cheese |
| Difficulty | Intermediate |
Nutrition per serving (approximate, per ounce): Calories: 110, Protein: 7g, Fat: 9g, Carbohydrates: 1g.

Now, let’s gather our ingredients for this exciting cheesemaking journey. Making your own Asiago cheese is more attainable than you might think!
| Ingredient | Quantity | Notes |
|---|---|---|
| Whole Milk (unpasteurized preferred) | 2 gallons | If using pasteurized milk, add calcium chloride. |
| Mesophilic Culture | 1/4 teaspoon | Choose a culture suitable for semi-hard cheeses. |
| Rennet (liquid or tablet) | As directed on package for 2 gallons of milk | Vegetarian or animal rennet can be used. |
| Calcium Chloride (if using pasteurized milk) | 1/4 teaspoon diluted in 1/4 cup water | Helps with curd formation. |
| Non-iodized Salt | 2 tablespoons | For salting the curd. |
| Water | As needed | For sanitizing equipment and diluting calcium chloride. |
Cooking Instructions
- Sanitize Your Equipment: Thoroughly clean and sanitize all equipment that will come into contact with the milk, including your pot, thermometer, stirring spoon, cheese mold, and draining cloth. This is crucial to prevent unwanted bacteria from affecting your cheese.
- Heat the Milk: Pour the milk into a large pot. Slowly heat the milk to 86°F (30°C) over low heat, stirring gently to prevent scorching. Use a reliable thermometer to monitor the temperature. Accurate temperature control is key to successful cheese making.
- Add Calcium Chloride (if using): If you are using pasteurized milk, add the diluted calcium chloride to the milk at 86°F (30°C). Stir gently to incorporate it thoroughly. This step helps to ensure a firm curd.
- Inoculate with Culture: Sprinkle the mesophilic culture over the surface of the milk. Allow it to rehydrate for a few minutes, then gently stir it in, distributing it evenly throughout the milk.
- Ripen the Milk: Cover the pot and let the milk ripen for 60 minutes, maintaining the temperature at 86°F (30°C). This allows the culture to begin working, developing the flavor of the cheese.
- Add Rennet: Dilute the rennet in about ¼ cup of cool, non-chlorinated water. Gently stir the diluted rennet into the milk for about 30 seconds.
- Form the Curd: Cover the pot and let the milk sit undisturbed for 45-60 minutes, or until a firm curd forms. You should be able to get a clean break when you insert a knife into the curd. The curd should separate cleanly from the sides of the pot.
- Cut the Curd: Once a firm curd has formed, cut it into ½-inch cubes using a long knife. Cut vertically, then horizontally, creating a grid pattern. This process helps to release the whey from the curd.
- Cook the Curd: Slowly heat the curds to 102°F (39°C) over 30 minutes, stirring gently to prevent them from matting together. This step helps to expel more whey and firm up the curds. The curds will shrink in size and become more elastic.
- Stir the Curds: Maintain the temperature at 102°F (39°C) and continue stirring the curds gently for another 30 minutes. This helps to further firm the curds and prevent them from sticking together.
- Drain the Whey: Line a colander with cheesecloth. Carefully pour the curds and whey into the cheesecloth-lined colander to drain. Allow the whey to drain for about 15-20 minutes.
- Salt the Curd: Transfer the drained curds to a bowl. Sprinkle the salt evenly over the curds and gently mix it in with your hands. This step adds flavor and helps to draw out more moisture.
- Mold the Cheese: Transfer the salted curds to a cheese mold lined with cheesecloth. Press the curds firmly into the mold to remove any remaining air pockets.
- Press the Cheese: Place a cheese press on top of the mold and press the cheese with increasing weight over the next 12-24 hours. Start with a light weight (about 2-3 pounds) and gradually increase it to 10-15 pounds. This step helps to consolidate the cheese and expel any remaining whey.
- Air Dry: Remove the cheese from the mold and cheesecloth. Place it on a cheese mat in a cool, humid place (around 50-55°F and 80-85% humidity) to air dry for 2-3 days. Turn the cheese daily to ensure even drying.
- Age the Cheese: After air drying, age the Asiago cheese in a cheese cave or refrigerator (around 50-55°F and 80-85% humidity) for at least 60 days, or longer for a sharper flavor. Turn the cheese regularly (every few days) and wipe it down with a brine solution (salt water) every week to prevent mold growth.
Making Asiago cheese requires patience and attention to detail, but the reward is a delicious, homemade cheese that you can be proud of. The aging process is crucial for developing the characteristic flavor of Asiago cheese. The longer it ages, the sharper and more complex the flavor will become. This homemade Asiago cheese recipe yields a delicious and versatile cheese that can be enjoyed in a variety of ways.

Asiago cheese is a delightful addition to any cheese board, offering a nutty and slightly sweet flavor that pairs well with fruits, nuts, and crackers. Experiment with different aging times to achieve your desired flavor profile. Young Asiago is mild and creamy, while aged Asiago is sharper and more complex. You can use this homemade Asiago cheese in a variety of dishes, from grilled cheese sandwiches to pasta sauces. Its rich, nutty flavor adds depth and complexity to any recipe. Serve your homemade Asiago cheese with a crusty bread and a glass of wine for a simple yet satisfying meal. The possibilities are endless with this versatile cheese.

Here are some serving suggestions to fully appreciate your homemade Asiago cheese:

- Cheese Board: Include Asiago cheese on a cheese board with other cheeses, fruits, nuts, and crackers.
- Pasta Dishes: Grate Asiago cheese over pasta dishes for a rich, nutty flavor.
- Sandwiches: Melt Asiago cheese in sandwiches for a delicious and satisfying meal.
- Salads: Crumble Asiago cheese over salads for added flavor and texture.
- Pizza: Use Asiago cheese as a topping on pizza for a unique and flavorful twist.
- Soups: Add Asiago cheese to soups for a creamy and flavorful broth.
Enjoy the process of making your own Asiago cheese! Remember, cheesemaking is a journey, and each batch will be a unique learning experience. Don’t be afraid to experiment and adjust the recipe to your own preferences. Making Asiago cheese at home is a rewarding experience that allows you to control the ingredients and flavor of your cheese. With a little practice and patience, you can create a delicious and authentic Asiago cheese that you can be proud of. Whether you’re a seasoned cheesemaker or a curious beginner, this recipe provides a comprehensive guide to making perfect Asiago cheese at home. The rich, nutty flavor of homemade Asiago cheese is sure to impress your friends and family. So, gather your ingredients and embark on this exciting cheesemaking adventure today!

Tips and Notes:

- Use the highest quality milk possible for the best flavor. Unpasteurized milk is preferred but may not be available in all areas.
- Sanitation is key to preventing unwanted bacteria from affecting your cheese. Be sure to thoroughly clean and sanitize all equipment.
- Accurate temperature control is crucial for successful cheese making. Use a reliable thermometer to monitor the temperature of the milk and curds.
- Don’t be afraid to experiment with different aging times to achieve your desired flavor profile.
- If you encounter any mold growth during aging, wipe it down with a brine solution.
- The humidity level in your cheese cave or refrigerator is important for proper aging. Maintain a humidity level of around 80-85%.
- Consider investing in a cheese press for more consistent results.
- Making Asiago cheese at home is a rewarding experience that allows you to control the ingredients and flavor of your cheese.
- Making your own Asiago cheese is a skill that can be passed down through generations, creating a family tradition.
- Enjoy the process of making your own Asiago cheese! It’s a journey of discovery and a celebration of culinary creativity.


