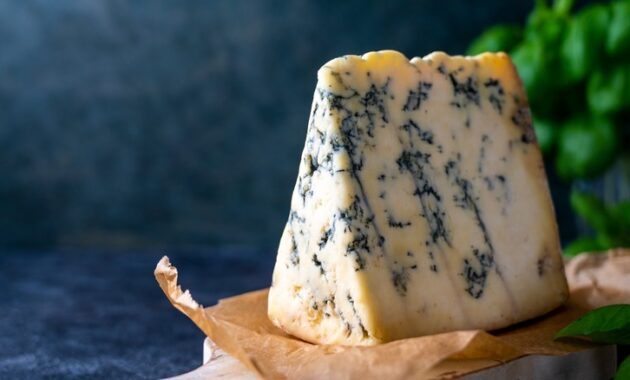
Stilton cheese, often hailed as the ‘King of English Cheeses,’ is a culinary masterpiece known for its distinctive flavor and creamy texture. This blue cheese, with its rich history and complex profile, is a favorite among cheese connoisseurs worldwide. But have you ever considered making your own Stilton? While traditionally a carefully controlled process, this recipe offers a simplified, home-friendly approach to crafting a Stilton-inspired cheese that captures the essence of this beloved classic. This recipe is designed to provide a guide, offering an accessible way to appreciate the nuances of blue cheese making within the comfort of your own kitchen.

Crafting cheese at home may seem intimidating, but this particular method focuses on achieving a similar flavor profile and texture to Stilton using readily available ingredients and equipment. We’ll explore techniques to encourage the development of the characteristic blue mold and impart that unmistakable Stilton tang. Prepare to embark on a rewarding culinary adventure as we unveil the secrets to homemade Stilton cheese!

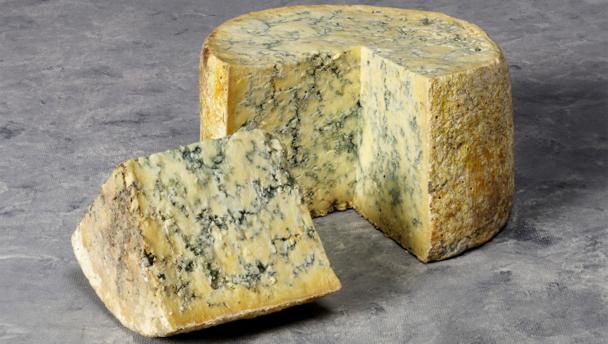
[Image Placeholder: A mouthwatering photo of homemade Stilton cheese, ideally showcasing its creamy texture and blue veins.]

Recipe Overview
| Category | Value |
|---|---|
| Preparation Time | 30 minutes |
| Incubation Time | 7 days |
| Aging Time | 4-6 weeks |
| Servings | Approximately 1 pound of cheese |
| Difficulty | Intermediate |
Nutrition per Serving (Approximate)
| Nutrient | Amount (per ounce) |
|---|---|
| Calories | Approx. 100 |
| Fat | Approx. 8g |
| Protein | Approx. 6g |
| Calcium | Approx. 150mg |
Ingredients
| Ingredient | Quantity | Notes |
|---|---|---|
| Pasteurized Whole Milk | 1 gallon | Avoid ultra-pasteurized milk. |
| Mesophilic Starter Culture | 1/4 teaspoon | MM100 or similar blend. |
| Penicillium Roqueforti Mold Powder | 1/8 teaspoon | Essential for blue veins. |
| Liquid Rennet | 1/4 teaspoon | Vegetarian or animal rennet. |
| Calcium Chloride | 1/4 teaspoon diluted in 1/4 cup water | Especially important if using pasteurized milk. |
| Non-iodized Salt | 2 tablespoons | For salting the curd and brine. |
Cooking Instructions
- Sanitize Your Equipment: Thoroughly sanitize all equipment that will come into contact with the milk, including the pot, thermometer, stirring spoons, cheese molds, and draining mats. This is crucial to prevent unwanted bacteria from interfering with the cheesemaking process.
- Heat the Milk: Pour the milk into a large pot and gently heat it to 86°F (30°C). Use a reliable thermometer to monitor the temperature accurately. Avoid overheating, as this can denature the proteins in the milk and affect the final cheese texture.
- Add Calcium Chloride: Stir in the diluted calcium chloride solution. This helps improve curd formation, particularly when using pasteurized milk, which can sometimes be deficient in calcium.
- Inoculate with Cultures: Sprinkle the mesophilic starter culture and Penicillium Roqueforti mold powder over the surface of the milk. Allow them to rehydrate for a few minutes, then gently stir them in to distribute evenly.
- Ripen the Milk: Cover the pot and let the milk ripen for 60 minutes, maintaining the temperature at 86°F (30°C). This allows the starter culture to begin working, acidifying the milk and setting the stage for curd formation.
- Add Rennet: Dilute the rennet in about ¼ cup of cool, non-chlorinated water. Gently stir the diluted rennet into the milk using an up-and-down motion for about 30 seconds.
- Form the Curd: Cover the pot and let the milk sit undisturbed for 60-90 minutes, or until a firm curd has formed. The curd should have a clean break when you insert a knife at an angle and lift gently. If the curd is too soft, let it sit for another 15-30 minutes.
- Cut the Curd: Using a long knife, cut the curd into 1-inch cubes. Gently stir the curd for 15 minutes to encourage whey expulsion.
- Scald the Curd: Slowly heat the curd to 95°F (35°C) over 30 minutes, stirring gently to prevent the curd from matting together. This process helps to further firm up the curd and remove more whey.
- Drain the Whey: Line a colander with cheesecloth. Gently pour the curd and whey into the cheesecloth-lined colander. Let the whey drain for about 30 minutes.
- Molding the Cheese: Gently transfer the curd into cheese molds (cylinder shape is ideal for Stilton). Do not press the curd. Allow the curd to drain naturally for 24 hours, turning the cheese several times to ensure even drainage.
- Salting: After 24 hours, remove the cheese from the molds. Salt the cheese generously on all sides with non-iodized salt. You can also create a brine solution (2 tablespoons of salt per quart of water) and soak the cheese in the brine for 2-3 hours. This helps to control the moisture content and inhibit the growth of undesirable bacteria.
- Piercing: This is a crucial step for Stilton-style cheese. After salting, pierce the cheese with a sterilized needle or skewer multiple times, creating channels for air to enter. This allows the Penicillium Roqueforti mold to grow and develop the characteristic blue veins.
- Aging: Place the cheese in a cheese cave or aging container with high humidity (85-90%) and a temperature of 50-55°F (10-13°C). Turn the cheese regularly (every 2-3 days) to ensure even aging. Age for 4-6 weeks, or longer for a more intense flavor.
- Monitoring Mold Growth: Check the cheese regularly for mold growth. You should start to see blue veins developing within a week or two. If you notice any unwanted mold growth (e.g., fuzzy white or colored molds), wipe it off with a clean cloth dipped in vinegar or brine.
Serving Suggestions
Enjoy your homemade Stilton cheese in a variety of ways:
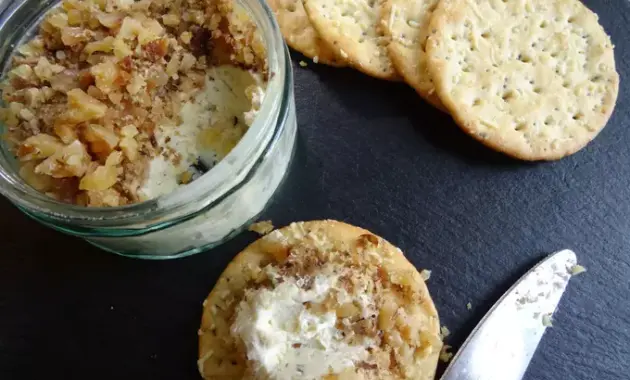
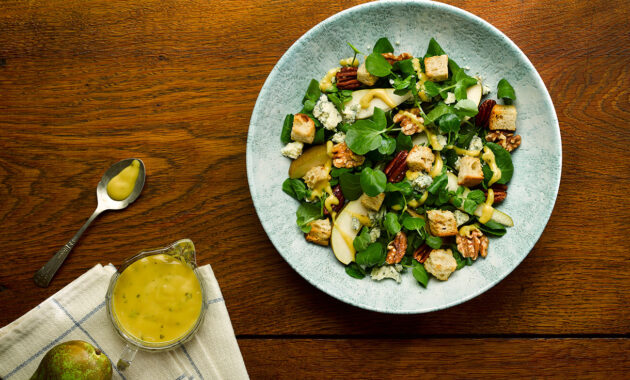
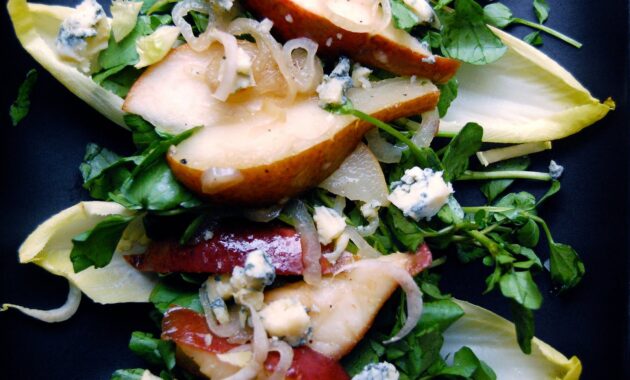
- Serve it with crackers, crusty bread, or fruit (such as pears, apples, or grapes).
- Crumble it over salads or pasta dishes.
- Use it as a filling for tarts or quiches.
- Pair it with a glass of port wine or a strong ale.
Tips and Notes
Milk Quality: The quality of the milk is crucial for successful cheesemaking. Use fresh, whole milk from a reliable source. Avoid ultra-pasteurized milk, as it may not form a good curd.

Temperature Control: Accurate temperature control is essential throughout the cheesemaking process. Use a reliable thermometer and monitor the temperature closely.
Humidity Control: Maintaining high humidity during aging is important to prevent the cheese from drying out. If you don’t have a cheese cave, you can use a plastic container with a lid and a damp cloth or sponge to create a humid environment. However, make sure there’s enough airflow to prevent excessive mold growth on the surface of the cheese.
Patience: Cheesemaking requires patience. Don’t rush the process. Allow the cheese to age properly to develop its full flavor and texture. The longer it ages, the stronger the flavor will become.
Experimentation: Feel free to experiment with different types of milk, cultures, and aging techniques to create your own unique Stilton-style cheese. For a stronger, spicier flavor, you can try adding a pinch of chili flakes to the milk along with the cultures.

Troubleshooting:
- Soft Curd: If the curd is too soft, it may be due to insufficient rennet, low milk temperature, or using ultra-pasteurized milk. Try increasing the amount of rennet or using a different type of milk.
- Slow Mold Growth: If the blue mold is not growing well, it may be due to low humidity or insufficient piercing. Try increasing the humidity or piercing the cheese more thoroughly.
- Unwanted Mold Growth: If you notice any unwanted mold growth, wipe it off with a clean cloth dipped in vinegar or brine. Ensure that the cheese is aging in a clean environment with good airflow.
Making Stilton-style cheese at home is a rewarding culinary experience. While it may require some practice and attention to detail, the results are well worth the effort. Enjoy the creamy, tangy flavor of your homemade cheese and impress your friends and family with your cheesemaking skills. Remember that the quality of Stilton cheese will depend heavily on the quality of the milk used, as well as the environment it is left in to mature. By mastering this Stilton cheese recipe, you’ll elevate your culinary capabilities and bring an exquisite taste of English tradition to your table. Happy Cheesemaking!

Enjoy this delightful Stilton cheese, it’s truly a king among cheeses! Experiment with different crackers and wines to find your perfect pairing with this exquisite Stilton cheese.
This Stilton cheese recipe is not just a culinary guide; it’s an invitation to explore the fascinating world of cheese making and to create something truly special in your own kitchen. Whether you are a seasoned chef or a curious beginner, this recipe will empower you to create a cheese that embodies the rich heritage and distinctive flavor of Stilton. So, gather your ingredients, prepare your equipment, and embark on this delicious journey today. With patience, passion, and a little bit of creativity, you can craft a Stilton-inspired cheese that will delight your senses and impress everyone who has the pleasure of tasting it. Happy cheesemaking!