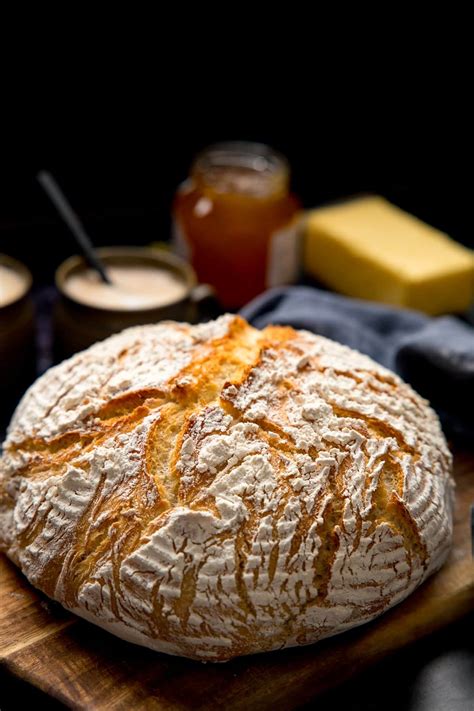
Artisan Bread: A Step-by-Step Guide to Homemade Deliciousness
Are you dreaming of that perfect, crusty artisan loaf? The kind you see in fancy bakeries, with its crackly exterior and airy, chewy interior? Well, dream no more! This comprehensive guide will walk you through creating your own artisan bread at home, even if you're a complete beginner. Get ready to impress yourself (and your friends!) with this simple yet rewarding recipe.
What Makes Artisan Bread Unique?
Artisan bread differs from commercially produced loaves in several key ways. The focus is on simple ingredients – flour, water, salt, and yeast – allowing the natural flavors of the ingredients to shine. The long fermentation process develops complex flavors and a superior texture. And finally, the attention to shaping and baking techniques results in that beautiful, rustic appearance.
Key Ingredients for Success:
- Flour: Bread flour is ideal for its high protein content, which contributes to gluten development, resulting in a strong, chewy crumb.
- Water: Use lukewarm water to activate the yeast effectively. The exact amount may need slight adjustments depending on the flour's absorption.
- Salt: Salt controls yeast activity, adds flavor, and strengthens the dough's structure.
- Yeast: Active dry yeast is commonly used. Make sure it's fresh for optimal results.
The Artisan Bread Recipe:
This recipe provides a basic foundation; feel free to experiment with additions like herbs, seeds, or nuts.
Yields: One large loaf Prep time: 15 minutes Rise time: 4-6 hours (bulk fermentation) + 2-3 hours (final proof) Bake time: 45-50 minutes
Ingredients:
- 4 cups (500g) bread flour
- 1 ¾ cups (420ml) lukewarm water
- 1 ½ teaspoons (7g) active dry yeast
- 1 ½ teaspoons (9g) salt
Instructions:
-
Mixing the Dough: In a large bowl, combine the flour, yeast, and salt. Add the lukewarm water and mix with your hands or a stand mixer with a dough hook until a shaggy dough forms. Don't worry about kneading at this stage.
-
Bulk Fermentation: Cover the bowl with plastic wrap and let the dough rise at room temperature for 4-6 hours, or until doubled in size. The dough should be bubbly and slightly sticky.
-
Shaping the Loaf: Lightly flour your work surface. Gently turn the dough out onto the surface. Shape the dough into a round or oval loaf. This can take some practice!
-
Final Proof: Place the shaped loaf in a well-floured banneton basket (or a bowl lined with a floured kitchen towel). Cover and let it proof for another 2-3 hours, or until almost doubled again.
-
Baking: Preheat your oven to 450°F (232°C) with a Dutch oven inside for at least 30 minutes. Carefully remove the hot Dutch oven. Gently place the dough into the Dutch oven. Cover and bake for 30 minutes.
-
Crust Development: Remove the lid and bake for another 15-20 minutes, or until the crust is deeply golden brown and the internal temperature reaches 205-210°F (96-99°C).
-
Cooling: Remove the bread from the Dutch oven and let it cool completely on a wire rack before slicing and enjoying.
Tips for Artisan Bread Success:
- Room Temperature is Key: A warmer room will speed up fermentation; a cooler room will slow it down.
- Don't Overknead: Overkneading can lead to a tough loaf.
- Score Your Loaf: Scoring the top of the loaf before baking allows for controlled expansion and creates that beautiful crust.
- Experiment with Flours: Try different types of flour, such as whole wheat or rye, to add unique flavors and textures.
With practice, you’ll master the art of artisan bread baking. So grab your ingredients and start your baking journey today! Enjoy the delicious rewards of your homemade creation!
