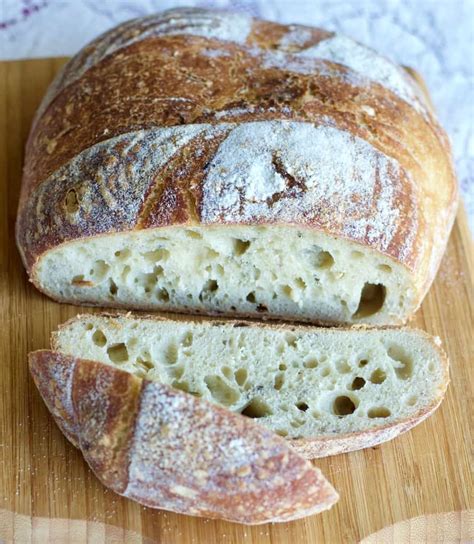
Beginner Sourdough Bread Recipe: Your First Loaf Awaits!
So, you're ready to embark on the wonderfully rewarding journey of sourdough baking? Fantastic! Sourdough bread, with its tangy flavor and chewy texture, is a true culinary masterpiece. While it might seem intimidating at first, this beginner-friendly recipe will guide you through each step, ensuring your first loaf is a success. Let's get started!
What You'll Need: Ingredients & Equipment
Before we dive into the process, let's gather everything we need. Don't worry, you probably already have most of these items in your kitchen.
Ingredients:
- Starter: This is the heart of sourdough. Make sure your starter is active and bubbly before you begin. (Instructions for creating a starter are readily available online; search for "how to make a sourdough starter" for detailed guidance).
- Bread Flour: About 500g (4 cups). Bread flour has a higher protein content, resulting in better gluten development and a chewier loaf. All-purpose flour can be used as a substitute, but the results might be slightly different.
- Water: About 300-350ml (1 1/4 - 1 1/2 cups). The exact amount will depend on the absorption of your flour.
- Salt: About 10g (1 ½ tsp). Salt helps control fermentation and enhances the flavor.
Equipment:
- Large Mixing Bowl: For combining ingredients and bulk fermentation.
- Scraper/Spatula: For folding the dough.
- Proofing Basket (Banneton): A proofing basket helps the dough maintain its shape while it proofs. A bowl lined with a clean kitchen towel can work as a substitute.
- Dutch Oven: For baking. A cast iron Dutch oven provides the best results, creating steam that helps the bread rise beautifully.
- Baking Scale (Optional but Recommended): Baking by weight ensures consistent results.
Step-by-Step Sourdough Baking Process
Now, let's bake! This recipe provides a simple approach for beginners, focusing on straightforward techniques.
Step 1: Autolyse (Optional but Recommended)
Combine the flour and water in your mixing bowl. Mix gently until just combined, forming a shaggy mass. Cover and let it rest for 30-60 minutes. This autolyse process allows the flour to fully hydrate, making gluten development easier later on.
Step 2: Mixing the Dough
Add your active sourdough starter and salt to the autolysed dough. Mix thoroughly until all ingredients are incorporated. You can do this by hand, using a spatula or your fingers to gently mix. Don't overmix!
Step 3: Bulk Fermentation
Lightly oil the bowl. Place the dough inside, cover, and let it ferment at room temperature (around 70-75°F) for 4-6 hours. During this time, perform stretch and folds every 30-45 minutes for the first 2-3 hours. This process helps strengthen the gluten structure.
Step 4: Shaping and Cold Proof
Gently turn the dough out onto a lightly floured surface. Shape it into a round or oval loaf. Place the shaped dough in your floured proofing basket or bowl lined with a floured cloth. Cover and refrigerate for 12-18 hours. This slow, cold proof develops flavor and texture.
Step 5: Baking
Preheat your Dutch oven in the oven to 450°F (232°C) for at least 30 minutes. Carefully remove the hot Dutch oven from the oven. Gently transfer the dough from the proofing basket into the Dutch oven. Score the top of the dough with a sharp knife or lame (a special bread-scoring tool). Cover and bake for 20 minutes.
Reduce the oven temperature to 425°F (218°C), remove the lid, and bake for another 25-30 minutes, or until the crust is deeply golden brown and the internal temperature reaches 205-210°F (96-99°C).
Step 6: Cooling and Enjoying
Remove the bread from the Dutch oven and let it cool completely on a wire rack before slicing and enjoying your delicious homemade sourdough bread!
Tips for Success
- Starter Activity: Ensure your starter is active and bubbly before using it.
- Room Temperature: Room temperature plays a crucial role in fermentation. Adjust timing as needed based on your environment.
- Hydration: The amount of water needed may vary depending on the flour you use. Adjust accordingly.
- Don't Overmix: Overmixing can lead to a tough loaf. Gentle mixing is key.
This recipe provides a foundational understanding of sourdough baking. Experiment with different techniques and flours to find what works best for you. Happy baking!
