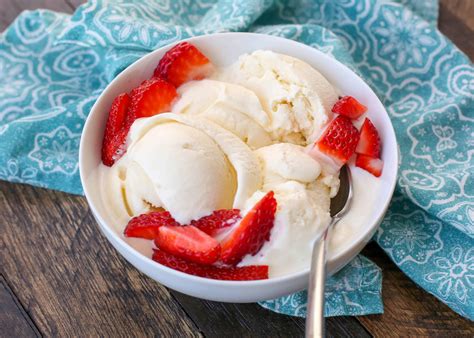
The Best Homemade Ice Cream Recipe: Creamy, Dreamy, and Deliciously Easy
Making ice cream at home might sound daunting, but it's surprisingly simple and incredibly rewarding! This recipe delivers creamy, dreamy ice cream every single time, and it's easily customizable to your favorite flavors. Get ready to impress your friends and family with this unbelievably delicious treat.
Why This is the BEST Homemade Ice Cream Recipe
This recipe stands out because it focuses on achieving the perfect creamy texture without using any fancy equipment. We'll utilize a simple custard base, ensuring a rich and smooth final product that rivals any store-bought ice cream. You'll also learn some helpful tips and tricks to avoid common ice cream-making pitfalls.
Key Ingredients for Success
- Heavy Cream: The foundation of rich and creamy ice cream. Don't substitute!
- Whole Milk: Adds further creaminess and helps prevent ice crystals.
- Granulated Sugar: Sweetens the ice cream to perfection. Adjust to your taste preference.
- Egg Yolks: These are crucial for creating a luscious custard base, contributing to that velvety smooth texture.
- Vanilla Extract: Classic and essential for a well-rounded flavor profile. Feel free to experiment with other extracts!
Step-by-Step Guide to Homemade Ice Cream Perfection
Let's get started on crafting your dream ice cream!
Step 1: Making the Custard Base
- Heat the Milk and Cream: In a medium saucepan, gently heat the whole milk and heavy cream over medium heat until it's just simmering (small bubbles around the edges). Do not boil.
- Whisk the Egg Yolks and Sugar: In a separate bowl, whisk together the egg yolks and granulated sugar until pale and thick. This creates an emulsion that will help prevent the eggs from scrambling.
- Temper the Eggs: Slowly drizzle a small amount of the hot cream mixture into the egg yolk mixture, whisking constantly to temper the eggs. This prevents them from cooking and becoming grainy.
- Combine and Cook: Pour the tempered egg mixture into the saucepan with the remaining cream mixture. Cook over low heat, stirring constantly, until the mixture thickens enough to coat the back of a spoon (about 5-7 minutes). Do not boil!
- Strain the Custard: Pour the custard through a fine-mesh sieve into a bowl to remove any lumps or cooked egg bits. This ensures a perfectly smooth ice cream.
Step 2: Churning and Freezing
- Cool the Custard: Cover the custard with plastic wrap, pressing it directly onto the surface to prevent a skin from forming. Refrigerate for at least 4 hours, or preferably overnight, to allow it to chill completely.
- Churn: Pour the chilled custard into your ice cream maker and churn according to the manufacturer's instructions. This usually takes about 20-30 minutes.
- Harden: Once churned, transfer the ice cream to an airtight container and freeze for at least 2-4 hours to allow it to harden completely.
Step 3: Flavor Variations
The beauty of homemade ice cream lies in its endless possibilities! Here are some flavor ideas to inspire you:
- Chocolate Ice Cream: Add melted chocolate to the custard base.
- Strawberry Ice Cream: Blend fresh strawberries into the custard base after it has cooled.
- Mint Chocolate Chip: Add crushed chocolate chips and mint extract to the custard base.
- Coffee Ice Cream: Add strong brewed coffee to the custard base.
Tips for Ice Cream Success
- Use high-quality ingredients: The better the ingredients, the better the ice cream will taste.
- Don't overcook the custard: Overcooking can lead to a grainy texture.
- Chill the custard thoroughly: This is essential for proper churning and preventing ice crystals.
- Freeze in an airtight container: This will help prevent ice crystals from forming.
This recipe is your key to unlocking a world of delicious homemade ice cream adventures. So grab your ingredients, put on your apron, and get ready to create the perfect scoop of happiness! Enjoy!
