Mastering the Art of the Brush Crepe: A Simple Yet Elegant Recipe
Are you ready to elevate your crepe game? Forget flimsy, torn crepes – this guide will teach you how to make perfectly brushed crepes, achieving that delicate, even texture that's both visually stunning and incredibly delicious. Whether you're a seasoned crepe-maker or a complete beginner, this recipe will empower you to create restaurant-quality crepes right in your own kitchen.
What Makes a Brush Crepe Special?
The secret to the perfect brushed crepe lies in the technique. Unlike pouring batter directly into the pan, brushing the batter creates a thinner, more even layer, resulting in a crepe that's less prone to tearing and boasts a delicate, almost ethereal quality. This method allows for greater control over the crepe's size and thickness, making it ideal for both sweet and savory fillings.
Ingredients You'll Need:
This recipe focuses on simplicity, allowing the quality of the ingredients to shine through.
- 1 cup all-purpose flour: Provides the structure for your crepe.
- 2 large eggs: Bind the ingredients and add richness.
- 1 cup milk: Adds moisture and creates a smooth batter.
- 1/4 cup water: Adjusts the batter's consistency for easier brushing.
- 1 tablespoon melted butter: Adds flavor and richness, ensuring that your crepes are nicely browned and not sticking to the pan.
- Pinch of salt: Enhances the overall flavor profile.
- Optional: 1 tablespoon sugar (for sweeter crepes)
Step-by-Step Instructions: Creating Your Brush Crepe Masterpiece
1. Whisk the Dry Ingredients: In a large bowl, whisk together the flour and salt until fully combined. This prevents lumps from forming later.
2. Combine Wet Ingredients: In a separate bowl, whisk together the eggs, milk, water, and melted butter. Make sure the butter is fully incorporated.
3. Gently Combine Wet and Dry: Gradually add the wet ingredients to the dry ingredients, whisking gently until a smooth batter forms. Avoid over-mixing, as this can lead to tough crepes. Let the batter rest for at least 30 minutes. This allows the gluten to relax, resulting in more tender crepes.
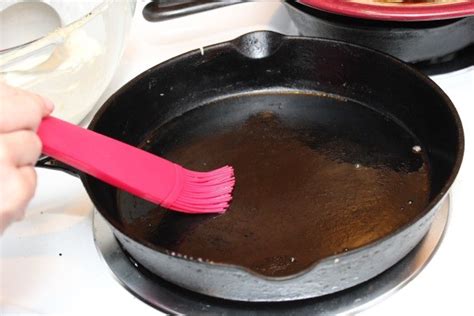
4. Prepare Your Pan: Heat a lightly oiled non-stick pan over medium heat. Make sure the pan is hot enough before you begin brushing.
5. The Brushing Technique: Using a pastry brush or a silicone brush, lightly brush a thin layer of batter onto the hot pan, spreading it evenly to create a thin circle. Don't worry about perfection; a little unevenness adds character.
6. Cooking the Crepe: Cook for about 1-2 minutes per side, or until lightly golden brown. Use a spatula to gently flip the crepe.
7. Stack and Serve: Once cooked, stack the crepes on a plate and cover them with a clean kitchen towel to keep them warm and prevent them from drying out. Serve immediately with your favorite fillings, whether sweet or savory.
Tips for Crepe Perfection:
- Batter Consistency: The batter should be slightly thinner than pancake batter. If it's too thick, add a little more water. If it's too thin, add a little more flour.
- Pan Temperature: A properly heated pan is essential for even cooking. If the pan is too hot, the crepes will burn. If it's too cool, they will stick.
- Don't Overcrowd the Pan: Give each crepe enough space to cook evenly.
Creative Filling Ideas:
- Sweet: Fresh berries, whipped cream, Nutella, lemon curd, chocolate sauce.
- Savory: Sautéed mushrooms and spinach, cheese, ham, ratatouille.
With practice, you'll master the art of the brushed crepe, creating delicate, flavorful creations that will impress your family and friends. So, grab your ingredients and get brushing! Happy cooking!
