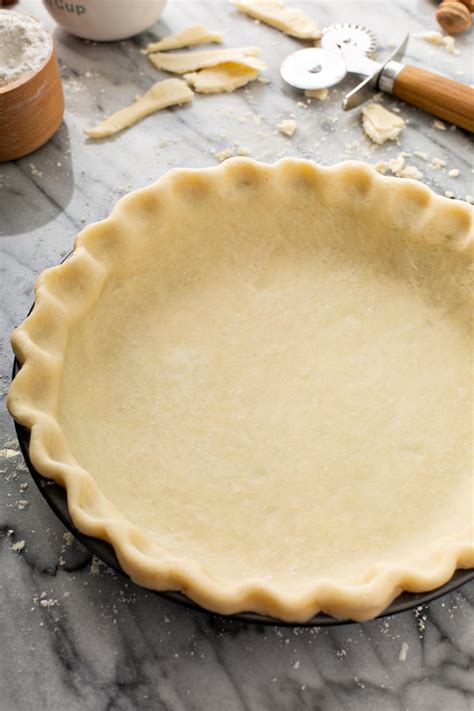
The Ultimate Guide to Making a Flaky Butter Crust Pie Crust
Are you ready to bake the most delicious, flaky pie you've ever tasted? The secret? A perfectly made butter crust. This comprehensive guide will walk you through each step, ensuring your pie crust is tender, buttery, and utterly irresistible. We'll cover everything from ingredient selection to baking tips, guaranteeing success even for beginner bakers.
Why Butter is Best for Pie Crust
While shortening or lard can create a tender crust, butter delivers unparalleled flavor and flakiness. The fat in butter melts during baking, creating steam that lifts the layers of dough, resulting in that signature flaky texture we all crave. Don't be intimidated by the process; with a little patience and attention to detail, you'll master this technique in no time.
Ingredients for the Perfect Butter Crust
- 2 ½ cups (300g) all-purpose flour: Using good quality flour is essential for a tender crust.
- 1 teaspoon salt: Enhances the flavors of the butter and other ingredients.
- 1 cup (2 sticks) unsalted butter, very cold and cut into cubes: Cold butter is crucial for preventing the gluten from developing too much, which can result in a tough crust.
- ½ cup (120ml) ice water: Gradually add the ice water, a tablespoon at a time, to ensure the dough doesn't become too wet.
Step-by-Step Instructions: Mastering the Butter Crust
1. Prepare Your Ingredients:
This is the most crucial step! Ensure your butter is extremely cold, even slightly frozen. This helps prevent the butter from melting into the flour, maintaining the flakiness. Keep the flour and water cold as well.
2. Whisk Dry Ingredients:
In a large bowl, whisk together the flour and salt. This ensures even distribution of salt throughout the dough.
3. Cut in the Butter:
Add the cold, cubed butter to the flour mixture. Using a pastry blender or your fingertips, cut the butter into the flour until the mixture resembles coarse crumbs. This process incorporates the butter without overmixing, maintaining flakiness. Avoid overworking the dough at this stage.
4. Gradually Add Ice Water:
Slowly add the ice water, one tablespoon at a time, mixing gently with a fork. The dough should just come together; it shouldn't be sticky. If it's too dry, add a little more water; if it's too wet, add more flour, a tablespoon at a time.
5. Form the Dough:
Gently gather the dough into a disc. Avoid kneading the dough, as this develops the gluten and makes the crust tough. Wrap the disc in plastic wrap and refrigerate for at least 30 minutes (or up to 2 days). Chilling the dough allows the gluten to relax and the flavors to meld.
6. Roll and Bake:
On a lightly floured surface, roll out the dough into your desired shape and thickness. Carefully transfer the dough to your pie plate. Trim and crimp the edges. Blind bake the crust (optional): For a crispier crust, you can pre-bake it by lining it with parchment paper and filling it with pie weights before baking. This step helps prevent a soggy bottom.
Tips for Pie Crust Perfection
- Use a food processor (optional): For faster mixing, you can pulse the flour and butter together in a food processor until the mixture resembles coarse crumbs.
- Don't overwork the dough: Overmixing develops the gluten, resulting in a tough crust.
- Chill the dough thoroughly: This allows the gluten to relax and prevents shrinkage during baking.
- Use a pastry blender: A pastry blender is the ideal tool for cutting the butter into the flour.
- Experiment with flavors: Add herbs, spices, or citrus zest to your dough for an extra layer of flavor.
Baking Your Dream Pie
With this recipe, you're well on your way to creating a pie crust that will impress your family and friends. Remember, practice makes perfect. Don't be discouraged if your first attempt isn't flawless; each time you bake, you'll refine your technique and achieve even greater success. Happy baking!
