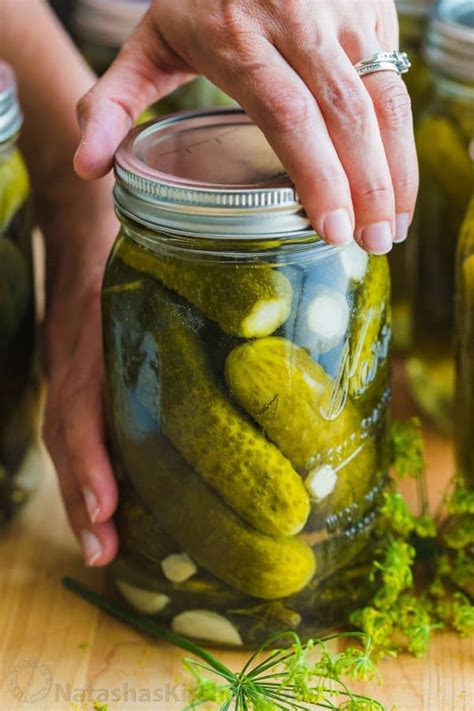
Dill Pickle Canning: A Comprehensive Guide to Crisp, Tangy Perfection
Are you ready to experience the unparalleled satisfaction of biting into a perfectly crisp, tangy dill pickle, knowing you made it yourself? Canning dill pickles is a rewarding culinary adventure that allows you to preserve the taste of summer and enjoy homemade pickles year-round. This comprehensive guide will walk you through the process, ensuring your jars are filled with delicious, safe, and shelf-stable pickles.
Getting Started: Essential Equipment and Ingredients
Before embarking on your canning journey, gather the necessary equipment and ingredients. Having everything prepared beforehand will streamline the process and prevent any mid-canning mishaps.
Essential Equipment:
- Jars and Lids: Use clean, sterilized canning jars with new lids and bands. Proper sterilization is crucial for preventing spoilage. Consider using half-gallon jars for larger pickles or pint jars for smaller ones.
- Large Stockpot: This will be used for processing the filled jars in a boiling water bath. Ensure it's large enough to accommodate your jars with at least an inch of water covering them.
- Jar Lifter: This tool will protect your hands from burns when handling hot jars.
- Funnel: A funnel will facilitate clean and easy filling of the jars.
- Headspace Tool: This tool helps ensure consistent headspace (the space between the contents and the jar lid) for proper sealing.
- Canning Rack: This sits at the bottom of the stockpot, keeping jars from directly touching the bottom and preventing breakage.
Essential Ingredients:
- Cucumbers: Choose pickling cucumbers; they're smaller and firmer than slicing cucumbers, yielding crisper pickles.
- Dill: Fresh dill is preferred, but dried dill can be substituted.
- Garlic: Adds a pungent and delicious flavor.
- Pickling Salt: Crucial for drawing out moisture from the cucumbers and maintaining crispness. Do not use regular table salt.
- Vinegar: White vinegar is traditionally used for pickling, offering a clean, crisp flavor.
- Water: Used to create the brine.
- Optional additions: Consider adding other spices like mustard seeds, black peppercorns, or red pepper flakes for added complexity.
Preparing the Cucumbers and Brine: The Key to Success
The quality of your pickles hinges on proper preparation of both the cucumbers and the brine.
Cucumber Preparation:
- Wash Thoroughly: Rinse the cucumbers thoroughly under cold water.
- Trim Ends: Carefully trim both ends of each cucumber.
- Pack Carefully: Pack cucumbers into the sterilized jars, leaving the appropriate headspace (generally ½ inch for pints and ¾ inch for half-gallon jars).
Brine Preparation:
- Combine Ingredients: Combine vinegar, water, pickling salt, dill, garlic, and any other desired spices in a large saucepan.
- Bring to a Boil: Bring the mixture to a rolling boil, stirring until the salt is completely dissolved.
- Pour into Jars: Carefully pour the hot brine over the packed cucumbers, leaving the appropriate headspace.
- Remove Air Bubbles: Use a non-metallic utensil to gently remove any air bubbles trapped in the jars.
- Wipe Jar Rims: Wipe the rims of the jars clean with a damp cloth to ensure a good seal.
- Apply Lids and Bands: Place the lids and bands onto the jars, tightening them fingertip-tight.
Processing and Storage: Ensuring Safety and Shelf Life
The final stage involves processing the jars in a boiling water bath to ensure proper sealing and safety.
Boiling Water Bath Processing:
- Place Jars in Pot: Carefully place the jars into the boiling water bath, ensuring they're covered by at least an inch of water.
- Bring to a Boil: Bring the water to a rolling boil and maintain that boil for the recommended time (refer to your specific recipe for exact timing). This time varies depending on jar size and altitude.
- Remove and Cool: Carefully remove the jars from the pot using the jar lifter and let them cool completely. You should hear a "pop" sound as the jars seal.
- Check Seals: Once cooled, press down on the center of each lid. If the lid doesn't flex, it's sealed properly.
Storage:
Once the jars are completely cool and sealed, store them in a cool, dark, and dry place. Properly canned dill pickles can last for up to a year, though they're often best enjoyed within a few months.
Troubleshooting: Addressing Common Canning Issues
While canning is relatively straightforward, some issues may arise.
- Unsealed Jars: If a jar doesn't seal, it's likely due to improper cleaning, air bubbles, or insufficient processing time. Refrigerate these jars and consume them quickly.
- Soft Pickles: Soft pickles are often a result of not using enough pickling salt or improper processing.
- Mold Growth: Mold indicates spoilage; discard any jars exhibiting mold growth.
With careful attention to detail and following these steps, you'll be well on your way to enjoying delicious, homemade dill pickles all year long! Remember, safety is paramount when canning, so always refer to reliable resources and follow instructions precisely. Happy canning!
