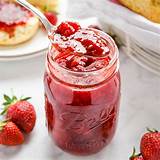
Freezer Jam Recipe: A Quick & Easy Guide to Homemade Goodness
Making your own freezer jam is a fantastic way to preserve the flavors of summer and enjoy delicious homemade preserves throughout the year. This method skips the canning process, making it a beginner-friendly option that's perfect for busy schedules. This recipe emphasizes simplicity and speed, while still delivering a delicious, high-quality jam.
Why Choose Freezer Jam?
Freezer jam offers several advantages over traditional canning:
- No canning equipment needed: Forget the pressure canner and boiling water baths! All you need are some freezer-safe containers.
- Faster preparation: This method significantly reduces the time it takes to make jam.
- Minimal cleanup: Fewer pots and pans mean less time spent washing dishes.
- Perfect for small batches: Ideal for experimenting with different fruits and flavors without committing to large quantities.
Ingredients for Easy Freezer Jam
This recipe provides a simple base that can be easily customized to your taste. Feel free to experiment with different fruits and add-ins!
- 4 cups prepared fruit: This could be berries (strawberries, raspberries, blueberries), peaches, or a combination. Make sure your fruit is thoroughly washed and any stems or blemishes are removed.
- 2 1/2 cups granulated sugar: The sugar helps preserve the jam and adds sweetness. You can adjust this based on the sweetness of your fruit and your preference.
- 1 box powdered pectin (1.75 oz): Pectin is a natural ingredient that helps the jam set. Make sure to use the correct type for freezer jam.
Step-by-Step Instructions for Delicious Freezer Jam
Follow these simple steps to create your perfect freezer jam:
Step 1: Preparing the Fruit
Crush or mash the fruit slightly. You want some texture, so don't puree it completely.
Step 2: Combining Ingredients
In a large bowl, combine the crushed fruit, sugar, and powdered pectin. Stir well to ensure everything is evenly mixed.
Step 3: Maceration (Optional but Recommended)
Let the mixture sit for at least 10 minutes, or even longer (up to 30 minutes). This allows the fruit to release its juices and creates a better texture. This step is crucial for proper setting.
Step 4: Filling the Containers
Spoon the jam into freezer-safe containers, leaving about ½ inch of headspace at the top. Seal the containers tightly.
Step 5: Freezing the Jam
Place the filled containers in the freezer. They should be frozen solid within a few hours. They'll keep for up to a year in the freezer.
Tips for Perfect Freezer Jam
- Use ripe fruit: The riper the fruit, the better the flavor of your jam.
- Adjust sweetness: Taste the mixture before freezing and add more sugar if needed.
- Properly seal containers: This prevents freezer burn and maintains freshness.
- Label your containers: Include the date and type of fruit for easy identification.
- Thaw gradually: When ready to enjoy, thaw the jam in the refrigerator overnight.
Variations and Flavor Combinations
Don't be afraid to get creative! Here are some ideas to inspire your freezer jam creations:
- Berry Medley: Combine strawberries, blueberries, raspberries, and blackberries for a vibrant mix.
- Peach Jam: Use ripe peaches for a sweet and summery jam.
- Lemon-Blueberry Jam: Add a squeeze of lemon juice to your blueberry jam for a tangy twist.
- Spicy Strawberry Jam: Incorporate a pinch of cayenne pepper for a unique kick.
With its simplicity and delicious results, freezer jam is a fantastic choice for both novice and experienced jam-makers. So grab your fruit and get started on your homemade culinary adventure!
