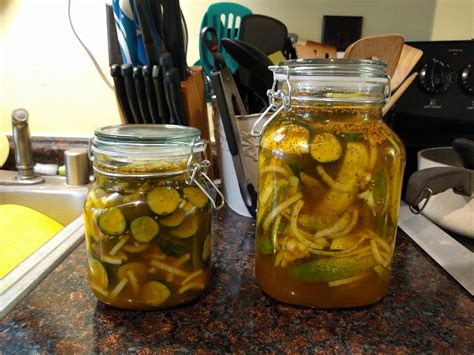
Homemade Bread and Butter Spear Pickles: A Tangy, Sweet, and Crunchy Delight
Are you ready to embark on a culinary adventure that will tantalize your taste buds? This recipe for homemade bread and butter spear pickles delivers a perfectly balanced blend of sweet, tangy, and crunchy – a flavor profile that's simply irresistible. Forget store-bought; these pickles are effortlessly homemade and infinitely superior.
Why Make Your Own Bread and Butter Pickles?
Store-bought bread and butter pickles often contain artificial ingredients and preservatives. Making your own allows you to control the ingredients, ensuring a delicious, all-natural product. Plus, the satisfaction of creating something so flavorful from scratch is unparalleled. You'll be amazed at how easy it is to achieve that perfect balance of sweet and tangy.
Ingredients for the Best Bread and Butter Pickles
This recipe yields approximately 4 pints of perfectly crunchy pickles. Adjust quantities as needed.
- Pickles: 4 pounds pickling cucumbers, thoroughly washed and trimmed. Choose smaller cucumbers (about 3-4 inches long) for optimal spear-shaped pickles.
- Brine:
- 2 cups white vinegar (5% acidity)
- 2 cups water
- 2 cups sugar
- 1/4 cup salt (non-iodized)
- 2 tablespoons yellow mustard seeds
- 2 tablespoons celery seeds
- 1 tablespoon turmeric powder (for color)
- 1 teaspoon ground cloves
- 1 teaspoon ground allspice
Step-by-Step Guide to Perfectly Pickled Perfection
This detailed guide will walk you through each step, guaranteeing pickle-making success:
Step 1: Prepare the Cucumbers
Wash and trim the cucumbers. Carefully pack them into sterilized pint jars, leaving about 1/2 inch of headspace. Ensure the spears are tightly packed.
Step 2: Create the Brine
In a large saucepan, combine the vinegar, water, sugar, salt, mustard seeds, celery seeds, turmeric, cloves, and allspice. Bring the mixture to a boil, stirring until the sugar and salt are completely dissolved.
Step 3: Pour and Process
Carefully ladle the hot brine over the cucumbers in the jars, again leaving about 1/2 inch of headspace. Remove any air bubbles by gently tapping the jars. Wipe the jar rims clean, and place the lids and rings on tightly.
Step 4: Can Your Pickles (Optional)
For long-term storage, process the filled jars in a boiling water bath for 10 minutes (adjust processing time according to your altitude – consult a canning guide for accurate times). This step ensures the pickles are safely preserved. If you prefer not to can, store them in the refrigerator for up to 3 weeks.
Step 5: Patience is Key!
Allow the pickles to cool completely. You'll notice the vibrant color deepening as they cool. Refrigerate for at least 24 hours to allow the flavors to fully meld. The longer they sit (up to 3 weeks in the fridge), the more intense the flavor will become.
Tips for Bread and Butter Pickle Success
- Use high-quality ingredients: This significantly impacts the final flavor.
- Sterilize your jars: This prevents spoilage and ensures a safe product.
- Pack tightly: This helps maintain the crispness of the pickles.
- Proper headspace: Leaving adequate headspace is crucial for safe canning.
- Don't be afraid to experiment: Adjust the spices to your liking for a unique flavor profile.
Serving Suggestions
These homemade bread and butter spear pickles are perfect as a side dish, on sandwiches, or as a complement to charcuterie boards. Their tangy-sweet flavor adds a delightful crunch to any meal!
