Kneaded Bread: A Simple Recipe for Perfect Homemade Loaf
Are you ready to ditch the store-bought loaves and bake your own delicious, crusty bread? This simple kneaded bread recipe is perfect for beginners and guarantees a satisfying, homemade result. Let's get started!
Ingredients You'll Need:
This recipe uses simple ingredients, likely already in your pantry.
- 3 cups (375g) all-purpose flour, plus more for dusting
- 1 ½ cups (355ml) warm water (around 105-115°F)
- 1 ½ teaspoons (7g) active dry yeast
- 1 ½ teaspoons (9g) salt
- 2 tablespoons (30ml) olive oil (optional, for richer flavor)
Step-by-Step Instructions:
This recipe is designed for ease and clarity. Follow these steps for perfect bread every time.
Step 1: Activating the Yeast
In a large bowl, combine the warm water and yeast. Let it sit for 5-10 minutes until foamy. This ensures your yeast is alive and ready to work its magic.
Step 2: Combining Ingredients
Add the flour and salt to the yeast mixture. If using, add the olive oil as well. Stir with a wooden spoon or spatula until a shaggy dough forms.
Step 3: Kneading the Dough
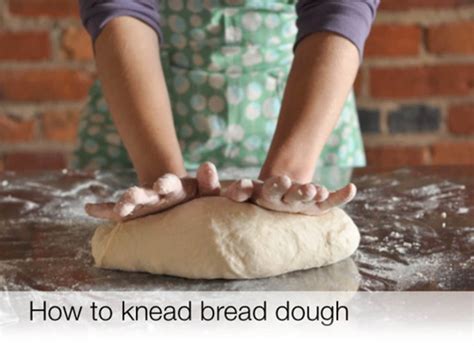
This is where the magic happens! Turn the dough out onto a lightly floured surface and knead for 8-10 minutes. Kneading develops the gluten in the flour, resulting in a chewy, textured bread. If you're unsure about kneading, there are plenty of helpful videos online demonstrating the technique.
Step 4: First Rise (Bulk Fermentation)
Place the dough in a lightly oiled bowl, turning to coat. Cover the bowl with plastic wrap or a damp kitchen towel and let it rise in a warm place for 1-1.5 hours, or until doubled in size.
Step 5: Shaping the Loaf
Gently punch down the dough to release the air. Shape it into a round or oval loaf.
Step 6: Second Rise (Proofing)
Place the shaped loaf in a greased loaf pan or on a baking sheet lined with parchment paper. Cover and let it rise for another 30-45 minutes, or until almost doubled.
Step 7: Baking
Preheat your oven to 375°F (190°C). Bake the bread for 30-35 minutes, or until golden brown and the internal temperature reaches 200°F (93°C). Use a bread thermometer for accurate results.
Step 8: Cooling and Enjoying
Let the bread cool completely on a wire rack before slicing and serving. This allows the crust to crisp and the interior to set. Enjoy your freshly baked, homemade bread!
Tips for Success:
- Water Temperature: Make sure your water is the right temperature. Too hot will kill the yeast, too cold will slow down the rising process.
- Kneading: Don't skip the kneading! It's crucial for developing gluten and texture.
- Rising Time: Rising times can vary depending on the temperature of your environment.
- Don't Overbake: Overbaking will result in a dry, hard loaf.
Variations:
- Add Herbs: Incorporate herbs like rosemary or thyme into the dough for added flavor.
- Use Different Flour: Experiment with whole wheat flour or bread flour for a different texture and taste.
- Sweet Bread: Add sugar and spices to create a sweet bread.
This kneaded bread recipe is a great starting point for your baking journey. With a little practice, you'll be baking delicious, homemade loaves in no time! Happy baking!
