The Ultimate Guide to Making a Sourdough Starter
So, you're ready to embark on the wonderful, slightly unpredictable, and utterly rewarding journey of sourdough baking? Fantastic! The cornerstone of any sourdough adventure is, of course, the starter itself. This comprehensive guide will walk you through creating your own vibrant, bubbly sourdough starter, from initial mixing to feeding and maintenance.
What is a Sourdough Starter?
A sourdough starter is a living leaven—a mixture of flour and water that has been fermented by wild yeasts and bacteria naturally present in the air and on the flour. These microorganisms consume the sugars in the flour, producing carbon dioxide (which creates air bubbles and rise in your bread) and lactic acid (which gives sourdough its characteristic tangy flavor). It's a fascinating ecosystem in a jar!
Ingredients You'll Need:
- 100g (¾ cup) Unbleached All-Purpose Flour: Avoid bleached flour, as it often contains additives that can hinder starter development.
- 100g (¾ cup) Non-Chlorinated Water: Chlorine can inhibit the growth of beneficial bacteria. If your tap water is chlorinated, let it sit out overnight to allow the chlorine to dissipate.
Tip: Using filtered or spring water is always best!
Step-by-Step Sourdough Starter Recipe:
-
Mixing: In a clean, preferably glass, jar, combine the flour and water. Mix thoroughly until a smooth, thick paste forms. Don't worry about perfection; a few lumps are okay!
-
Initial Fermentation (Day 1-3): Loosely cover the jar with a lid or breathable cloth (to prevent dust and pests while allowing air exchange). Let the mixture sit at room temperature (ideally around 70-75°F or 21-24°C). You might notice minimal activity in the first 24 hours. Patience is key!
-
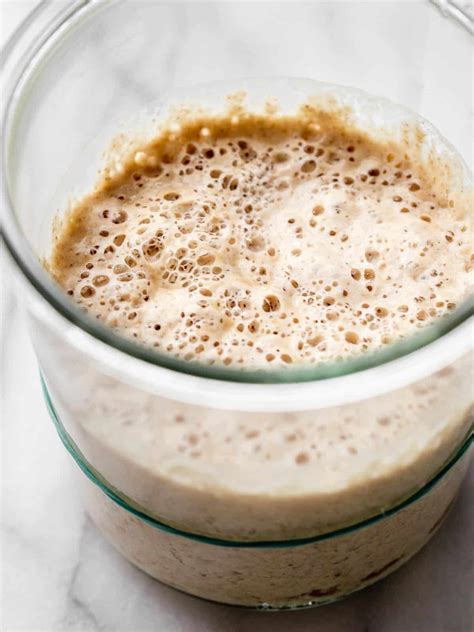
Observing for Activity (Day 3-7): Over the next few days, observe your mixture. You’ll start to see some changes! Look for signs of fermentation like bubbles forming on the surface and a slightly sour smell. This indicates that the wild yeasts and bacteria are beginning to colonize your starter.
-
Feeding Your Starter (Daily): Once you see clear signs of fermentation (bubbles), it's time to feed your starter. This involves discarding about half of the starter and then adding fresh flour and water in equal proportions (typically 50g of each). Gently mix everything together.
-
Continued Feeding (Week 1-4): Continue the feeding process daily. The frequency might need adjusting based on your starter’s activity and the ambient temperature. A more active starter might require more frequent feedings.
-
Maturity Test: After about 1-4 weeks, your starter should be considered mature when it reliably doubles in size within 4-8 hours after feeding. This doubling should be consistent for at least a few feedings.
Maintaining Your Mature Sourdough Starter:
- Regular Feeding: Once mature, you can reduce the feeding frequency. Every 12-24 hours is usually sufficient for a mature starter, but this can depend on how frequently you bake.
- Refrigeration: For long-term storage, store your starter in the refrigerator. You will need to feed it less frequently—about once a week, or even every other week.
- Signs of Trouble: If your starter is not showing any activity (no bubbles, no increase in size), you may need to adjust your temperature, try different flour, or start again with fresh ingredients.
Troubleshooting Your Sourdough Starter:
- Starter is too liquid: Add more flour.
- Starter is too stiff: Add more water.
- Mold Growth: Discard the starter and begin again. This is a rare issue with proper sanitation.
- No activity: Check your temperature; it might be too cold or too hot.
Making a sourdough starter takes time and patience. But the reward is the amazing, unique flavor of freshly baked sourdough bread, all thanks to the little ecosystem you've nurtured in your jar. Good luck, and happy baking!
