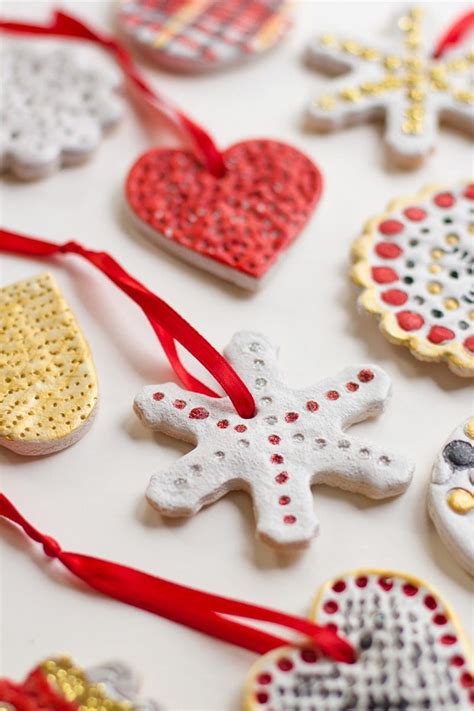
Salt Dough Decoration Recipe: A Fun and Festive DIY Project
Looking for a fun and creative activity for kids (and adults!)? Look no further than salt dough decorations! This simple recipe allows for endless possibilities, from adorable ornaments to personalized keepsakes. This guide provides a comprehensive, SEO-optimized recipe and decorating tips to ensure your crafting experience is a smashing success.
What You'll Need:
Ingredients:
- 2 cups all-purpose flour
- 1 cup salt
- 1 cup warm water
Equipment:
- Large bowl
- Mixing spoon
- Rolling pin
- Cookie cutters (various shapes and sizes)
- Baking sheet
- Parchment paper
- Straw or toothpick
- Acrylic paints (various colors)
- Paintbrushes
- Glitter (optional)
- Sealant (optional, for added durability)
Instructions:
Step 1: Mixing the Dough
- In a large bowl, combine the flour and salt.
- Gradually add the warm water, mixing with a spoon until a smooth, pliable dough forms. If the dough is too sticky, add a little more flour. If it's too dry, add a little more water. The consistency should be similar to modeling clay.
- Knead the dough on a lightly floured surface for about 5 minutes until it's smooth and elastic.
Step 2: Rolling and Cutting
- On a lightly floured surface, roll out the dough to your desired thickness (about ¼ inch is a good starting point). Thicker dough will result in sturdier ornaments.
- Use cookie cutters to cut out various shapes. Experiment with different sizes and shapes to create interesting designs.
- Use a straw or toothpick to poke a hole near the top of each shape. This hole is crucial for hanging your finished ornaments or decorations.
Step 3: Baking the Dough
- Preheat your oven to 250°F (120°C).
- Line a baking sheet with parchment paper.
- Place the cut-out shapes onto the baking sheet.
- Bake for 1-2 hours, or until the salt dough is completely dry and hard. Baking time may vary depending on the thickness of the dough. Keep an eye on them to prevent burning.
Step 4: Decorating Your Creations
Once the salt dough ornaments are completely cool, let your creativity shine! Use acrylic paints to add details, patterns, and colors. Let your imagination run wild! You can add glitter for extra sparkle, or use markers for finer details.
Tips for Decorating:
- Multiple Coats: For vibrant colors, apply multiple thin coats of paint, allowing each coat to dry completely before applying the next.
- Detailing: Use a fine-tipped paintbrush for intricate details.
- Sealing: Once the paint is dry, you can apply a sealant (like Mod Podge or a varnish) to protect your decorations and add durability. This is especially helpful if you plan to hang them outdoors or in areas where they might get bumped.
Step 5: Displaying Your Masterpieces
Once your salt dough decorations are completely dry and decorated, thread some ribbon or string through the hole you made earlier and hang them on your Christmas tree, or display them proudly around your home!
Salt Dough Decoration Ideas:
- Holiday Ornaments: Create festive Christmas trees, snowmen, stars, and other holiday-themed shapes.
- Personalized Gifts: Make customized ornaments with names or initials.
- Animal Shapes: Cut out shapes of your favorite animals and add details with paint.
- Seasonal Decorations: Adapt the shapes and colors to create decorations for any occasion.
This salt dough recipe provides a versatile and engaging crafting experience. With a little creativity, you can produce unique and beautiful decorations for any occasion. Enjoy the process and the satisfaction of creating something beautiful with your own hands! Remember to share your creations using relevant hashtags on social media for increased visibility. Happy crafting!
