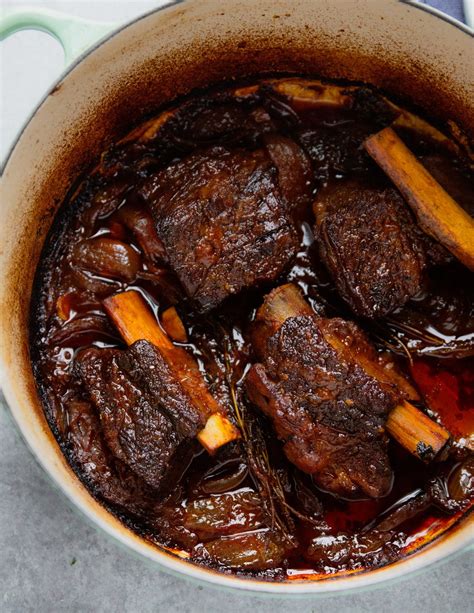
The Ultimate Guide to Tender, Fall-Off-the-Bone Short Ribs
Short ribs. Just the name conjures up images of succulent, melt-in-your-mouth meat, rich gravy, and a meal that's as comforting as it is impressive. But achieving that perfect tenderness can seem daunting. Fear not, aspiring chefs! This guide will walk you through everything you need to know to make unbelievably delicious short ribs, every single time.
Choosing Your Short Ribs
The first step to amazing short ribs is selecting the right cut. There are two main types:
Bone-In vs. Boneless
-
Bone-in short ribs: These retain more flavor and moisture during cooking, resulting in a richer, more intense taste. They are generally preferred for their superior texture and overall experience.
-
Boneless short ribs: These cook faster and are easier to handle, but they might lack some of the deep flavor of their bone-in counterparts. They’re a good option if you’re short on time or prefer a cleaner presentation.
Preparing for Perfection: A Step-by-Step Guide
Regardless of whether you choose bone-in or boneless, here's a foolproof method for achieving melt-in-your-mouth short ribs:
Seasoning is Key
Don't underestimate the power of seasoning! A simple blend of salt, pepper, and garlic powder can work wonders. However, feel free to experiment with other spices to create your signature flavor profile. Consider adding:
- Paprika: For a smoky sweetness
- Onion powder: For added depth of flavor
- Dried thyme or rosemary: For an herbaceous touch
Generously season your short ribs on all sides, ensuring the spices are evenly distributed.
The Braising Process: Slow and Low
Braising is the key to tender short ribs. This slow-cooking method involves searing the ribs to develop a rich crust, then braising them in liquid until incredibly tender.
-
Sear: Heat a heavy-bottomed pot or Dutch oven over medium-high heat. Add a tablespoon or two of oil (vegetable or canola work well) and sear the short ribs on all sides until nicely browned. This step develops flavor and creates a beautiful crust.
-
Braise: Once seared, remove the short ribs from the pot. Add aromatics like onions, carrots, and celery to the pot and sauté until softened. Then, return the short ribs to the pot. Pour in enough liquid (beef broth, red wine, or a combination) to come about halfway up the sides of the ribs. Add a bay leaf and a few sprigs of fresh herbs (thyme or rosemary work well).
-
Slow Cook: Bring the liquid to a simmer, then reduce the heat to low, cover the pot, and braise for at least 2-3 hours, or until the meat is incredibly tender. The longer you braise, the more tender the ribs will become. You should be able to easily pierce them with a fork.
Finishing Touches
Once the short ribs are tender, you can remove them from the braising liquid and let them rest for a few minutes. Skim any excess fat from the braising liquid, and then either:
- Thicken the sauce: Simmer the liquid until it reduces and thickens to your desired consistency.
- Serve it au jus: Serve the braising liquid alongside the short ribs.
Serving Suggestions
Your perfectly braised short ribs are now ready to enjoy! Serve them with:
- Mashed potatoes: A classic pairing that soaks up the delicious braising liquid.
- Roasted vegetables: Add some color and texture to your plate.
- Polenta: A creamy and comforting side dish.
Tips for Success
- Use a meat thermometer: Ensure your short ribs reach an internal temperature of at least 190°F (88°C) for maximum tenderness.
- Don't overcrowd the pot: Give the short ribs enough space to brown properly.
- Patience is key: Braising takes time, but the results are well worth the wait.
With these tips and techniques, you'll be well on your way to creating mouthwatering, unforgettable short ribs. Enjoy!
