Craving authentic Japanese cuisine but intimidated by the thought of making sushi at home? Fear not! This comprehensive guide will demystify the art of crafting perfect Sushi Nigiri. Whether you’re a seasoned sushi enthusiast or a complete beginner, this recipe will empower you to create delicious, restaurant-quality Sushi Nigiri in your own kitchen. We’ll walk you through every step, from preparing the sushi rice to expertly shaping the nigiri, ensuring a rewarding and delectable experience. Get ready to impress your friends and family with your newfound sushi-making skills!
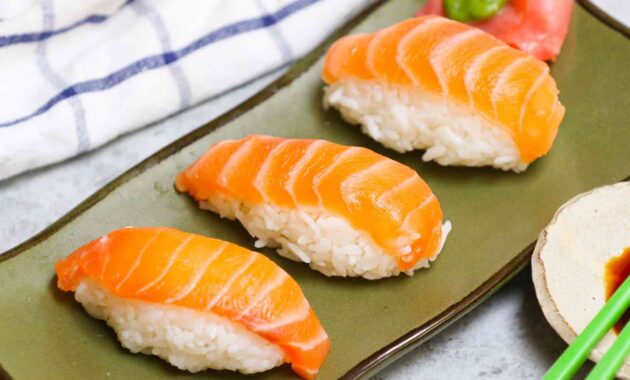
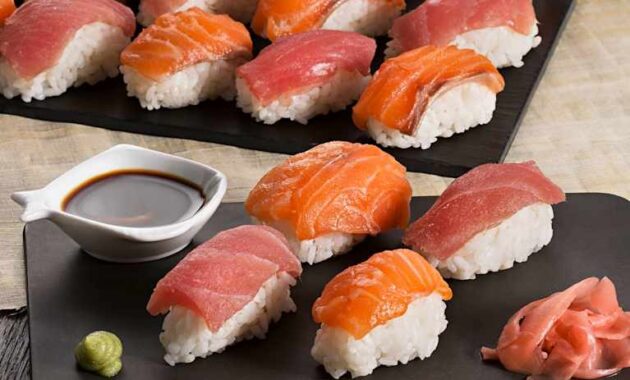
[Image Placeholder: A beautifully plated selection of Sushi Nigiri]
| Category | Value |
|---|---|
| Preparation Time | 30 minutes |
| Cooking Time | 20 minutes |
| Servings | 4 servings (approximately 12-16 pieces) |
| Difficulty | Medium |
Nutrition per serving (approximate)
The following information is an estimate and may vary based on specific ingredients and portion sizes.
- Calories: 350-450
- Protein: 15-25g
- Carbohydrates: 50-60g
- Fat: 5-15g
Ingredients for Perfect Sushi Nigiri
Here’s what you’ll need to make your own delicious Sushi Nigiri:

| Ingredient | Quantity | Notes |
|---|---|---|
| Sushi Rice | 2 cups (uncooked) | Short-grain Japanese rice is essential for the right texture. |
| Water | 2 1/4 cups | For cooking the rice. |
| Rice Vinegar | 1/4 cup | Seasoned or unseasoned, adjust sugar accordingly. |
| Sugar | 2 tablespoons | Granulated sugar works best. |
| Salt | 1 teaspoon | Sea salt or kosher salt. |
| Sushi Grade Fish | 4-6 ounces (Salmon, Tuna, Yellowtail, etc.) | Ensure it is specifically labeled ‘sushi grade’. |
| Wasabi | As needed | Optional, for adding a kick. |
| Soy Sauce | For serving | Low sodium is a good choice. |
| Pickled Ginger (Gari) | For serving | To cleanse the palate between different types of sushi. |
| Nori Seaweed | Optional, for Gunkan Nigiri | If making Gunkan Nigiri. |
Cooking Instructions
- Prepare the Sushi Rice: Rinse the sushi rice thoroughly under cold water until the water runs clear (about 4-5 times). This removes excess starch and prevents the rice from becoming too sticky.
- Cook the Rice: Place the rinsed rice and 2 1/4 cups of water in a heavy-bottomed pot or a rice cooker. If using a pot, bring it to a boil, then reduce the heat to low, cover, and simmer for 18-20 minutes, or until all the water is absorbed. If using a rice cooker, follow the manufacturer’s instructions.
- Prepare the Sushi Vinegar: While the rice is cooking, combine the rice vinegar, sugar, and salt in a small saucepan. Heat over low heat, stirring until the sugar and salt are completely dissolved. Do not boil. Let it cool slightly. This mixture is crucial for achieving the characteristic flavor of Sushi Nigiri.
- Season the Rice: Once the rice is cooked, gently transfer it to a large wooden bowl (hangiri) if you have one. If not, a large, non-metallic bowl will work. Pour the sushi vinegar mixture evenly over the rice.
- Mix the Rice: Using a rice paddle or a wooden spoon, gently cut and fold the vinegar into the rice. Be careful not to mash the rice. Fan the rice with a fan or a piece of cardboard while mixing to help it cool down and absorb the vinegar evenly. The rice should be shiny and slightly sticky.
- Cool the Rice: Continue to fan and mix the rice until it cools to lukewarm. This is important for preventing the fish from cooking slightly when you place it on the rice. Properly cooled and seasoned rice is the foundation of excellent Sushi Nigiri.
- Prepare the Fish: While the rice is cooling, prepare the sushi-grade fish. Using a very sharp knife, slice the fish into thin, rectangular pieces, about 2 inches long, 1 inch wide, and 1/4 inch thick. The slices should be clean and even. Proper knife skills are essential for visually appealing Sushi Nigiri.
- Shape the Nigiri: Wet your hands with water mixed with a little rice vinegar (this prevents the rice from sticking to your hands). Take a small amount of rice (about 1 tablespoon) and gently squeeze it into an oblong shape. The rice should be firm enough to hold its shape but not too tightly packed.
- Combine Fish and Rice: Dab a small amount of wasabi on the fish slice (optional). Place the fish slice on top of the rice oval. Gently press the fish onto the rice to adhere it.
- Repeat: Repeat steps 8 and 9 with the remaining rice and fish.
- Serve Immediately: Serve the Sushi Nigiri immediately with soy sauce, pickled ginger (gari), and wasabi (optional). The sooner you eat it, the fresher and better it will taste.
Serving Suggestions
Sushi Nigiri is best enjoyed fresh and chilled. Here are some serving suggestions:

- Serve with a variety of different types of fish to offer a diverse culinary experience.
- Accompany with miso soup and a side salad for a complete Japanese meal.
- Offer a selection of different soy sauces, including low-sodium and tamari, to cater to different preferences.
- Consider adding other toppings like thinly sliced scallions, sesame seeds, or a light drizzle of spicy mayo for added flavor and visual appeal.
Making Sushi Nigiri at home allows you to customize your ingredients and create your favorite combinations. Don’t be afraid to experiment with different types of fish, seafood, or even vegetarian options like avocado or cucumber.
Tips and Notes for Perfect Sushi Nigiri
- Use High-Quality Ingredients: The quality of your ingredients will significantly impact the taste of your Sushi Nigiri. Invest in sushi-grade fish and good-quality sushi rice.
- Don’t Overcook the Rice: Overcooked rice will be mushy and difficult to work with. Follow the cooking instructions carefully.
- Keep Your Hands Wet: Wetting your hands with water and a little rice vinegar will prevent the rice from sticking to your hands.
- Don’t Pack the Rice Too Tightly: The rice should be firm enough to hold its shape but not too tightly packed. This will allow the flavors to meld together properly.
- Use a Sharp Knife: A sharp knife is essential for slicing the fish cleanly and evenly.
- Practice Makes Perfect: Don’t be discouraged if your first few attempts aren’t perfect. With practice, you’ll master the art of making Sushi Nigiri.
- Storage: While best enjoyed fresh, leftover Sushi Nigiri can be stored in the refrigerator for up to 24 hours. However, the rice may become hard, and the fish may lose some of its freshness.
- Gunkan Nigiri Variation: For Gunkan Nigiri, wrap a strip of nori seaweed around the rice oval, creating a small “battleship.” Fill the top with toppings like salmon roe (ikura), sea urchin (uni), or chopped scallions.
With this detailed guide, you’re well on your way to becoming a Sushi Nigiri master! Enjoy the process, experiment with different flavors, and most importantly, have fun! Making Sushi Nigiri is a rewarding culinary experience that you can share with friends and family. So gather your ingredients, sharpen your knives, and get ready to create some delicious and authentic Japanese cuisine right in your own home. Remember, patience and practice are key to perfecting your Sushi Nigiri technique.
Beyond the traditional Sushi Nigiri variations with fish, consider exploring vegetarian options. Thinly sliced avocado, cooked shiitake mushrooms marinated in soy sauce, or even a vibrant tamagoyaki (Japanese omelet) can be delightful alternatives. These options cater to a wider range of dietary preferences and showcase the versatility of Sushi Nigiri as a customizable dish. Embrace the opportunity to create unique and flavorful combinations that reflect your personal tastes.
Furthermore, the quality of your soy sauce can significantly impact the overall flavor profile of your Sushi Nigiri experience. Experiment with different brands and varieties, including light soy sauce (usukuchi), dark soy sauce (koikuchi), and tamari (wheat-free soy sauce). Each offers a distinct flavor profile that can complement the various types of fish and toppings you choose. Consider offering a selection of soy sauces to your guests, allowing them to personalize their dipping experience and discover their preferred pairings.
Finally, remember that the presentation of your Sushi Nigiri is just as important as the taste. Take the time to arrange your creations artfully on a plate, using contrasting colors and textures to create a visually appealing display. Garnish with fresh herbs, edible flowers, or a delicate drizzle of sauce to elevate the presentation even further. The extra effort you put into presentation will not only enhance the dining experience but also demonstrate your care and attention to detail.
Now go forth and create your own stunning platter of homemade Sushi Nigiri! Your friends and family will be amazed by your newfound culinary skills and the delicious flavors you create. Happy sushi making!