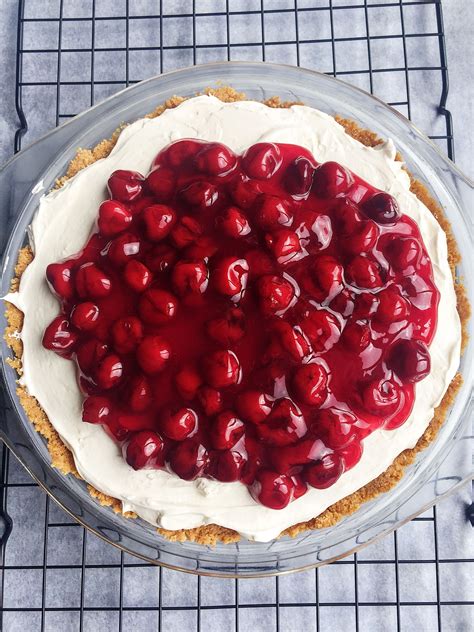
No-Bake Cherry Cheesecake: A Deliciously Easy Dessert
This no-bake cherry cheesecake recipe is perfect for those hot summer days when you don't want to turn on the oven. It's incredibly easy to make, requiring no baking skills whatsoever, and tastes absolutely divine! This recipe is optimized for search engines, incorporating relevant keywords naturally throughout the text.
Ingredients You'll Need
This recipe uses readily available ingredients, making it perfect for a spontaneous dessert craving or a last-minute party treat. You'll need:
For the Crust:
- 1 ½ cups graham cracker crumbs
- ¼ cup sugar
- 6 tablespoons (3 ounces) unsalted butter, melted
For the Filling:
- 16 ounces cream cheese, softened to room temperature (this is crucial for a smooth filling!)
- 1 cup sugar
- 1 teaspoon vanilla extract
- 2 cups heavy cream, well-chilled
- 1 (21-ounce) can cherry pie filling (or your favorite homemade cherry filling!)
Instructions: A Step-by-Step Guide
Let's get baking...or rather, not baking! This recipe is incredibly straightforward.
Making the Crust:
- Combine dry ingredients: In a medium bowl, combine the graham cracker crumbs and sugar.
- Add the butter: Pour in the melted butter and mix until evenly moistened. The mixture should resemble wet sand.
- Press into a pan: Press the mixture firmly into the bottom of a 9-inch springform pan. Use the bottom of a measuring cup or your fingers to create an even layer. Chill in the refrigerator while you prepare the filling.
Preparing the Filling:
- Beat the cream cheese: In a large bowl, beat the softened cream cheese with an electric mixer until smooth and creamy. Gradually add the sugar, beating until well combined.
- Add vanilla: Stir in the vanilla extract.
- Whip the cream: In a separate bowl, whip the heavy cream until stiff peaks form. This is important for a light and airy texture.
- Fold in the cream: Gently fold the whipped cream into the cream cheese mixture until just combined. Be careful not to overmix.
- Layer the filling and cherries: Spread the cream cheese mixture evenly over the chilled crust. Top with the cherry pie filling, spreading it evenly across the cheesecake.
Chilling and Serving:
- Chill for at least 4 hours: Cover the cheesecake and refrigerate for at least 4 hours, or preferably overnight, to allow the filling to set completely.
- Serve and enjoy: Once chilled, carefully remove the sides of the springform pan. Slice and serve chilled. Garnish with fresh cherries or a dollop of whipped cream if desired.
Tips for Success
- Room temperature cream cheese: Make sure your cream cheese is softened to room temperature for a smooth and creamy filling.
- Chill thoroughly: Allow the cheesecake to chill for at least 4 hours, or preferably overnight, for the best results.
- Get creative with toppings: Feel free to experiment with different toppings, such as chocolate shavings, fresh berries, or a sprinkle of nuts.
Frequently Asked Questions (FAQ)
- Can I use a different type of pie filling? Absolutely! You can substitute the cherry pie filling with your favorite fruit filling, such as blueberry, strawberry, or raspberry.
- Can I make this cheesecake ahead of time? Yes, this no-bake cheesecake can be made a day or two in advance. It actually tastes even better the next day!
- How do I store leftover cheesecake? Store leftover cheesecake in the refrigerator, covered, for up to 3 days.
Enjoy your delicious and easy no-bake cherry cheesecake! Let me know in the comments how yours turned out!
