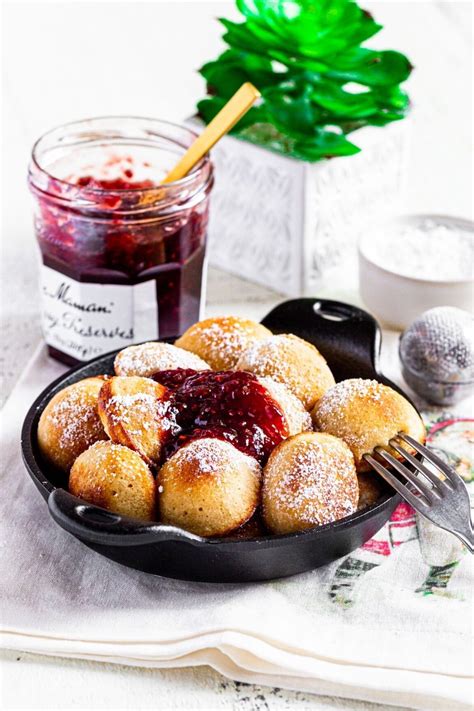
The Ultimate Guide to Making Delicious Æbleskiver
Are you ready to embark on a culinary adventure? Let's dive into the world of æbleskiver, those delightful, golden-brown, spherical delights that are a true treat for the taste buds. This comprehensive guide will walk you through everything you need to know, from essential ingredients to expert tips and tricks, ensuring your æbleskiver are perfect every time.
What are Æbleskiver?
Æbleskiver (pronounced "AY-bluh-skee-ver") are a traditional Danish treat, essentially a kind of Danish pancake ball. These aren't your average pancakes, though! Their unique spherical shape and crispy exterior, combined with a soft and often slightly sweet interior, make them truly special. They're often served warm, sometimes with fillings or toppings, making them a perfect dessert or breakfast option.
Essential Ingredients for Perfect Æbleskiver
Before you begin your æbleskiver journey, gather these key ingredients:
- Flour: All-purpose flour forms the base of your batter.
- Milk: Adds moisture and richness to the batter.
- Eggs: Bind the ingredients together and add structure.
- Butter: Provides richness and contributes to the delightful golden-brown color.
- Sugar: A touch of sweetness complements the other flavors. Adjust to your preference.
- Baking Powder: The leavening agent, crucial for achieving that light and airy texture.
- Salt: Enhances the overall flavor profile.
- Optional Fillings: This is where you can get creative! Popular choices include jam, chocolate chips, applesauce, or even whipped cream.
Equipment You'll Need
The right equipment is key to successful æbleskiver making. You'll need an æbleskiver pan. These specialized pans feature hemispherical molds that create the perfect spherical shape. Don't worry if you don't have a traditional æbleskiver pan, however. You can adapt and try making them in a regular non-stick pan, but the results won't be quite the same. Beyond the pan, you'll also need:
- Wooden Skewer or Long-Handled Fork: For gently turning the æbleskiver.
- Large Bowl: For mixing the batter.
- Whisk: To thoroughly combine the ingredients.
- Spatula: To help with maneuvering the æbleskiver in the pan.
Step-by-Step Æbleskiver Recipe
Now, let's get to the heart of the matter – making those delicious æbleskiver!
-
Prepare the Batter: In a large bowl, whisk together the flour, sugar, baking powder, and salt. In a separate bowl, whisk together the milk and eggs. Gradually add the wet ingredients to the dry ingredients, whisking until just combined. Do not overmix.
-
Heat the Pan: Lightly grease your æbleskiver pan with butter. Heat over medium heat until a small drop of batter sizzles when added to the pan.
-
Cooking the Æbleskiver: Pour a small amount of batter into each well of the pan, about halfway full.
-
Turning the Æbleskiver: As the batter begins to set around the edges, use a wooden skewer or long-handled fork to carefully turn the æbleskiver, allowing the uncooked portions to cook. Continue turning until the æbleskiver are golden brown and cooked through.
-
Serve and Enjoy: Serve your warm æbleskiver immediately. Top with your favorite fillings and enjoy!
Tips and Tricks for Perfect Æbleskiver
- Don't overmix the batter: Overmixing can lead to tough æbleskiver.
- Use medium heat: This prevents burning and ensures even cooking.
- Be patient: Turning the æbleskiver takes practice. Don't rush the process.
- Experiment with fillings: Get creative and add your favorite ingredients.
Æbleskiver Variations and Serving Suggestions
The beauty of æbleskiver lies in their versatility. Experiment with different flavors and toppings:
- Classic: Dust with powdered sugar.
- Fruity: Top with fresh berries and a drizzle of honey.
- Chocolatey: Drizzle with melted chocolate and sprinkle with chopped nuts.
- Savory: Add shredded cheese and herbs to the batter for a savory twist.
Making æbleskiver is a fun and rewarding experience. With a little practice, you'll be making these delicious treats like a pro! Now, go forth and create some culinary magic!
