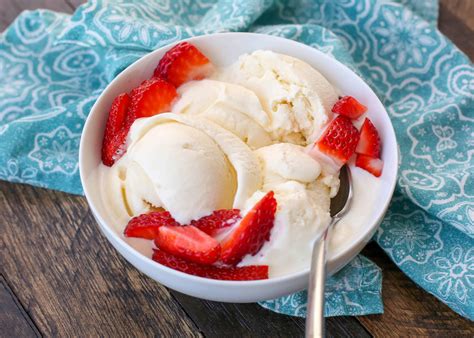
Homemade Ice Cream Recipe: A Cool Treat for a Hot Day
Summer is here, and what better way to beat the heat than with a delicious scoop of homemade ice cream? This recipe is surprisingly easy and allows for endless customization, making it a perfect project for the whole family. Forget those expensive store-bought tubs – let's dive into creating a creamy, dreamy dessert that will have everyone asking for more!
Ingredients You'll Need:
This recipe provides a foundation; feel free to experiment with your favorite flavors!
-
The Base:
- 2 cups heavy cream (the higher the fat content, the richer the ice cream!)
- 1 cup whole milk (again, full-fat for best results)
- ¾ cup granulated sugar (adjust to your sweetness preference)
- 1 teaspoon vanilla extract (or your preferred flavoring)
-
Optional Mix-ins:
- Fresh berries (strawberries, raspberries, blueberries)
- Chocolate chips
- Cookie crumbs
- Nuts (chopped pecans, walnuts, almonds)
- Caramel swirls
- Candied fruit
Easy Steps to Homemade Ice Cream Bliss:
Step 1: The Sweet Symphony
In a medium-sized bowl, whisk together the heavy cream, whole milk, and granulated sugar until the sugar is completely dissolved. This ensures a smooth and even texture in your final product.
Step 2: Flavor Infusion
Stir in your chosen flavoring – vanilla extract is a classic choice, but the possibilities are endless! Feel free to experiment with extracts like almond, peppermint, or even coffee. This is where you can let your creativity shine!
Step 3: Chill Out
Cover the bowl and refrigerate the mixture for at least 4 hours, or preferably overnight. This chilling step is crucial for achieving the perfect creamy texture. The longer it chills, the smoother your ice cream will be.
Step 4: Churn Baby, Churn!
Pour the chilled mixture into your ice cream maker and follow the manufacturer’s instructions. Churning time usually varies, but it's generally around 20-30 minutes. The consistency should thicken significantly.
Step 5: Mix-in Magic (Optional)
During the last few minutes of churning, gently add your desired mix-ins. Be careful not to overmix, as this can create a lumpy texture.
Step 6: Harden Up
Once churned, transfer the ice cream to an airtight container and freeze for at least 2-3 hours to allow it to fully harden. This final freeze helps develop the ice cream's ideal consistency.
Tips and Tricks for Ice Cream Perfection:
- Rock Salt Magic: For those using a traditional ice cream maker (without a built-in compressor), using rock salt in the ice bath significantly improves the freezing process.
- Sweetness Level: Adjust the sugar amount to suit your taste. If you prefer a less sweet ice cream, start with ½ cup of sugar and add more to taste after churning.
- Fresh is Best: Using fresh ingredients whenever possible results in a more vibrant flavor and richer texture.
- Patience is Key: Allow sufficient time for chilling and freezing for the best results.
Beyond Vanilla: Flavor Adventures Await!
This basic recipe is a blank canvas for your culinary imagination. Here are a few flavor combination ideas to inspire your next batch:
- Strawberry Swirl: Blend fresh strawberries before adding them as a swirl.
- Chocolate Fudge Chunk: Use high-quality dark chocolate and add chunks of fudge.
- Mint Chocolate Chip: Combine peppermint extract with chocolate chips.
- Coffee Caramel: Use strong brewed coffee and a rich caramel sauce.
Making homemade ice cream is a rewarding experience that brings the family together and results in a delicious treat. So, grab your ingredients and prepare for a cool and creamy adventure!
