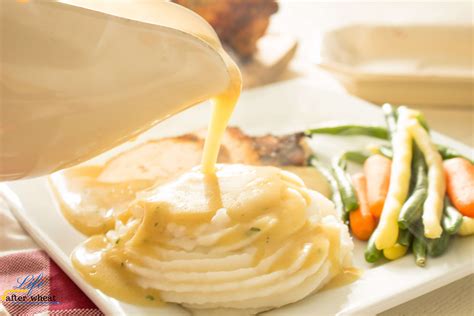
Quick Gluten-Free and Dairy-Free Gravy Recipe
Making a delicious gravy that's both gluten-free and dairy-free doesn't have to be a complicated process. This recipe will guide you through a quick and easy method perfect for busy weeknights or special occasions. Say goodbye to complicated recipes and hello to flavorful, allergy-friendly gravy!
Ingredients You'll Need:
This recipe uses simple, readily available ingredients. You likely already have most of them in your pantry!
- 2 tablespoons gluten-free all-purpose flour (or a blend of cornstarch and arrowroot powder for a lighter gravy): This is the base for thickening your gravy. Ensure it's certified gluten-free if you have celiac disease or a severe gluten intolerance.
- 2 cups dairy-free broth or stock: Vegetable broth works wonderfully, adding depth of flavour. Chicken or turkey broth can also be used depending on your preference. Make sure it's low in sodium if you prefer to manage your salt intake.
- 1 tablespoon dairy-free butter or oil: This adds richness and helps create a smooth gravy. You can use olive oil, coconut oil (ensure it's refined for a neutral taste), or vegan butter.
- Salt and pepper to taste: Seasoning is key! Adjust these to your liking.
- Optional additions: Consider adding herbs like thyme or rosemary, or a splash of Worcestershire sauce (check for gluten-free certification) for extra depth of flavour.
Instructions: A Step-by-Step Guide
This recipe is designed for speed and ease. Follow these simple steps for perfect gravy every time.
Step 1: Whisk the Flour (or Flour Blend)
In a small bowl, whisk the gluten-free flour thoroughly to prevent lumps. This crucial step ensures a smooth, lump-free gravy.
Step 2: Sauté in Dairy-Free Butter (or Oil)
In a saucepan over medium heat, melt the dairy-free butter (or heat the oil). Add the whisked flour and cook for 1-2 minutes, stirring constantly, until lightly browned. This process, called a roux, is essential for thickening. Avoid burning the flour.
Step 3: Gradually Whisk in the Broth
Slowly pour in the dairy-free broth, whisking continuously to prevent lumps. This gradual addition is key to a smooth consistency. Continue whisking until the gravy thickens to your desired consistency. It should coat the back of a spoon.
Step 4: Season and Serve
Remove from heat and season with salt and pepper to taste. You can add any optional ingredients at this stage. Serve immediately over your favourite gluten-free and dairy-free meal.
Tips for the Perfect Gravy
- For a richer flavour: Use homemade stock instead of store-bought broth.
- Thicker gravy: Add a bit more flour at the beginning.
- Thinner gravy: Add a bit more broth.
- Lumpy gravy: Make sure to whisk the flour thoroughly and add the broth slowly, whisking continuously.
- Storing leftovers: Store leftover gravy in an airtight container in the refrigerator for up to 3 days.
Serving Suggestions:
This versatile gravy is perfect for:
- Roasted vegetables: A delightful addition to roasted root vegetables or a hearty vegetable roast.
- Meat alternatives: Pair it with lentil loaf, mushroom wellington, or your favorite plant-based meat alternative for a satisfying and flavourful meal.
- Mashed potatoes (dairy-free): A classic pairing that's guaranteed to impress.
- Gluten-Free Thanksgiving Dinner: A must-have for any festive celebration.
This quick, gluten-free, and dairy-free gravy recipe is a lifesaver for those with dietary restrictions and those seeking a simpler, healthier option. Enjoy!
