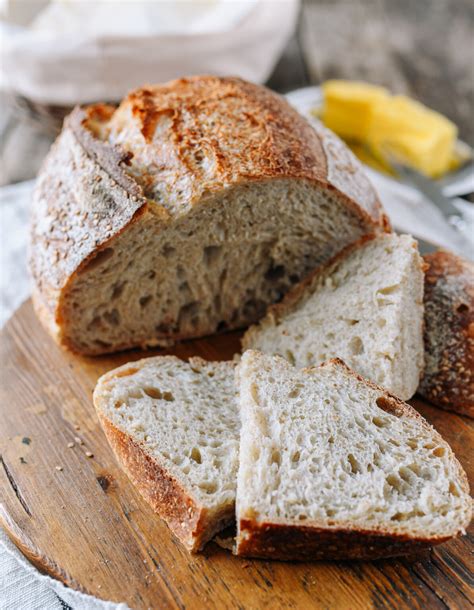
Sourdough Bread: A Beginner's Guide to Baking Amazing Bread at Home
So, you're ready to embark on the rewarding journey of sourdough baking? Fantastic! This comprehensive guide will walk you through everything you need to know, from creating your starter to baking a delicious loaf. Get ready to ditch the store-bought stuff and enjoy the incredible flavor and texture of homemade sourdough.
Building Your Sourdough Starter: The Heart of Your Bread
The first step in making sourdough bread is cultivating a sourdough starter. This is a living culture of wild yeasts and bacteria, giving sourdough its unique tangy flavor. It requires patience, but the wait is absolutely worth it.
Creating Your Starter:
- Day 1: In a clean jar, combine ½ cup of unbleached all-purpose flour and ½ cup of non-chlorinated water. Mix well until a thick paste forms. Cover loosely with a lid or plastic wrap.
- Day 2-7: Wait. Seriously. Observe your mixture. You might see some bubbles, which is a good sign! Stir gently once or twice a day. Discard any mold (if you see any, start again).
- Day 7 onwards: Once your starter shows consistent bubbling and doubles in size after feeding, it’s ready to use!
Feeding Your Starter:
Regular feedings are essential to keep your starter alive and thriving. A typical feeding involves discarding about half of the starter and then adding fresh flour and water in equal parts.
Pro Tip: Keep your starter in a warm place (around 70-75°F) for optimal growth.
Making Your Sourdough Bread Dough:
Now that your starter is ready, let’s get baking! This recipe is a great starting point; feel free to experiment with different flours and hydration levels once you feel comfortable.
Ingredients:
- 500g strong bread flour (or a mix of bread and all-purpose flour)
- 375g water (adjust slightly depending on flour)
- 100g active sourdough starter (fed 4-6 hours prior)
- 10g salt
Instructions:
- Mix: Combine the flour, water, and starter in a large bowl. Mix until just combined; don’t overmix.
- Autolyse: Cover the bowl and let the dough rest for 30-60 minutes. This allows the flour to fully hydrate.
- Add Salt: Add the salt and mix thoroughly until incorporated.
- Bulk Fermentation: Perform stretch and folds every 30 minutes for the first 2 hours, then let the dough bulk ferment for 4-6 hours, or until it has nearly doubled in size.
- Shape: Gently turn the dough out onto a lightly floured surface and shape it into a boule (round) or batard (oval) shape.
- Proof: Place the shaped dough in a banneton (a proofing basket) or a bowl lined with a floured linen cloth. Cover and proof in the refrigerator for 12-18 hours.
- Bake: Preheat your oven to 450°F (232°C) with a Dutch oven inside. Carefully place the dough in the Dutch oven, cover, and bake for 20 minutes. Remove the lid and bake for another 25-30 minutes, or until the crust is deeply golden brown and the internal temperature reaches 205-210°F (96-99°C).
- Cool: Let the bread cool completely on a wire rack before slicing and enjoying.
Troubleshooting Your Sourdough Journey:
Don't be discouraged if your first few attempts aren't perfect. Sourdough baking is a learning process! Here are some common issues and how to address them:
- Starter not bubbling: Make sure your starter is getting enough food (flour and water) and is in a warm enough environment.
- Dough too sticky: Add a little more flour.
- Dough too dry: Add a little more water.
- Flat loaf: Your starter might not be active enough, or your bulk fermentation might have been too short.
Beyond the Basics: Exploring Sourdough Variations
Once you've mastered the basic recipe, the possibilities are endless! Experiment with different flours (whole wheat, rye), add-ins (seeds, nuts, herbs), and shaping techniques to create your own unique sourdough creations. Enjoy the process, and happy baking!
