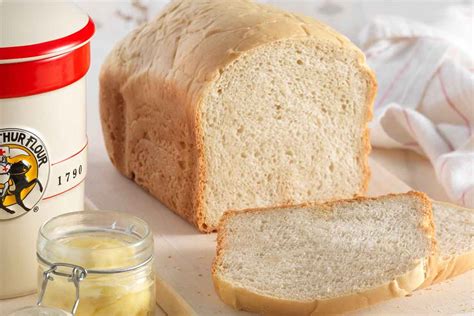
Sourdough Bread Maker Recipe: Achieve Perfect Results Every Time
Are you dreaming of that crusty, tangy sourdough loaf but intimidated by the process? Fear not! This recipe is designed for your bread maker, simplifying the process while delivering incredible results. Forget the long fermentation times and complicated shaping; your bread maker does the heavy lifting, leaving you with a delicious loaf with minimal effort.
Ingredients You'll Need:
This recipe yields one large loaf of sourdough bread. Adjust accordingly for smaller bread makers.
- Sourdough Starter (fed and active): 1 cup (approximately 240ml) Ensure your starter is bubbly and active before beginning.
- Warm Water (105-115°F): 1 cup (approximately 240ml) Temperature is crucial for yeast activation.
- Bread Flour: 3 cups (approximately 360g) Bread flour provides the best structure for sourdough.
- Whole Wheat Flour: 1 cup (approximately 120g) Adds depth of flavor and nutrients.
- Salt: 1 1/2 teaspoons (approximately 7g) Enhances flavor and controls yeast activity.
- Honey or Sugar (optional): 1 tablespoon Provides additional food for the yeast, resulting in a potentially more flavorful loaf. Skip this if you prefer a more traditionally tart sourdough.
Step-by-Step Instructions for Sourdough Bread Maker Success:
- Prepare Your Bread Maker: Ensure your bread maker is clean and ready to go.
- Add Liquids: Add the warm water and active sourdough starter to the bread maker pan.
- Add Dry Ingredients: Add the bread flour, whole wheat flour, salt, and optional honey or sugar to the bread maker pan, ensuring they are evenly distributed. Avoid mixing at this point.
- Select the Dough Cycle: Select the "dough" cycle on your bread maker. This will typically knead the dough for you, eliminating the need for manual kneading. This cycle usually lasts around an hour. Consult your bread maker’s manual for specific instructions.
- First Rise: After the dough cycle is complete, allow the dough to rise for approximately 1.5 to 2 hours, or until doubled in size. The rise time will vary depending on the temperature of your environment and the activity of your starter.
- Shape (Optional): While not strictly necessary, you can gently shape the dough into a round or oval before placing it back in the bread maker pan. This can affect the final shape of the loaf.
- Select the Bake Cycle: Select the “bake” cycle on your bread maker. This will usually last between 1-1.5 hours, depending on your machine.
- Cool and Enjoy: Once the baking cycle is complete, carefully remove the bread from the bread maker pan. Allow it to cool completely on a wire rack before slicing and enjoying. This prevents a soggy loaf!
Tips for Sourdough Bread Maker Perfection:
- Starter Strength: A strong, active starter is key to success. Make sure it’s bubbly and has a pleasant, slightly sour aroma.
- Water Temperature: Accurate water temperature is crucial for optimal yeast activity. Use a thermometer to ensure accuracy.
- Flour Type: Bread flour is recommended for its gluten development, leading to a better loaf structure.
- Don't Over-Knead: The bread maker handles the kneading, so avoid over-kneading manually.
- Experiment with Hydration: Adjust the water amount slightly depending on the flour's absorbency. You might need slightly less water if your flour seems dry.
Troubleshooting Common Problems:
- Dense Loaf: This usually indicates an inactive starter or insufficient kneading.
- Flat Loaf: This often suggests under-proofing (not rising enough) or using too much salt.
- Tough Loaf: This might be due to over-baking or using too little water.
This sourdough bread maker recipe simplifies the process, allowing you to enjoy the delicious taste of homemade sourdough without the lengthy traditional method. Follow these steps, and you'll be rewarded with a delicious and satisfying loaf! Remember to always consult your bread maker’s manual for specific instructions and adjustments. Happy baking!
