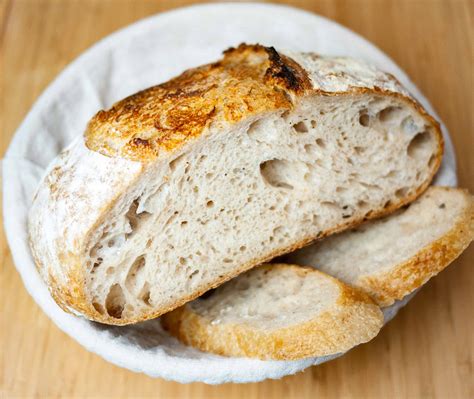
Sourdough Bread Recipe: A Step-by-Step Guide for Beginners
Making sourdough bread can seem daunting, but with a little patience and this detailed recipe, you'll be enjoying crusty, tangy loaves in no time. This guide focuses on creating a delicious sourdough using your own active starter. Let's get baking!
What You'll Need:
Ingredients:
- Active Sourdough Starter: About 200g (fed 4-6 hours before). Your starter should be bubbly and doubled in size, indicating it's ready to work its magic.
- Water: 350g lukewarm water (around 75-80°F or 24-27°C). Temperature is crucial for yeast activity.
- Bread Flour: 500g (high protein, around 12-14%). This provides the structure for your bread. You can experiment with different flours, but bread flour is the best starting point.
- Salt: 10g (fine sea salt or kosher salt). Salt controls yeast activity and adds flavor.
Equipment:
- Large mixing bowl
- Dough scraper or spatula
- Plastic wrap or a damp kitchen towel
- Proofing basket (banneton) - optional, but recommended for shaping.
- Dutch oven or oven-safe pot with a lid
- Baking sheet (if not using a Dutch oven)
Step-by-Step Instructions:
1. Autolyse: Hydrating the Flour
This step allows the flour to fully absorb the water, resulting in a more developed gluten network.
- Combine the flour and water in your large mixing bowl. Mix with your hands or a spatula until just combined – don't overmix.
- Cover the bowl and let it rest for 30-60 minutes. This is the autolyse stage.
2. Mixing the Dough
- Add the sourdough starter and salt to the autolysed dough.
- Knead the dough: This is best done by hand, but you can use a stand mixer with a dough hook if you prefer. Knead for 8-10 minutes until the dough becomes smooth and elastic. The dough should be slightly tacky but not sticky.
3. Bulk Fermentation
- Place the dough back in the bowl, cover it, and let it rise in a warm place for 4-6 hours, or until it has almost doubled in size. This is the bulk fermentation, where the yeast does its work. During this time, perform stretch and folds every 30-45 minutes for the first 2-3 hours. This helps develop the gluten structure and creates a stronger, airier loaf.
4. Shaping the Dough
- Gently turn the dough out onto a lightly floured surface.
- Shape the dough into a round or oblong boule. This process helps create tension in the dough, leading to a better oven spring.
- Place the shaped dough into a floured proofing basket (banneton) seam-side up.
- Cover and let it cold proof in the refrigerator for 12-18 hours. This slow fermentation develops flavor and improves texture.
5. Baking the Bread
- Preheat your oven to 500°F (260°C) with the Dutch oven inside for at least 30 minutes. This is crucial for creating a good crust.
- Carefully remove the hot Dutch oven from the oven.
- Gently invert the dough from the banneton into the Dutch oven.
- Score the top of the dough with a sharp knife or lame. This allows for controlled expansion during baking.
- Cover the Dutch oven and bake for 20 minutes.
- Reduce the oven temperature to 450°F (232°C), remove the lid, and bake for another 25-30 minutes, or until the crust is deeply golden brown and the internal temperature reaches 200-210°F (93-99°C).
- Remove the bread from the Dutch oven and let it cool completely on a wire rack before slicing and enjoying.
Tips for Success:
- Starter Activity: Ensure your starter is active and bubbly before you begin.
- Water Temperature: Lukewarm water is key for optimal yeast activity.
- Flour Type: Using high-protein bread flour will give you the best results.
- Patience: Sourdough baking takes time, but the results are worth it!
This detailed recipe provides a strong foundation for your sourdough journey. Experiment with different flours, hydration levels, and baking times to find your perfect loaf. Happy baking!
