Mastering Simple Pan-Seared Chicken Breasts
Home cooking often hinges on mastering fundamental protein techniques. Chicken breasts are ubiquitous in grocery carts, yet they remain notoriously difficult to prepare well. Too often, weeknight efforts yield rubbery, dry, or tasteless results that rely on heavy store-bought sauces to be palatable. When exploring practical easy chicken recipes that fit seamlessly into busy schedules, the secret does not lie in complicated marinades or lengthy prep times. Instead, mastering skillet temperature control, surface moisture management, and simple pan sauce mechanics elevates basic boneless, skinless chicken breasts into a tender, rich dinner in under thirty minutes.
Understanding heat transfer and surface moisture transforms how you approach pan searing. When chicken hits a hot pan, any surface water must evaporate before the temperature can rise high enough to trigger the Maillard reaction—the chemical process responsible for deep browning and complex flavor development. By taking a few deliberate steps before your skillet touches the stovetop, you can ensure a golden crust while keeping the interior moist and tender. Paired with a swift garlic-infused butter sauce made right in the same skillet, this approach turns everyday ingredients into a memorable meal.
Key Takeaways
- Pound to Even Thickness: Uneven chicken breasts cook unevenly. Flattening thick ends ensures the entire piece reaches safe internal temperatures simultaneously without drying out thin edges.
- Dry the Surface Completely: Surface moisture creates steam in the pan. Thoroughly patting the meat dry with paper towels guarantees a deep, crisp brown sear.
- Respect the Unmoved Sear: Resisting the urge to flip or shift the chicken during the first four minutes allows a proper crust to form and prevents sticking.
- Build a Pan Sauce from the Fond: The browned bits stuck to the pan bottom (fond) are packed with concentrated flavor. Deglazing with broth unlocks this taste foundation instantly.
- Rest Before Slicing: Slicing immediately causes essential juices to spill onto the cutting board. A five-minute rest redistributes moisture throughout the protein fibers.
Recipe Overview: Garlic Herb Pan-Seared Chicken
This streamlined method pairs seasoned pan-seared chicken breasts with an aromatic sauce built directly from the cooking pan. It requires only standard pantry staples, one large skillet, and roughly twenty-five minutes from start to finish. It serves four adults comfortably and scales easily for meal prepping.

- Prep Time: 10 minutes
- Cook Time: 15 minutes
- Resting Time: 5 minutes
- Total Time: 30 minutes
- Yield: 4 servings
- Method: Pan-searing and pan reduction
Ingredients and Detailed Component Notes
Quality ingredients make a noticeable difference when working with minimal components. Here is what you will need for this skillet recipe:
- Chicken Breasts: 2 large boneless, skinless chicken breasts (approx. 1.5 lbs total). Look for air-chilled chicken when available, as it contains less absorbed water than water-chilled poultry, leading to superior browning.
- Kosher Salt & Black Pepper: 1 teaspoon kosher salt and 1/2 teaspoon freshly cracked black pepper. Salt draws out surface moisture and seasons the meat deeply. Fine sea salt can be substituted; use slightly less volume if using fine table salt.
- Aromatic Dry Seasoning: 1/2 teaspoon garlic powder and 1/2 teaspoon smoked paprika. Garlic powder adds savory baseline depth, while smoked paprika provides subtle earthiness and aids in deep color development.
- Cooking Oil: 1.5 tablespoons high-smoke-point oil (such as avocado oil, light olive oil, or canola oil). Avoid extra virgin olive oil for the initial sear, as its low smoke point can scorch at high heat and leave a bitter taste.
- Unsalted Butter: 3 tablespoons unsalted butter, divided. Using unsalted butter allows precise control over final seasoning levels as the pan sauce reduces.
- Fresh Garlic: 4 cloves, finely minced. Fresh garlic brings vibrant bite and aroma to the pan sauce. Avoid pre-minced jarred garlic, which lacks punch and can turn sour when sautéed.
- Low-Sodium Chicken Broth: 1/2 cup good-quality low-sodium chicken stock or broth. Low-sodium varieties are crucial because liquid reduction concentrates salt levels rapidly.
- Fresh Lemon Juice: 1 tablespoon freshly squeezed lemon juice. Acid cuts through the richness of the butter and brightens the overall flavor profile.
- Fresh Parsley: 1 tablespoon finely chopped flat-leaf Italian parsley for freshness, color contrast, and a clean herbal finish.
Step-by-Step Cooking Instructions
Step 1: Prep and Flatten the Chicken
Place the chicken breasts on a clean cutting board lined with plastic wrap. Slice each breast in half horizontally (butterflying completely through) to create four thinner cutlets of roughly equal size. Place another sheet of plastic wrap on top. Using a meat mallet or heavy rolling pin, gently pound the thick ends until each cutlet reaches a uniform thickness of roughly 1/2 to 3/4 inch. This step is essential for uniform heat distribution.
Step 2: Season and Dry
Pat both sides of each cutlet completely dry using paper towels. In a small bowl, mix the kosher salt, black pepper, garlic powder, and smoked paprika. Sprinkle the spice blend evenly over both sides of the chicken cutlets, pressing gently so the seasoning adheres to the meat surface.
Step 3: Heat the Skillet
Place a large, heavy-bottomed skillet (stainless steel or well-seasoned cast iron) over medium-high heat. Add the high-smoke-point oil and 1 tablespoon of unsalted butter. Allow the butter to melt and foam. Once the foam subsides and the oil shimmers across the skillet surface, the pan is hot enough for searing.
Step 4: Sear to Golden Crispness
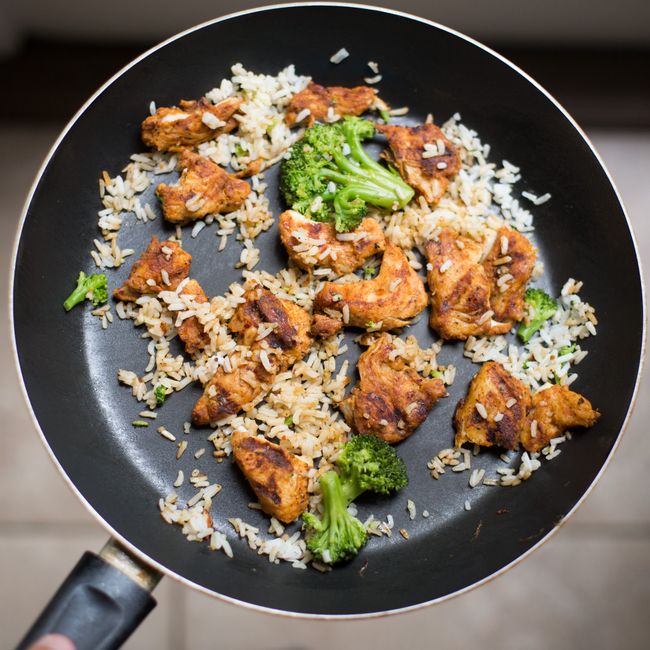
Lay the seasoned chicken cutlets gently into the hot pan, lay them away from you to prevent hot oil splatters. Do not overcrowd the skillet; cook in two batches if your pan is smaller than 12 inches. Cook undisturbed for 4 to 5 minutes. The chicken should release naturally from the pan once a crisp, dark golden crust forms. Flip the cutlets and cook for an additional 3 to 4 minutes on the second side.
The biggest mistake home cooks make with pan-seared chicken is moving the meat too early. Once the chicken hits the hot skillet, leave it undisturbed for at least four minutes. As the surface caramelizes through the Maillard reaction, it naturally releases from the pan. If it sticks when you try to lift it, it isn’t ready to turn.
Step 5: Check Temperature and Rest
Insert an instant-read meat thermometer into the thickest section of the cutlets. The reading should register 160°F (71°C). Transfer the cooked chicken to a clean plate and tent loosely with foil. The residual internal heat will continue cooking the meat to the safe USDA target of 165°F (74°C) while it rests, keeping the meat fibers soft and juicy.
Step 6: Build the Garlic Butter Pan Sauce
Turn the skillet heat down to medium. Leave any residual oil and browned bits (fond) in the pan. Add the minced garlic and cook for 30 to 45 seconds until fragrant, stirring constantly to prevent scorching. Pour in the low-sodium chicken broth, using a wooden spoon to scrape up all cooked brown bits stuck to the bottom of the pan.
Step 7: Reduce and Emulsify
Bring the broth to a gentle simmer and let it reduce by half, which should take roughly 2 to 3 minutes. Turn off the heat entirely. Whisk in the remaining 2 tablespoons of cold unsalted butter and 1 tablespoon of fresh lemon juice. Whisking cold butter off the heat emulsifies the sauce, creating a glossy, velvety coating rather than an oily separation.
Step 8: Finish and Serve
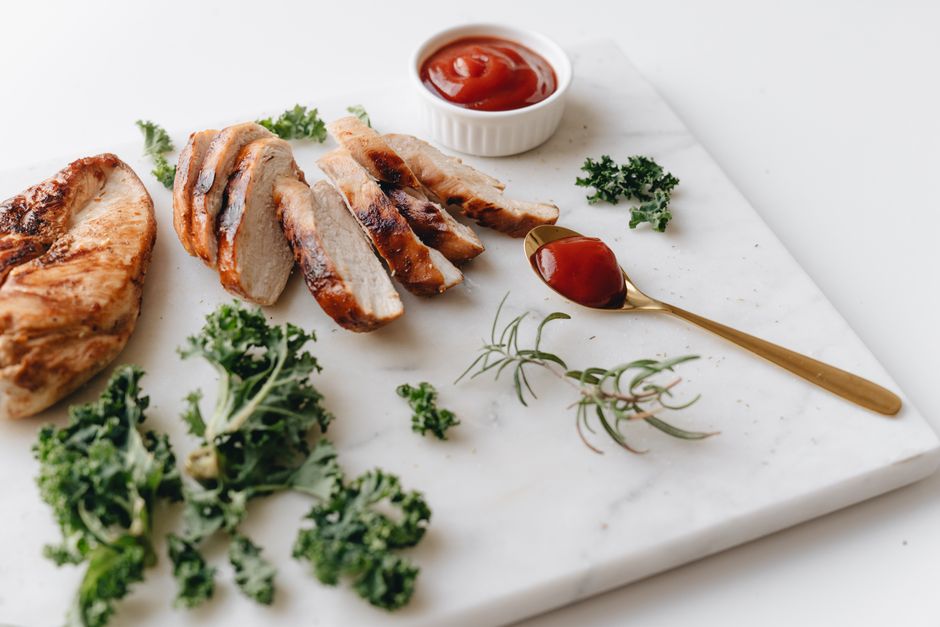
Stir the finely chopped fresh parsley into the pan sauce. Spoon any accumulated resting juices from the chicken plate back into the skillet sauce. Place the chicken cutlets back into the pan for 30 seconds to coat with the glossy garlic sauce, or plate the chicken and spoon generous helpings of sauce directly over top.
Essential Cooking Tips and Common Pitfalls
Achieving consistently tender, flavorful results with easy chicken recipes comes down to avoiding common culinary missteps. Even simple dishes benefit from technique adjustments that improve moisture retention and flavor delivery.
1. Pounding vs. Long Cooking Times
Chicken breasts are naturally tapered, featuring a thick lobe at one end and a thin tail at the other. If cooked un-pounded, the thin tail overcooks and dries out long before the thick center reaches safe temperatures. Slicing breasts into cutlets and pounding them level removes this variable entirely.
2. Avoiding Cold Meat Shock
Taking chicken directly from a cold refrigerator and dropping it into a searing pan lowers the skillet temperature rapidly, causing the meat to release water and steam rather than sear. Remove your chicken from refrigeration 10 to 15 minutes prior to cooking so it loses its extreme chill before hitting the pan.
3. The Smoke Point Trap
Whole butter contains milk solids that burn quickly over high heat, turning dark brown and bitter. Combining oil with high smoke thresholds (like avocado oil) alongside butter provides rich taste while raising the thermal limit, preventing bitter scorching during the high-heat searing phase.
4. Garlic Burning Control
Garlic turns acrid very quickly when exposed to high temperatures. Always lower pan heat before adding minced garlic, and have your deglazing liquid (broth) ready to pour immediately once you smell the garlic’s fragrance.
Chicken Cuts Comparison and Cooking Times
Different chicken cuts require varied heat applications and cooking times to reach peak tenderness. Understanding how these cuts behave helps when adapting basic stovetop techniques across different recipes.
| Chicken Cut | Average Thickness | Skillet Heat Level | Target Internal Temp | Average Cook Time |
|---|---|---|---|---|
| Pounded Breast Cutlet | 1/2 to 3/4 inch | Medium-High | 165°F (74°C) | 7 – 9 mins total |
| Whole Bone-In Breast | 1.5 to 2 inches | Medium to Low (Finish in oven) | 165°F (74°C) | 22 – 28 mins total |
| Boneless Thigh | 3/4 inch | Medium-High | 175°F (79°C) | 10 – 12 mins total |
| Bone-In Thigh | 1 to 1.5 inches | Medium | 175°F (79°C) | 18 – 22 mins total |
| Chicken Tenders | 1/2 inch | High | 165°F (74°C) | 5 – 6 mins total |
Substitutions and Flavor Variations
This simple pan-searing method acts as a canvas for various flavor additions depending on what ingredients you have in your pantry:
- Creamy Tuscan Variation: Add 1/3 cup of heavy cream and 1/2 cup of fresh baby spinach along with a tablespoon of sun-dried tomatoes to the sauce during the final reduction step.
- Classic Piccata Style: Add 2 tablespoons of drained capers along with an extra tablespoon of lemon juice and thin lemon slices to the skillet when reducing the chicken broth.
- Honey Mustard Herb: Stir 1 tablespoon of Dijon mustard and 1 tablespoon of raw honey into the broth before reducing to create a tangy-sweet glaze.
- Poultry Thigh Swap: Boneless, skinless chicken thighs can be substituted directly for breasts. Thighs contain higher fat content and remain forgiving if cooked past target temperatures, though they benefit from reaching 175°F to yield the most tender texture.
- Dairy-Free Modification: Substitute extra virgin olive oil or plant-based butter for the finishing butter step, and deglaze with clear vegetable or chicken broth.
Serving Suggestions and Side Dishes
A well-balanced meal comes together quickly when pairing pan-seared garlic chicken with simple, complementary side dishes. Because this dish generates a rich pan sauce, starch-based sides excel at soaking up residual flavor:
- Starches: Garlic mashed potatoes, buttered egg noodles, steamed jasmine rice, or creamy parmesan polenta provide an ideal base for absorbing extra garlic butter sauce.
- Vegetables: Roasted asparagus spears, steamed green beans with lemon zest, sautéed zucchini, or a crisp green garden salad tossed in light vinaigrette balance the rich butter finish.
- Crusty Bread: Warm warm sourdough or French baguette slices work wonderfully for dipping directly into the pan reduction.
Storage, Meal Prep, and Reheating Instructions
Chicken breasts often suffer when reheated, turning rubbery if exposed to sudden high microwave heat. Proper storage techniques and gentle warming preserve the original texture and moisture.
Refrigeration Storage
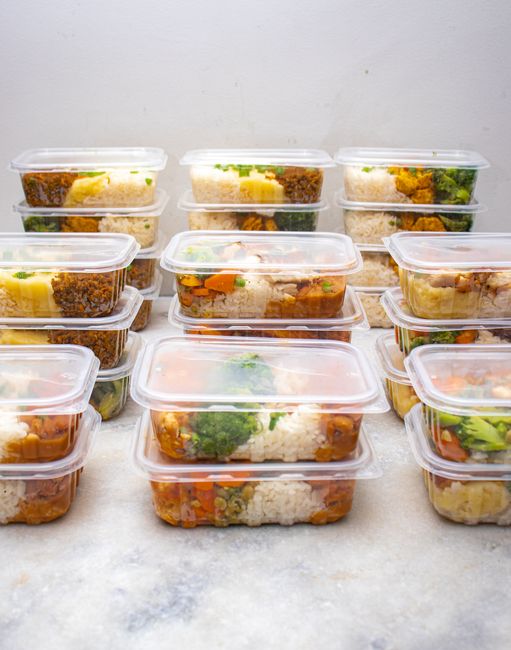
Allow leftover cooked chicken and sauce to cool to ambient temperature. Transfer into airtight glass storage containers and store in the refrigerator for up to 3 to 4 days. Store sauce alongside the chicken so the meat stays lubricated during storage.
Freezing Instructions
Pan-seared chicken cutlets freeze reasonably well. Place cooked and cooled cutlets in a single layer inside heavy-duty freezer bags or vacuum-sealed containers for up to 2 months. Thaw completely in the refrigerator overnight before reheating.
Optimal Reheating Methods
- Stovetop Method (Best Quality): Place chicken cutlets in a small skillet over medium-low heat. Add 2 tablespoons of chicken stock or water and cover with a lid. Heat gently for 4 to 6 minutes until warmed through. The steam rehydrates the protein without toughening it.
- Oven Method: Preheat oven to 325°F (160°C). Place chicken in a baking dish, splash with a spoonful of broth, cover tightly with aluminum foil, and warm for 10 to 12 minutes.
- Microwave Method (Fastest): Slice chicken into strips first. Place on a microwave-safe dish, cover with a damp paper towel, and heat on 50% power in 45-second intervals until warm. Reduced power prevents the proteins from constricting violently and becoming rubbery.
Nutrition Information
The nutritional values listed below are approximate estimates based on standard ingredients and portion sizes. Values may vary based on exact brands and measurement precision.
| Nutrient Component | Amount Per Serving | % Daily Value* |
|---|---|---|
| Calories | 320 kcal | — |
| Total Fat | 16 g | 21% |
| Saturated Fat | 6 g | 30% |
| Trans Fat | 0 g | — |
| Cholesterol | 115 mg | 38% |
| Sodium | 480 mg | 21% |
| Total Carbohydrates | 2 g | 1% |
| Dietary Fiber | 0 g | 0% |
| Sugars | 0.5 g | — |
| Protein | 38 g | 76% |
*Percent Daily Values are based on a 2,000 calorie diet.
Frequently Asked Questions
How do I keep chicken breasts from drying out when pan searing?
Drying out occurs when internal temperatures exceed safe limits or when thickness is uneven. Always pound breasts to uniform thickness so they cook quickly and evenly. Pull the meat from heat when an internal probe reads 160°F (71°C), as carryover heat brings it to the safe target of 165°F while resting.
Can I use chicken thighs instead of chicken breasts for this recipe?
Yes, boneless skinless chicken thighs work exceptionally well. Thighs contain more dark meat and fat, making them naturally resilient to drying out. Cook thighs until they reach an internal temperature of 175°F (79°C) for ideal tenderness.
What is pan fond, and why is it important?
Fond refers to the small, browned caramelized bits of protein and seasoning stuck to the skillet bottom after searing meat. It is concentrated flavor created by heat. Scraping it up while deglazing with liquid incorporates these caramelized compounds directly into your pan sauce.
Can I prepare this easy chicken recipe in advance for meal prep?
Absolutely. Cook the chicken completely and pack it into meal prep containers along with cooked rice or vegetables. Pour the pan sauce directly over the meat. When reheated gently, the sauce melts back into a liquid state and keeps the chicken moist.
Why did my garlic burn when making the pan sauce?
Garlic burns easily when placed into a screaming-hot skillet with high direct heat. Lower the heat setting to medium after removing the chicken, let the skillet cool slightly for 30 seconds, and keep the minced garlic moving constantly with a spoon. Have your liquid ready to add within 30 to 45 seconds.
Do I need to flour the chicken before searing?
Dredging in flour creates a slightly thicker crust and helps thicken sauces, but it is not strictly necessary. Skipping flour keeps this recipe gluten-free and low-carb while still producing a golden, delicious pan crust when cooked in a hot skillet with proper oil balance.
Conclusion
Developing confidence with everyday meal prep does not require complicated gadgets or exhaustive ingredient lists. Mastering fundamental skillet techniques—like pounding cutlets flat, creating surface dryness, managing heat, and constructing quick emulsified pan sauces—turns standard chicken breasts into consistent dinner options. Keep this basic framework in mind next time you search for easy chicken recipes: focus on temperature control, sear without moving prematurely, and build rapid sauces from pan drippings. With minimal practice, you will reliably produce juicy, flavorful skillet chicken in thirty minutes or less.