Perfect French Toast: The Ultimate Breakfast Comfort Food
There’s something magical about that moment when you lift a perfectly cooked slice of French toast from the griddle. The aroma of cinnamon and vanilla fills the air, the golden-brown crust shatters slightly under gentle pressure, and when you cut into it, you reveal a soft, custardy interior that melts in your mouth. This isn’t just breakfast—it’s a warm hug on a plate, a weekend ritual that turns ordinary mornings into something special.






I’ve spent years perfecting this French toast recipe, testing different breads, custard ratios, and cooking techniques to find that sweet spot between crispy exterior and creamy interior. What makes this version stand out is the combination of rich brioche with a perfectly balanced custard that’s not too eggy and not too sweet. It’s the kind of recipe that feels indulgent but comes together in under 30 minutes, making it perfect for lazy Sunday brunches or even quick weekday treats when you need a little comfort.
Recipe Overview
Nutrition Facts (per serving)
- Calories: 320 kcal
- Protein: 12g
- Fat: 14g
- Carbohydrates: 35g
- Fiber: 2g
- Sugar: 12g
Ingredients
Main Ingredients
- 4 thick slices brioche bread (1-inch thick, about 8 ounces total – day-old bread works best)
- 3 large eggs (room temperature)
- 3/4 cup whole milk (or 2% milk if preferred)
- 1/4 cup heavy cream (this adds richness – you can substitute with more milk)
For the Custard
- 2 tablespoons granulated sugar
- 1 teaspoon pure vanilla extract
- 1/2 teaspoon ground cinnamon
- 1/4 teaspoon ground nutmeg (freshly grated if possible)
- Pinch of salt (balances the sweetness)
For Cooking and Serving
- 2 tablespoons unsalted butter (for cooking)
- Maple syrup (for serving – pure maple syrup recommended)
- Powdered sugar (for dusting)
Step-by-Step Instructions
Step 1: Prepare the Custard Mixture
Start by cracking your eggs into a medium mixing bowl. Whisk them vigorously until they’re well beaten and uniform in color. This is important because you want the custard to be smooth, not streaky with egg whites. Now add the milk, heavy cream, sugar, vanilla extract, cinnamon, nutmeg, and that pinch of salt. Whisk everything together until the sugar has completely dissolved and the spices are evenly distributed throughout the mixture. You should have a beautiful, speckled custard that smells incredible already.
Step 2: Soak the Bread Properly
Pour your custard mixture into a shallow baking dish or pie plate—something wide enough to lay a slice of bread flat. Now for the crucial step: soaking time. Place one slice of brioche in the custard and let it soak for about 30 seconds. Gently flip it over and soak the other side for another 30 seconds. You want the bread to absorb enough custard to become rich and flavorful, but not so much that it falls apart when you try to lift it. Day-old bread works best here because it’s sturdier and absorbs the custard without becoming mushy.
Step 3: Heat Your Cooking Surface
While your bread is soaking, heat a large non-stick skillet or griddle over medium heat. Add about half of the butter (1 tablespoon) and let it melt completely, swirling the pan to coat the bottom evenly. You want the butter to be foamy and fragrant but not browned—that’s your cue that the pan is at the perfect temperature for French toast, around 375°F (190°C).
Step 4: Cook to Golden Perfection
Carefully lift the soaked bread from the custard, letting any excess drip back into the dish, and transfer it to the hot skillet. Cook for 3-4 minutes on the first side. You’ll know it’s ready to flip when the bottom is a deep golden brown and the edges look set. Use a thin spatula to gently flip each slice—these are delicate, so be patient. Cook for another 3-4 minutes on the second side until it’s equally golden brown. The French toast should feel firm but slightly springy when gently pressed in the center.
Step 5: Finish and Serve Immediately
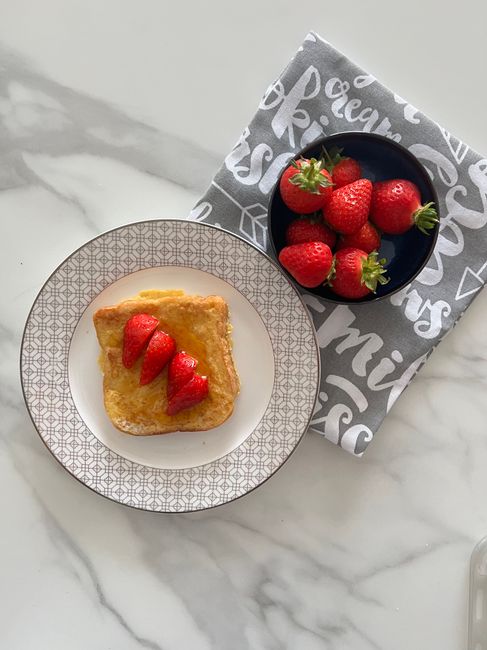
Transfer your cooked French toast to a wire rack (this prevents sogginess) or keep them warm in a 200°F (95°C) oven while you cook the remaining slices. Add more butter to the pan as needed. Serve your perfect French toast immediately with a generous drizzle of warm maple syrup and a light dusting of powdered sugar. The contrast of warm toast, cool syrup, and snowy sugar is part of the experience.
Expert Tips & Tricks
- Bread Choice Matters: While brioche is my favorite, challah, French bread, or Texas toast all work well. Stale bread actually absorbs custard better than fresh bread without falling apart.
- Don’t Over-Soak: 30-45 seconds per side is the sweet spot. If your bread starts to fall apart, it’s been in the custard too long.
- Temperature Control: Medium heat is key. Too hot and the outside burns before the inside cooks; too low and you get pale, greasy toast.
- Make-Ahead Custard: You can prepare the custard mixture the night before and store it covered in the refrigerator. Just give it a good whisk before using.
- Keep it Warm: Place cooked French toast on a wire rack in a 200°F (95°C) oven while you finish the batch. This keeps them crispy.
- Flavor Variations: Add orange zest, almond extract, or a tablespoon of bourbon to the custard for different flavor profiles.
- Dairy-Free Option: Substitute the milk and cream with almond milk or oat milk and use dairy-free butter for cooking.
- Testing Doneness: The French toast should feel firm but slightly springy when gently pressed in the center—like a perfectly baked custard.
Serving Suggestions
- Classic breakfast: Serve with crispy bacon or breakfast sausage links and fresh fruit
- Brunch spread: Pair with scrambled eggs, hash browns, and mimosas for a full experience
- Sweet toppings: Try fresh berries, whipped cream, caramel sauce, or nut butter in addition to maple syrup
- Savory twist: Skip the sugar in the custard and top with fried eggs and hot sauce for a savory French toast
- Dessert option: Add a scoop of vanilla ice cream and chocolate sauce for French toast à la mode
Frequently Asked Questions
Can I use different types of bread?
Absolutely! Brioche is my top choice for its richness, but challah, French bread, sourdough, or even thick-cut sandwich bread all work. Just adjust soaking time—denser breads might need an extra 10-15 seconds per side.
Why does my French toast come out soggy?
Sogginess usually comes from three issues: bread that’s too fresh (use day-old), over-soaking (stick to 30-45 seconds per side), or cooking at too low a temperature (make sure your pan is properly preheated to medium heat).
Can I make French toast ahead of time?
You can prepare the custard mixture up to 24 hours ahead and store it covered in the refrigerator. For the French toast itself, it’s best served immediately after cooking, but you can keep it warm in a 200°F (95°C) oven for up to 30 minutes.
How do I store and reheat leftovers?
Store cooled French toast in an airtight container in the refrigerator for up to 3 days. Reheat in a toaster oven or regular toaster until warm and crispy again—avoid the microwave as it will make them soggy.
Can I freeze French toast?
Yes! Let cooked French toast cool completely, then place in a single layer on a baking sheet and freeze until solid. Transfer to freezer bags with parchment between slices. They’ll keep for 2-3 months. Reheat from frozen in a toaster oven or at 350°F (175°C) for 10-12 minutes.
What’s the secret to extra crispy French toast?
Two tips: First, make sure your pan is properly preheated before adding the butter. Second, don’t overcrowd the pan—cook in batches if needed so each slice has room to breathe and crisp up evenly.
Final Thoughts
This French toast recipe has become my go-to for weekend breakfasts, special occasions, and even those “I need comfort food” weeknights. What I love most about it is how adaptable it is—once you master the basic technique, you can experiment with different breads, spices, and toppings to make it your own.
Remember that French toast is as much about the process as it is about the result. Take your time with the soaking, watch the heat, and don’t rush the cooking. That golden-brown crust and custardy interior are worth every minute. Store any leftovers in the refrigerator and reheat them in a toaster for a quick breakfast treat the next day.
I hope this recipe brings as much joy to your kitchen as it has to mine. There’s something truly special about sharing warm French toast with loved ones—it’s one of those simple pleasures that makes everyday moments feel extraordinary. Give it a try this weekend, and don’t forget to drizzle on that maple syrup generously!