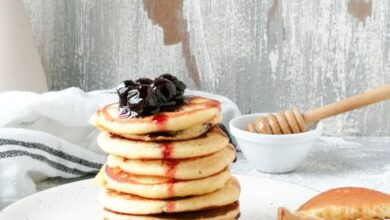
Fluffy Buttermilk Pancakes from Scratch: A Classic American Breakfast

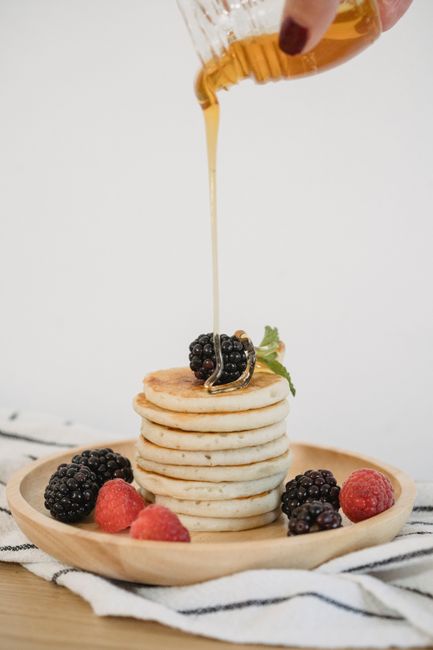
Welcome to Pancake Perfection
There’s something magical about a stack of homemade pancakes on a lazy weekend morning. The gentle sizzle from the griddle, the sweet aroma of vanilla and buttermilk filling the kitchen, and the anticipation of that first perfect bite. These aren’t just any pancakes—they’re the kind that rise tall and proud, with a tender, fluffy crumb and golden-brown edges that beg for a river of maple syrup. Making pancakes from scratch might seem simple, but the difference between a good pancake and a great one lies in the details. This recipe walks you through every step to ensure your pancakes are light, airy, and utterly delicious every single time.
🍳 Recipe Overview
Nutrition Facts (per serving – 3 pancakes)
- Calories: 280 kcal
- Protein: 8g
- Fat: 9g
- Carbohydrates: 40g
- Fiber: 1g
- Sugar: 10g
Ingredients
Dry Ingredients
- 2 cups (250g) all-purpose flour – spooned and leveled for accuracy
- 2 tablespoons (25g) granulated sugar – for a hint of sweetness and golden color
- 2 teaspoons baking powder – the key leavener for lift
- 1 teaspoon baking soda – reacts with the buttermilk for extra fluffiness
- 1/2 teaspoon salt – balances and enhances all the flavors
Wet Ingredients
- 2 cups (480ml) buttermilk, room temperature – the star ingredient for tang and tenderness
- 2 large eggs, room temperature – binds the batter and adds richness
- 1/4 cup (60ml) unsalted butter, melted and cooled – for flavor and a soft texture
- 1 teaspoon pure vanilla extract – adds warmth and depth
- Butter or neutral oil – for greasing the cooking surface
Step-by-Step Instructions
Step 1: Mix the Dry Ingredients
Grab a large mixing bowl and add your flour, sugar, baking powder, baking soda, and salt. Take a moment to whisk them together thoroughly. This isn’t just about mixing—it’s about evenly distributing the leaveners (baking powder and soda) so every bite of your pancake rises uniformly. A few extra whisks here pay off in perfect texture later.
Step 2: Prepare the Wet Ingredients
In a separate bowl (a medium one works great), crack in your eggs. Give them a quick whisk to break them up, then pour in the buttermilk. Whisk until the mixture is smooth and homogenous. Now, stream in the melted butter that’s had a minute to cool (you don’t want it to cook the eggs!) and the vanilla. Whisk it all together until you have a uniform, slightly thick liquid.


Step 3: Combine Gently—The Secret to Fluffiness
This is the most critical step. Pour the wet ingredients into the bowl with the dry ingredients. Using a rubber spatula or a whisk, gently fold the mixture together. Stir just until the last streaks of dry flour disappear. The batter will be thick, lumpy, and might even look a bit shaggy. This is exactly what you want! Overmixing develops the gluten in the flour, which leads to tough, dense pancakes. Embrace the lumps.
Step 4: The Patient Rest
Walk away. Seriously, let the batter sit on the counter for 5 to 10 minutes. This resting period allows the flour to fully hydrate and the baking powder to begin its bubbling magic. You’ll see the batter thicken slightly and become airier. This rest is what gives you those tall, fluffy stacks.
Step 5: Heat Your Cooking Surface
While the batter rests, heat your skillet, griddle, or cast-iron pan over medium heat. You want it properly preheated. A good test is flicking a few drops of water onto the surface—if they sizzle and evaporate quickly, you’re ready. If they just sit there, give it another minute. Consistent heat is crucial for even browning.
Step 6: Cook to Golden Perfection
Lightly grease the pan with a dab of butter or a brush of oil. For each pancake, use a 1/4-cup measuring cup or a ladle to pour the batter. Don’t press or spread it—let it settle naturally. Now, watch for the cues. After about 2 minutes, you’ll see bubbles forming and popping on the surface, and the edges will look dry and set. This is your signal.
Step 7: The Confident Flip
Slide a thin spatula underneath the pancake. You should be able to lift it easily. Give it one confident flip—don’t hesitate! Cook on the second side for 1 to 2 minutes, until it’s a beautiful, even golden brown. The second side always cooks faster than the first.
Step 8: Serve Immediately & Enjoy
Pancakes are best served straight from the griddle. Transfer them to a warm plate and serve with your favorite accompaniments. Keep finished pancakes in a single layer on a baking sheet in a warm (200°F / 95°C) oven if you’re cooking a big batch.
Expert Tips & Tricks for Pancake Mastery
- Room Temperature is Key: Using room-temperature buttermilk and eggs helps the ingredients blend smoothly and encourages a better rise. If you forgot to take them out, place cold eggs in a bowl of warm water for 5 minutes, and microwave the buttermilk in 10-second bursts until it’s no longer chilly.
- Don’t Overmix: Say it with me: lumps are good. A few streaks of flour are fine. Overmixed batter = flat, tough pancakes.
- Control the Heat: If your pancakes are browning too fast on the outside but staying raw inside, your heat is too high. Medium heat is usually the sweet spot. Adjust as needed—the first pancake is often a test.
- Make-Ahead Batter: You can mix the dry and wet ingredients separately the night before. In the morning, combine them and let rest for 5 minutes before cooking. Do not mix the batter and let it sit overnight, as the leaveners will lose their power.
- No Buttermilk? Make your own! For every cup of milk, add 1 tablespoon of lemon juice or white vinegar. Let it sit for 5-10 minutes until it curdles slightly. It works nearly as well.
- Freeze for Later: Let cooked pancakes cool completely, then place them in a single layer on a baking sheet to freeze. Once frozen solid, transfer to a freezer bag. Reheat in a toaster or a 350°F (175°C) oven for a quick breakfast anytime.
Serving Suggestions
- The Classic: A generous pour of pure maple syrup and a pat of melting butter.
- Berry Bliss: Top with fresh blueberries, strawberries, or raspberries and a dollop of whipped cream.
- Decadent Twist: Drizzle with chocolate sauce, sprinkle with chopped nuts, and add sliced bananas.
- Savory Option: Skip the sugar in the batter and serve with crispy bacon, scrambled eggs, and a drizzle of hot sauce.
- Fun for Kids: Create “pancake faces” using blueberries for eyes, a strawberry slice for a mouth, and whipped cream for hair.
Frequently Asked Questions
Why are my pancakes flat and not fluffy?
Flat pancakes are usually caused by one of three things: expired baking powder/baking soda (check the date!), overmixing the batter, or cooking on heat that’s too low. Make sure your leaveners are fresh, mix gently until just combined, and cook on a properly preheated medium-heat surface.
Can I make these pancakes gluten-free or whole wheat?
Absolutely. For gluten-free, use a 1:1 gluten-free flour blend. For whole wheat, I recommend replacing half the all-purpose flour with whole wheat flour to keep them from becoming too dense. You might need to add a splash more buttermilk as whole wheat flour absorbs more liquid.
How do I keep pancakes warm for a crowd?
The best method is to preheat your oven to 200°F (95°C). Place cooked pancakes in a single layer on a wire rack set over a baking sheet. This keeps them warm without getting soggy from steam. They can stay warm for up to 30 minutes this way.
What’s the difference between baking powder and baking soda here?
Baking powder provides the initial lift when the batter gets wet. Baking soda reacts with the acidic buttermilk, creating additional bubbles for extra fluffiness and helping the pancakes brown beautifully. Using both gives you the best texture.
My batter seems too thick/thin. What should I do?
Flour absorbs humidity, so slight variations happen. If it’s too thick (doesn’t pour easily), add a tablespoon of buttermilk at a time until it’s a scoopable consistency. If it’s too thin (spreads too thin in the pan), sprinkle in a tablespoon of flour and fold it in gently.
Your Pancake Journey Awaits
There you have it—everything you need to master the art of homemade fluffy buttermilk pancakes. Store any leftovers in an airtight container in the refrigerator for up to 3 days, or freeze them for up to 3 months for a future lazy morning. Remember, the best pancake is the one shared with good company. So fire up that griddle, pour a cup of coffee, and get ready to create a breakfast memory. I’d love to hear how your pancakes turn out—what’s your favorite topping? Happy cooking!