The Ultimate Comfort Food: Creamy Baked Mac and Cheese
Imagine that first spoonful: perfectly cooked pasta enveloped in a velvety, three-cheese sauce that stretches with every lift of your fork, crowned with a golden, crispy panko crust. The aroma alone—nutty Gruyère, sharp cheddar, a hint of smoky paprika—will have everyone gathering in the kitchen. This isn’t just mac and cheese; it’s a hug in a baking dish, a celebration of simple ingredients transformed into something extraordinary. Whether you’re cooking for a cozy family dinner, a holiday potluck, or just treating yourself, this recipe delivers that perfect balance of creamy indulgence and satisfying texture that makes mac and cheese the undisputed king of comfort food.


Recipe Overview
Nutrition Facts (per serving)
- Calories: 420 kcal
- Protein: 22g
- Fat: 24g
- Carbohydrates: 32g
- Fiber: 2g
- Sugar: 5g
Ingredients
For the Pasta & Cheese Sauce
- 12 oz elbow macaroni (about 3 ½ cups dry)
- 4 tbsp unsalted butter (1/2 stick)
- 1/3 cup all-purpose flour
- 3 cups whole milk
- 1 cup heavy cream
- 2 tsp Dijon mustard
- 1/2 tsp garlic powder
- 1/2 tsp smoked paprika
- 1/4 tsp ground nutmeg
- 1 tsp kosher salt
- 1/2 tsp black pepper (freshly ground)
For the Cheese Blend
- 3 cups shredded sharp cheddar cheese (about 12 oz)
- 1 cup shredded Gruyère cheese (about 4 oz)
- 1/2 cup grated Parmesan cheese
For the Topping
- 1 cup panko breadcrumbs
- 2 tbsp melted butter
- 2 tbsp chopped fresh parsley (for garnish)
Instructions
Step 1: Cook the Pasta
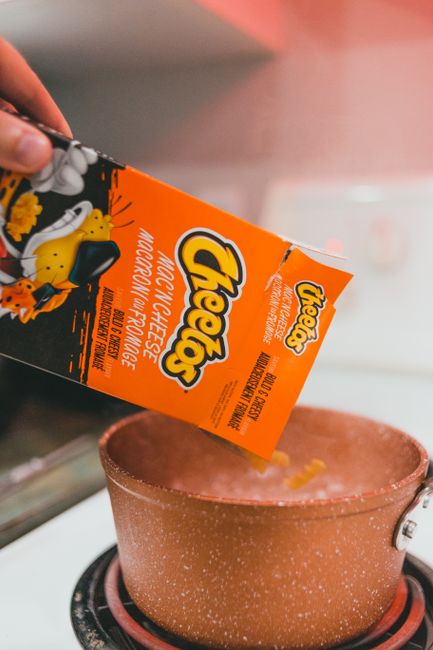
Bring a large pot of generously salted water to a rolling boil—it should taste like the sea. Add the elbow macaroni and cook according to package directions until al dente, which usually takes 8-10 minutes. You want a slight bite to the pasta since it will continue cooking in the oven. Drain well in a colander, but remember to reserve about ½ cup of that starchy pasta water. It’s liquid gold for adjusting your sauce consistency later.
Step 2: Make the Roux (The Foundation)
In your Dutch oven or heavy-bottomed pot, melt the 4 tablespoons of butter over medium heat. Once it’s foamy and fragrant, whisk in the flour. Cook this mixture, stirring constantly, for 2-3 minutes until it turns a light golden color and smells nutty. This step cooks out the raw flour taste and ensures your sauce thickens properly. Don’t rush it—this is the foundation of your creamy cheese sauce.
Step 3: Create the Cheese Sauce Base
Now, slowly drizzle in the milk and cream while whisking continuously. This gradual addition prevents lumps. Bring the mixture to a gentle simmer—you’ll see bubbles forming around the edges—then reduce the heat to medium-low. Stir in the Dijon mustard, garlic powder, smoked paprika, nutmeg, salt, and pepper. Cook for 5-7 minutes, stirring often, until the sauce coats the back of a spoon. It should be noticeably thicker than when you started.
Step 4: Add the Cheese (The Magic Moment)
Turn off the heat. Now add your shredded cheeses in two batches, stirring until fully melted and incorporated before adding more. The residual heat is perfect for melting without breaking the sauce. You’ll see it transform into a glossy, stretchy, velvety masterpiece. If the sauce seems too thick, stir in a splash of that reserved pasta water, one tablespoon at a time, until you reach your desired consistency.
Step 5: Combine Everything
Add the drained macaroni to the cheese sauce. Use a silicone spatula or wooden spoon to gently fold until every single piece of pasta is coated in that luscious cheese sauce. Take a moment to taste and adjust the seasoning—maybe another pinch of salt or a twist of pepper. This is your last chance to perfect the flavor before baking.
Step 6: Prepare the Crispy Topping
In a small bowl, mix the panko breadcrumbs with the 2 tablespoons of melted butter until the crumbs are evenly moistened. Panko gives you that wonderfully light, extra-crispy topping that contrasts perfectly with the creamy pasta underneath.
Step 7: Bake to Perfection
Transfer your mac and cheese to a greased 9×13-inch baking dish. Spread it evenly, then sprinkle the buttered panko all over the top in an even layer. Bake in a preheated 375°F (190°C) oven for 25-30 minutes. You’re looking for a deep golden-brown crust and bubbles erupting around the edges. That’s when you know it’s ready.
Step 8: Rest and Serve
This might be the hardest step: let it rest for 10 full minutes after pulling it from the oven. This resting time allows the sauce to set slightly, making serving much cleaner and the flavors to meld beautifully. Garnish with chopped fresh parsley for a pop of color and freshness.
Expert Tips & Tricks
- Grate Your Own Cheese: Pre-shredded cheese contains anti-caking agents that can make your sauce grainy. For the smoothest, creamiest texture, buy blocks and shred them yourself.
- Room Temperature Ingredients: Let your milk and cream sit out for 15-20 minutes before starting. Cold dairy added to a hot roux can cause the sauce to break or become lumpy.
- Al Dente Pasta: Always undercook your pasta by 1-2 minutes from package directions. It will continue cooking in the sauce and oven, preventing mushy results.
- Sauce Too Thick? Use the reserved pasta water to thin it. The starch helps maintain the emulsion better than plain water.
- Make-Ahead Magic: Assemble everything up through the topping step, cover tightly, and refrigerate for up to 24 hours. Add 5-10 minutes to the bake time when cooking from cold.
- Freezing: Cool completely, then freeze in an airtight container for up to 3 months. Thaw overnight in the fridge before reheating.
- Crispier Topping: For extra crunch, mix 1/4 cup of grated Parmesan into the panko before sprinkling.
Serving Suggestions
- Serve alongside a crisp green salad with a tangy vinaigrette to cut through the richness
- Pair with simple roasted vegetables like broccoli, Brussels sprouts, or asparagus
- For a hearty meal, add grilled chicken, pulled pork, or crispy bacon on top
- Serve in individual ramekins for a charming dinner party presentation
- Add a side of garlic bread or crusty baguette for scooping up every last bit of cheese sauce
Frequently Asked Questions
Can I use different cheeses?
Absolutely! The beauty of this mac and cheese recipe is its flexibility. Try swapping the Gruyère for Fontina or Monterey Jack. Add a little Gouda for smokiness, or pepper jack for a spicy kick. Just keep the total cheese quantity about the same (4 ½ cups total) and make sure at least half is a good melting cheese like cheddar, Gruyère, or Monterey Jack.
Can I make this without baking it?
Yes! Stop after combining the pasta and sauce (Step 5) and you have perfect stovetop mac and cheese. It will be creamier and saucier than the baked version. If you still want the crispy topping, you can toast the buttered panko separately in a skillet and sprinkle it on individual servings.
Why did my sauce turn out grainy?
Graininess usually happens from overheating the cheese or using pre-shredded cheese with anti-caking agents. Always remove the pot from heat before adding cheese, and shred your own from blocks. Also, adding cold dairy to a hot roux can cause separation—make sure your milk and cream aren’t ice-cold.
Can I make this gluten-free?
Easily! Use your favorite gluten-free pasta and replace the all-purpose flour with a 1:1 gluten-free flour blend for the roux. For the topping, use gluten-free breadcrumbs or crushed gluten-free crackers.
How long do leftovers keep?
Store leftover mac and cheese in an airtight container in the refrigerator for 3-4 days. Reheat gently in the microwave or in a 350°F oven until heated through. You may want to add a splash of milk when reheating to restore creaminess.
Can I double this recipe?
Yes, double all ingredients and use two 9×13-inch baking dishes or one large roasting pan. You may need to increase the baking time by 5-10 minutes. Make sure your pot is large enough to handle the doubled sauce volume—a 6-quart Dutch oven works perfectly.
The Final Word
There you have it—the ultimate creamy baked mac and cheese recipe that balances rich, indulgent flavor with just enough structure to make it company-worthy. Whether you’re serving it as the main attraction at a casual dinner or as a comforting side for your holiday table, this dish promises to deliver smiles with every creamy, cheesy bite. The beauty of this recipe lies in its adaptability; once you master the basic cheese sauce technique, you can experiment with different cheeses, add-ins, and toppings to make it uniquely yours. Go ahead, make that pot of comfort, and don’t forget to invite someone to share it with you. And when you do, I’d love to hear how it turned out—tag me in your photos or leave a comment below. Happy cooking!