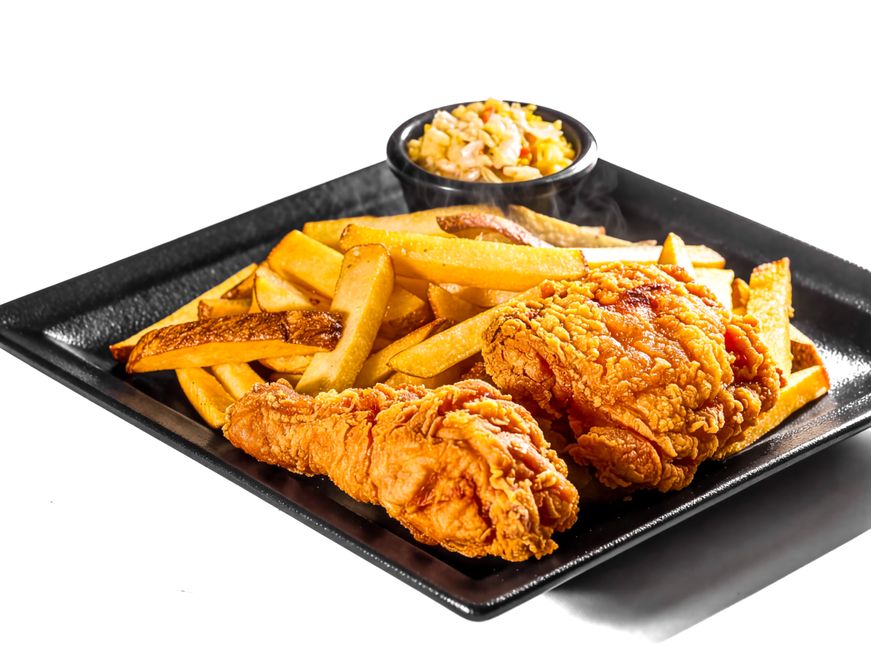
Fried chicken is a timeless classic that brings people together, whether it’s a family dinner or a backyard barbecue. This dish is not just about the meat; it’s all about the perfect crust, the juicy interior, and the irresistible aroma that fills your kitchen. If you’re looking to master the art of frying chicken, look no further. This comprehensive guide will walk you through every step, from marinating the chicken to achieving that golden, crispy exterior. Whether you’re a seasoned cook or a kitchen novice, this recipe will help you create the best fried chicken you’ve ever tasted.
Before we dive in, let’s talk about why this recipe stands out. The key to perfect fried chicken lies in the preparation and the cooking technique. We’ll start with a brine to infuse the chicken with flavor and moisture, followed by a triple-dredging method to ensure a crunchy, flavorful crust. The cooking process involves a combination of frying and baking to achieve the perfect texture. By the end, you’ll have a beautifully golden, crispy, and juicy fried chicken that will become a staple in your home cooking repertoire.
Here’s what you need to know to get started:
| Category | Value |
|---|---|
| Preparation Time | 20 minutes |
| Cooking Time | 45 minutes |
| Servings | 4 servings |
| Difficulty | Easy |
Nutrition per Serving
Calories: 500 kcal | Protein: 35g | Carbohydrates: 20g | Fat: 30g | Saturated Fat: 6g | Sodium: 600mg | Fiber: 2g | Sugar: 3g






Ingredients
| Ingredient | Quantity |
|---|---|
| Chicken pieces (thighs, drumsticks, wings, breasts) | 4-6 pieces |
| Salt | 1 tablespoon |
| Black pepper | 1 teaspoon |
| Garlic powder | 1 teaspoon |
| Paprika | 1 teaspoon |
| Cayenne pepper | 1/4 teaspoon |
| Buttermilk | 2 cups |
| All-purpose flour | 2 cups |
| Cornstarch | 1 cup |
| Butter | 1/2 cup, melted |
| Vegetable oil | For frying |
Cooking Instructions
-
Begin by preparing the brine. In a large bowl, mix together the buttermilk, 1 tablespoon of salt, 1 teaspoon of black pepper, 1 teaspoon of garlic powder, 1 teaspoon of paprika, and 1/4 teaspoon of cayenne pepper. Place the chicken pieces in the bowl, ensuring they are fully submerged in the brine. Cover the bowl with plastic wrap and refrigerate for at least 4 hours or overnight for the best results.
-
While the chicken is brining, preheat your oven to 400°F (200°C). Prepare a baking sheet by lining it with parchment paper and placing a wire rack on top. This will help the chicken cook evenly and stay crispy.
-
In a medium bowl, mix together the all-purpose flour, cornstarch, 1 tablespoon of salt, 1 teaspoon of black pepper, 1 teaspoon of garlic powder, 1 teaspoon of paprika, and 1/4 teaspoon of cayenne pepper. This will be your dry coating mixture.
-
Once the chicken has finished brining, remove it from the buttermilk and allow it to drain for a few minutes. Do not rinse the chicken, as the buttermilk helps to create a crispy crust.
-
Set up a dredging station with three shallow bowls. In the first bowl, place the dry coating mixture. In the second bowl, beat the melted butter. In the third bowl, place the dry coating mixture again. This triple-dredging method helps to create a thicker, crunchier crust.
-
Dredge each piece of chicken in the dry mixture, shaking off any excess. Then, dip the chicken in the melted butter, allowing any excess to drip off. Finally, dredge the chicken in the dry mixture again, pressing the coating onto the chicken to ensure it sticks. Place the coated chicken pieces on a plate or tray.
-
Fill a large, deep skillet or Dutch oven with about 2 inches of vegetable oil. Heat the oil over medium heat until it reaches 350°F (175°C). You can use a deep-fry thermometer to monitor the temperature.
-
Carefully place 2-3 pieces of chicken into the hot oil, being careful not to overcrowd the pan. Fry the chicken for about 7-8 minutes on each side, or until the crust is golden brown and the internal temperature of the chicken reaches 165°F (74°C). Use a meat thermometer to ensure the chicken is cooked through.
-
Using tongs, remove the fried chicken from the oil and place it on the prepared baking sheet. Repeat the frying process with the remaining chicken pieces, adding more oil to the skillet if necessary.
-
Once all the chicken is fried, place the baking sheet with the chicken in the preheated oven. Bake for 10-15 minutes, or until the chicken is fully cooked through and the crust is crispy and golden brown.
-
Remove the chicken from the oven and let it rest for a few minutes before serving. This allows the juices to redistribute, ensuring a juicy and tender result.
Serving Suggestions
Serve your perfectly crispy fried chicken with a side of creamy coleslaw, crispy fries, or a fresh garden salad. For a Southern twist, try serving it with classic sides like mashed potatoes, cornbread, or collard greens. A cold glass of sweet tea or a refreshing lemonade pairs perfectly with this dish.
Tips and Variations
-
To ensure the chicken is evenly coated, use one hand for dredging in the dry mixture and another for dipping in the wet mixture. This keeps your hands and the mixture clean.
-
If you don’t have a deep-fry thermometer, you can test the oil temperature by dropping a small piece of coating into the oil. If it sizzles and rises to the surface, the oil is ready.
-
For extra flavor, add herbs like thyme or rosemary to the dry coating mixture.
-
If you prefer a healthier option, you can bake the chicken instead of frying it. Place the coated chicken pieces on a baking sheet lined with parchment paper and bake at 400°F (200°C) for 40-45 minutes, or until the internal temperature reaches 165°F (74°C).
With this recipe, you’ll be well on your way to creating the best fried chicken you’ve ever had. The key is in the preparation and the attention to detail. Enjoy the process, and don’t be afraid to experiment with different seasonings and side dishes to make this classic dish your own. Happy cooking!