The Perfect Chocolate Chip Cookie: A Bite of Happiness
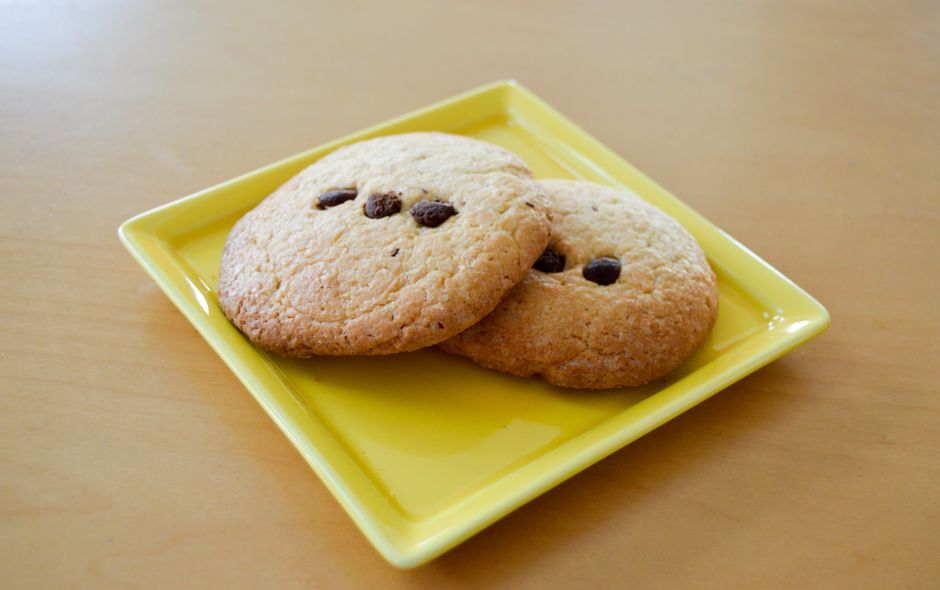
There’s something magical about a perfect chocolate chip cookie, isn’t there? That first warm bite—crisp around the edges, gloriously chewy in the center, with pools of melted chocolate that seem to stretch forever. It’s comfort food at its finest, a taste of childhood and home all wrapped up in one golden-brown package.





This recipe is my go-to for achieving that ideal texture every single time. After years of testing and tweaking, I’ve landed on the perfect balance of ingredients and technique. We’ll use a combination of brown and white sugars for depth, just enough flour for structure without being cakey, and most importantly, we won’t overbake them. The secret is pulling them out when they still look slightly underdone in the middle—trust me on this. Let’s bake some happiness together.
🍪 Recipe Overview
Nutrition Facts (per cookie)
- Calories: 180 kcal
- Fat: 9g
- Saturated Fat: 5g
- Carbohydrates: 24g
- Sugar: 15g
- Protein: 2g
- Sodium: 85mg
- Fiber: 1g
Ingredients
Dry Ingredients
- 2 1/4 cups (280g) all-purpose flour – spooned and leveled
- 1 teaspoon baking soda – make sure it’s fresh!
- 1 teaspoon fine sea salt – enhances all the flavors
Wet Ingredients
- 1 cup (226g) unsalted butter – softened to room temperature (about 65°F/18°C)
- 3/4 cup (150g) granulated sugar
- 3/4 cup (165g) packed light brown sugar – packed firmly into the measuring cup
- 2 large eggs – room temperature
- 2 teaspoons pure vanilla extract – not imitation
Mix-Ins
- 2 cups (340g) semi-sweet chocolate chips – I prefer 60% cacao
- 1 cup (120g) chopped walnuts or pecans – optional, but highly recommended
Instructions
Step 1: Preheat and Prepare
Start by preheating your oven to 375°F (190°C). This temperature gives us the perfect balance: crispy edges without burning. Line two baking sheets with parchment paper—this prevents sticking and makes cleanup a breeze. Don’t grease the sheets directly; it can cause the cookies to spread too much.
Step 2: Mix the Dry Ingredients
In a medium bowl, whisk together the flour, baking soda, and salt. Whisking instead of sifting aerates the flour and ensures even distribution. Set this aside. This is our dry team, ready to join the party later.
Step 3: Cream Butter and Sugars
In a large bowl, use an electric mixer to beat the softened butter with both sugars on medium speed for 2-3 minutes. You’re looking for a pale, fluffy mixture that’s light in texture. This step is crucial—it incorporates air and dissolves the sugar, which affects both texture and spread. Don’t rush it.
Step 4: Add Eggs and Vanilla
Beat in the eggs one at a time, making sure each is fully incorporated before adding the next. This helps create an emulsion that holds everything together. Then mix in the vanilla extract. Your mixture should look smooth and creamy now.
Step 5: Combine Wet and Dry Ingredients
Switch your mixer to low speed and gradually add the flour mixture. Mix just until the flour disappears—overmixing develops gluten and leads to tough cookies. A few streaks of flour are fine; they’ll get mixed in during the next step.
Step 6: Fold in Chocolate Chips
Using a sturdy spatula, gently fold in the chocolate chips (and nuts if using) until they’re evenly distributed. You want every scoop of dough to be packed with chocolate. This is also where you’d fold in any other mix-ins like toffee bits or different chocolate types.
Step 7: Portion Cookie Dough
Drop rounded tablespoons of dough (about 1.5 tablespoons each) onto your prepared baking sheets, spacing them about 2 inches apart. They need room to spread. For perfectly round cookies, roll the dough between your palms before placing them. You can also use a cookie scoop for consistent sizing.
Step 8: Bake Until Golden
Bake for 10-12 minutes, or until the edges are golden brown but the centers still look slightly soft and underbaked. They’ll continue to cook on the hot baking sheet. The cookies should have puffed up and then settled slightly. If you prefer crispier cookies, bake for an extra minute or two.
Step 9: Cool on Pan
This is the hardest part—patience! Let the cookies cool on the baking sheet for 5 minutes. They’re too soft to move immediately. Then use a spatula to transfer them to a wire rack to cool completely. The wait is worth it for that perfect texture.
Expert Tips & Tricks
- Cookie Dough Resting: For even better flavor, cover and refrigerate the dough for 24-48 hours before baking. The flour hydrates, and the flavors deepen.
- Butter Temperature: Your butter should be cool to the touch but soft enough that you can press a finger into it easily. Too warm, and your cookies will spread too much; too cold, and they won’t cream properly.
- Ingredient Quality: Use real butter, pure vanilla extract, and good chocolate chips. These small upgrades make a huge difference in flavor.
- Baking Sheet Rotation: Halfway through baking, rotate your baking sheets front to back and swap racks if using two. This ensures even browning.
- Storage: Keep cooled cookies in an airtight container at room temperature for up to 5 days. They’ll soften slightly but stay delicious.
- Freezing Dough: Portion dough balls onto a baking sheet, freeze until solid, then transfer to a freezer bag. Bake straight from frozen, adding 1-2 minutes to baking time.
Serving Suggestions
- Serve warm with a cold glass of milk—it’s the classic pairing for a reason.
- Make ice cream sandwiches with vanilla bean ice cream between two cookies.
- Crumble over a bowl of vanilla ice cream for an instant sundae.
- Pack in lunchboxes or take on picnics—they travel well.
- Serve alongside coffee or tea for an afternoon pick-me-up.
Frequently Asked Questions
Can I make these cookies without a mixer?
Absolutely! Use a sturdy wooden spoon and some elbow grease. Cream the butter and sugars really well—it might take 5-7 minutes of vigorous mixing. The rest of the steps are the same.
Why did my cookies spread too much?
Usually, this means your butter was too warm or your baking sheets were warm when you added the dough. Make sure your butter is cool room temperature, and always use cool baking sheets for each batch.
Can I use dark brown sugar instead of light?
Yes! Dark brown sugar has more molasses, which will give your cookies a deeper, almost caramel-like flavor and make them slightly chewier. The texture might be a bit different, but still delicious.
How do I get thicker cookies?
Chill the dough for at least 30 minutes before baking. Cold dough spreads less. Also, make sure your baking soda is fresh—it’s the leavening agent that helps cookies rise.
Can I double this recipe?
Definitely. Just make sure you have a big enough bowl for mixing. I recommend mixing in two batches if your mixer or bowl is small.
What’s the best way to store leftover cookies?
In an airtight container at room temperature for up to 5 days. If they start to get hard, add a slice of bread to the container—it’ll help keep them soft.
A Final Note
These chocolate chip cookies freeze beautifully, both as baked cookies and as dough balls. Having cookie dough ready to bake means fresh, warm cookies are never more than 15 minutes away—perfect for unexpected guests or sudden cravings. I love seeing how you make this recipe your own, whether it’s adding different mix-ins, adjusting the bake time for your preferred texture, or sharing them with people you love. Happy baking, and don’t forget to save one warm cookie for the baker!