The Ultimate Comfort Food: Chicken Pot Pie
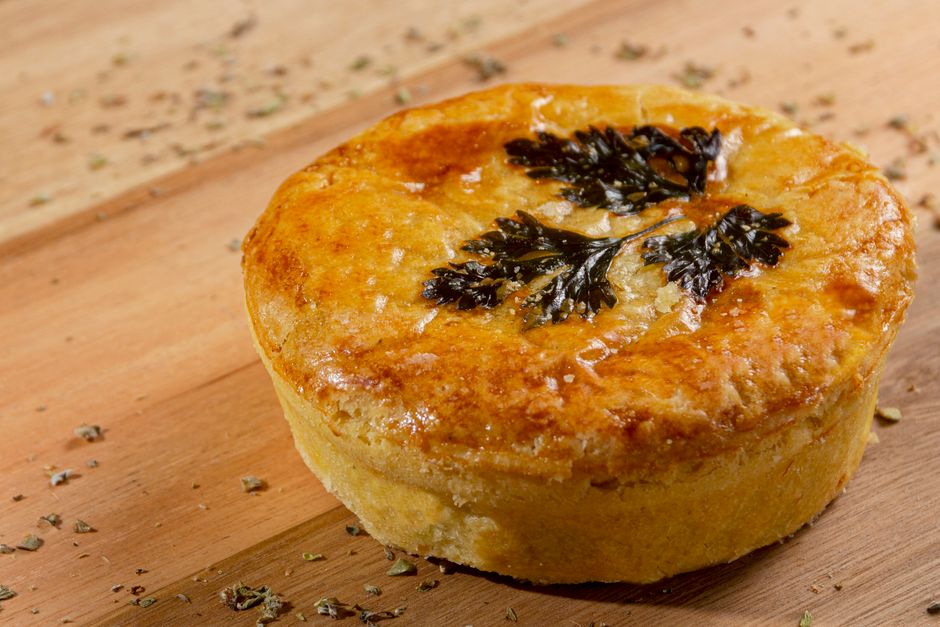
There’s something magical about pulling a golden-brown chicken pot pie from the oven. The steam that escapes when you cut through that flaky crust carries the most comforting aromas—savory chicken, sweet carrots, earthy herbs, and that creamy, rich gravy that holds everything together. It’s more than just a meal; it’s a hug in food form.






If you’ve ever thought making chicken pot pie from scratch was complicated, let me change your mind. This recipe breaks it down into simple, manageable steps that even beginner cooks can follow. I’ve tested and refined this version to ensure it delivers maximum flavor with minimal fuss. Whether you’re cooking for a cozy family dinner, meal prepping for the week, or impressing guests with your baking skills, this chicken pot pie recipe has you covered.
📋 Recipe Overview
Nutrition Facts (per serving)
- Calories: 420 kcal
- Protein: 28g
- Fat: 22g
- Carbohydrates: 32g
- Fiber: 4g
- Sugar: 5g
Ingredients
Gather these simple ingredients—most are pantry staples you probably already have!
For the Filling
- 1.5 lbs boneless, skinless chicken breasts (about 2 large breasts, cut into 1-inch cubes)
- 1 tablespoon olive oil (for cooking the chicken)
- 1 tablespoon butter (unsalted)
- 1 medium yellow onion (diced, about 1 cup)
- 3 medium carrots (peeled and diced, about 1 cup)
- 2 celery stalks (diced, about 1/2 cup)
- 3 cloves garlic (minced)
- 1/3 cup all-purpose flour (for thickening the gravy)
- 2 cups chicken broth (low sodium recommended)
- 1 cup whole milk (2% works too, but whole milk makes a richer sauce)
- 1 cup frozen peas (no need to thaw)
- 1 teaspoon dried thyme
- 1/2 teaspoon dried rosemary (crushed between your fingers)
- 1/4 cup fresh parsley (chopped, plus more for garnish)
- Salt and black pepper to taste
For the Crust & Assembly
- 1 package refrigerated pie crusts (contains 2 crusts, or use homemade pie dough)
- 1 egg (beaten, for egg wash)
Instructions
Step 1: Cook the Chicken
Start by cutting your chicken breasts into 1-inch cubes—this ensures they cook evenly and you get tender chicken in every bite. Pat the cubes dry with paper towels (this helps them brown better). Season generously with salt and pepper. Heat the olive oil in a large skillet or Dutch oven over medium-high heat. Cook the chicken until it’s browned on all sides and cooked through, about 6-8 minutes total. Remove the chicken with a slotted spoon and set it aside in a bowl. Don’t worry about cleaning the skillet—those browned bits at the bottom add incredible flavor to our gravy!
Step 2: Sauté the Vegetables
In the same skillet, melt the butter over medium heat. Add the diced onion, carrots, and celery. Cook, stirring occasionally, until the vegetables begin to soften, about 5-7 minutes. You want them just tender enough to pierce with a fork but still have a bit of texture. Add the minced garlic and cook for just 1 more minute until fragrant—garlic burns easily, so keep an eye on it!
Step 3: Make the Gravy
This is where the magic happens! Sprinkle the flour evenly over the vegetables and stir constantly for 2 minutes. This cooks out the raw flour taste and creates a roux that will thicken our sauce. Now gradually whisk in the chicken broth, making sure to scrape up all those delicious browned bits from the bottom of the pan. Once smooth, add the milk. Bring the mixture to a gentle simmer while stirring constantly. You’ll see it thicken beautifully into a creamy gravy in about 3-5 minutes.
Step 4: Combine the Filling
Return the cooked chicken to the skillet. Stir in the frozen peas (they’ll thaw as they cook), dried thyme, dried rosemary, and fresh parsley. Give everything a good mix and season with additional salt and pepper to taste. I always do a little taste test here to make sure the seasoning is just right. Remove the skillet from the heat and let the filling cool slightly while you prepare the crust—this helps prevent a soggy bottom crust.
Step 5: Prepare the Pie Dish
Preheat your oven to 400°F (200°C). If your pie crusts are refrigerated, let them sit at room temperature for about 10 minutes so they’re easier to work with. Roll out one pie crust on a lightly floured surface (unless using pre-rolled). Gently place it in a 9-inch pie dish, pressing it into the bottom and sides without stretching. Trim any excess dough, leaving about 1/2 inch overhang all around.
Step 6: Assemble the Pie
Pour the chicken and vegetable filling into the prepared pie crust, spreading it evenly. Roll out the second pie crust and carefully place it over the filling. Trim the edges, then crimp the top and bottom crusts together to seal. You can use a fork to press decorative marks around the edge. Don’t forget to cut 4-5 small slits in the top crust—this is crucial for allowing steam to escape during baking!
Step 7: Bake to Golden Perfection
Whisk an egg with 1 tablespoon of water to make an egg wash. Brush this lightly over the entire top crust—this gives our chicken pot pie that beautiful golden shine. Place the pie dish on a baking sheet (this catches any drips and makes it easier to handle). Bake for 30-35 minutes, or until the crust is a deep golden brown and you can see the filling bubbling through the slits.
Step 8: The Most Important Step—Rest!
I know it’s tempting to dive right in, but please let your chicken pot pie rest for 10-15 minutes after removing it from the oven. This allows the filling to set slightly, which means cleaner slices and prevents burning your mouth on molten-hot filling. The aroma will be absolutely intoxicating while you wait!
Expert Tips & Tricks
- Make-Ahead Magic: You can prepare the filling up to 2 days in advance and store it covered in the refrigerator. Assemble and bake when ready to serve.
- Vegetable Variations: Swap peas for corn, green beans, or mushrooms. Use what you have on hand or prefer!
- Herb Freshness: If you have fresh thyme and rosemary, use 1 tablespoon fresh thyme and 1 teaspoon fresh rosemary instead of dried.
- Crust Pro-Tip: For an extra-flaky crust, keep your butter or shortening very cold and handle the dough as little as possible.
- Leftover Rotisserie Chicken: Skip cooking raw chicken altogether! Use 3 cups of shredded cooked chicken (from a rotisserie chicken or leftovers).
- Individual Pot Pies: Divide the filling among 6 oven-safe ramekins, top with smaller rounds of pie crust or puff pastry, and bake for 20-25 minutes.
- Freezing Instructions: Freeze the unbaked assembled pie for up to 3 months. Wrap tightly in plastic wrap and foil. Bake from frozen, adding 15-20 minutes to baking time.
- No Egg Wash? Brush with milk or cream instead for a slightly less shiny but still golden crust.
Serving Suggestions
- Serve with a crisp green salad dressed with a tangy vinaigrette to cut through the richness
- Pair with roasted Brussels sprouts or glazed carrots for extra vegetables
- For a true comfort food feast, add mashed potatoes on the side (yes, carbs on carbs!)
- A chilled glass of Chardonnay or a crisp cider complements the savory flavors beautifully
- Leftovers are fantastic reheated for lunch the next day—the flavors deepen overnight
Frequently Asked Questions
Can I use chicken thighs instead of breasts?
Absolutely! Chicken thighs have more fat and flavor, which makes for an even richer filling. Use 1.5 lbs boneless, skinless chicken thighs cut into 1-inch pieces. They may need an extra minute or two of cooking time.
How do I prevent a soggy bottom crust?
Three tricks: 1) Let your filling cool slightly before adding it to the crust, 2) Bake on the lower oven rack, and 3) Consider blind-baking the bottom crust for 10 minutes before adding filling if you’re especially concerned.
Can I make this vegetarian?
Yes! Replace the chicken with 2 cups of cooked chickpeas or white beans, and use vegetable broth instead of chicken broth. Add extra vegetables like mushrooms or zucchini.
How long do leftovers keep?
Store cooled leftovers in an airtight container in the refrigerator for 3-4 days. Reheat individual slices in the oven at 350°F (175°C) for 15-20 minutes, or until heated through.
Can I use puff pastry instead of pie crust?
Yes, puff pastry makes a delicious, flaky alternative. Use one sheet for the top only (not bottom), and bake according to puff pastry package directions.
My filling is too thin/thick. How can I fix it?
Too thin? Simmer a few more minutes to reduce. Too thick? Add a splash more chicken broth or milk until you reach your desired consistency.
Final Thoughts
There’s nothing quite like homemade chicken pot pie. It’s the kind of meal that fills your kitchen with warmth and your belly with satisfaction. While it might seem like a project, breaking it down into these manageable steps makes it totally approachable. Don’t be intimidated—even if your crimping isn’t perfect or your crust tears a little (mine does too sometimes!), it will still taste absolutely delicious.
This recipe is forgiving and flexible, so make it your own. Add more of your favorite vegetables, experiment with different herbs, or make mini pot pies for a fun presentation. Once you master this classic version, you’ll find yourself making it again and again, especially on chilly evenings when comfort food is calling.
I’d love to hear how your chicken pot pie turns out! Share your photos, variations, or questions in the comments below. Happy baking!