Mastering the Classic French Macaron at Home
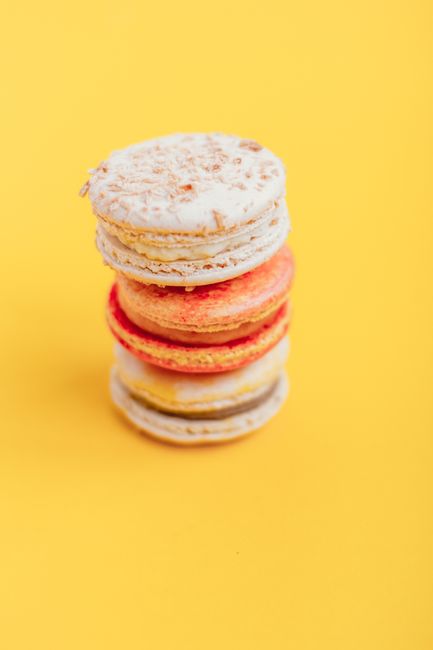
Few baked goods evoke the same sense of elegance and pastry shop sophistication as the classic French macaron. With their crisp outer shells, delightfully chewy centers, and smooth buttercream or ganache fillings, these French treats are as visually stunning as they are delicious. However, many home bakers feel intimidated by the reputation macarons have for being fickle and tricky to master.
The truth is that successful macaron baking isn’t about luck; it’s about technique, precise measurements, and understanding how batter consistency changes at each phase. Once you understand the mechanics of whipping egg whites, folding almond flour correctly, and allowing the piped batter to dry before baking, you’ll be able to produce beautiful batches consistently. This step-by-step macaron recipe guides you through every critical phase with absolute clarity, removing the guesswork so you can enjoy bakery-worthy results right from your home kitchen.
Key Takeaways for Macaron Success
- Always use a digital scale: Measuring almond flour and sugar by weight in grams rather than volume cups ensures the precise ratio necessary for proper structure.
- Master the macaronage stage: Stop folding as soon as your batter flows off the spatula in a continuous, thick ribbon that slowly reabsorbs into itself after 20-30 seconds.
- Respect the rest period: Let your piped batter rest on the counter until a dull, dry skin forms over the tops before placing the tray in the oven.
- Know your oven’s true heat: Use an independent oven thermometer to ensure your baking temperature stays steady at 300°F (150°C).
- Age your finished macarons: Let assembled macarons sit in an airtight container in the refrigerator for 24 hours before serving to achieve the ideal texture.
Understanding the Macaron Method
Before diving into the bowls and spatulas, it helps to know which technique you’re using. Macaron shells can be made using French, Swiss, or Italian meringue methods. This macaron recipe uses the traditional French method, which is the most direct approach because it involves whipping raw egg whites with granulated sugar without heating or boiling sugar syrups.
| Method | Meringue Preparation | Skill Level | Characteristics |
|---|---|---|---|
| French | Raw egg whites whipped with granulated sugar | Intermediate | Lightest shell, classic delicate texture, fewer dishes |
| Swiss | Egg whites and sugar warmed over a water bath before whipping | Intermediate to Advanced | Slightly more stable meringue, smooth finish |
| Italian | Hot sugar syrup (240°F) poured into whipping egg whites | Advanced | Most stable batter, highly consistent, extra equipment needed |
While the Italian and Swiss methods offer extra stability, the French method remains the classic standard for home bakers because it requires minimal specialized equipment while yielding light, airy, and delicious macaron shells.
Ingredients and Essential Notes
Because macaron batter relies on just a few simple ingredients, the quality and preparation of each component directly impact your final results.
- Almond Flour (100 grams): Use finely ground, blanched almond flour. Avoid unblanched almond meal, which contains brown skins that add weight and moisture, causing rough tops.
- Powdered Sugar (100 grams): Confectioners’ sugar contains a small amount of cornstarch, which helps absorb excess moisture in the batter. Sift this combined with your almond flour to remove any coarse bits.
- Egg Whites (75 grams): This is roughly equivalent to two large egg whites, but always weigh them. Fresh egg whites work, but egg whites aged in the refrigerator for 24 to 48 hours in a covered glass contain less moisture and whip into a sturdier meringue. Bring them to room temperature before whipping.
- Granulated Sugar (65 grams): Superfine granulated sugar dissolves quickly into the egg whites, producing a tight, stable meringue structure.
- Cream of Tartar (1/8 teaspoon): Optional, but highly recommended. Adding a pinch of acid stabilizes egg white proteins, making the meringue less prone to over-whipping.
- Fine Sea Salt (pinch): Enhances the sweet flavors and cuts through the richness of the almond flour.
- Gel Food Coloring (optional): Avoid liquid water-based food dyes, as liquid alters the batter’s hydration level. Use concentrated gel or powder colorings added during the final whipping phase of the meringue.
Step-by-Step Cooking Instructions
Phase 1: Preparation and Dry Ingredient Sifting
Line two large rimmed baking sheets with high-quality silicone baking mats or flat parchment paper. Trace 1.5-inch circles spaced 1 inch apart onto parchment paper if you want a visual guide, then flip the paper over so pencil marks don’t transfer to your shells.
Place a fine-mesh sieve over a large mixing bowl. Add 100 grams of blanched almond flour and 100 grams of powdered sugar. Sift the mixture completely. If coarse bits of almond remain in the sieve, discard them or save them for another baking project; do not force them through the mesh, as large pieces produce bumpy macaron tops.
Phase 2: Whipping the French Meringue
Ensure your mixing bowl and whisk attachment are completely clean and oil-free. Any trace of fat prevents egg whites from whipping properly. Pour 75 grams of room-temperature egg whites into the bowl along with 1/8 teaspoon of cream of tartar and a pinch of salt.
Begin whipping on low speed until the egg whites turn frothy and white, about 1-2 minutes. Gradually increase the mixer speed to medium and begin adding 65 grams of granulated sugar, one tablespoon at a time. Once all sugar is incorporated, increase speed to medium-high.
Whip until stiff, glossy peaks form. When you lift the beaters, the meringue peak should stand straight up with a slight tip that doesn’t droop. If adding gel food color, drop it in during the last 30 seconds of whipping.
Phase 3: The Macaronage (Folding Phase)
Pour one-third of the sifted dry ingredients into the bowl with your whipped meringue. Using a wide silicone spatula, cut down through the center, sweep around the bottom of the bowl, and fold the mixture over itself. Add the remaining dry ingredients in two more increments, folding gently after each addition.
Now begin the macaronage: deflate the batter slightly by spreading it up against the sides of the mixing bowl, then scraping it back down into the center. Turn the bowl continuously as you fold.
Pro Tip: Stop folding as soon as your batter reaches a lava-like consistency. When you lift the spatula, the batter should fall off in a continuous ribbon that forms a figure-8 without breaking. Any lines drawn in the batter bowl should smooth out on their own within 20 to 30 seconds.
Over-folding results in runny batter, flat shells without feet, and cracked tops. Under-folding leaves the batter too stiff, causing pointed tops that do not smooth out after piping.
Phase 4: Piping and Resting
Fit a large piping bag with a 1/2-inch round tip (such as an Ateco 804 or Wilton 1A). Transfer the macaron batter into the bag. Hold the piping bag directly perpendicular (at a 90-degree angle) above your prepared baking sheet, keeping the tip roughly 1/2 inch above the surface.
Squeeze from the top of the bag until a 1.5-inch circle forms, then stop squeezing and flick your wrist quickly in a small circle to detach the tip. Repeat across all baking trays.
Firmly tap the underside of the baking sheet against your kitchen counter 4-5 times. This forces trapped air bubbles to rise to the surface. Use a toothpick to gently pop any remaining visible bubbles on top of the piped circles.
Leave the baking sheets on the counter at room temperature to dry for 30 to 60 minutes. The resting duration depends on humidity. The shells are ready for the oven when you can touch the surface gently with your fingertip without any batter sticking to your skin. This dry skin traps steam underneath during baking, creating classic macaron feet.
Phase 5: Baking and Cooling
Preheat your oven to 300°F (150°C) with an oven rack positioned in the center. Bake one tray at a time for 14 to 16 minutes. To check if they are done, tap the side of a shell lightly; if the top wobbles separate from the foot, bake for another 1 to 2 minutes. The shells are finished when the tops feel firm and set.
Remove the tray from the oven and let the macaron shells cool completely on the baking mat or parchment paper for at least 30 minutes. Do not peel them off while warm, or the bottoms will tear and stick.
Macaron Troubleshooting and Tips
Macaron baking can feel like chemistry. If your first batch isn’t picture-perfect, use this quick reference guide to identify what happened and fix it next time.
| Issue | Likely Cause | How to Fix Next Time |
|---|---|---|
| Cracked tops | Trapped air bubbles, or shells didn’t rest long enough to form a dry skin before baking | Tap tray thoroughly on counter; rest until skin is completely non-sticky to touch |
| No feet | Batter was over-folded, or oven temperature was too low | Fold less during macaronage; check oven heat with an independent thermometer |
| Hollow shells | Meringue was over-whipped, or oven temperature was too high causing rapid rise | Whip meringue only to firm stiff peaks; lower oven temp slightly |
| Lopsided feet | Uneven oven airflow, tilted piping angle, or warped baking sheets | Pipe vertically at 90 degrees; use heavy aluminum sheets; rotate tray mid-bake |
| Sticky bottoms | Macaron shells were underbaked or removed from baking sheet before fully cooled | Bake 1-2 minutes longer; allow full cooling on silicone mat before peeling |
Creative Flavor Variations
Once you’ve mastered the classic vanilla macaron shell base using this foundational macaron recipe, you can adapt the flavor profile with simple additions to fillings and shells:
- Chocolate Macarons: Replace 10 grams of powdered sugar in the dry mixture with 10 grams of unsweetened Dutch-process cocoa powder. Pair with dark chocolate ganache filling.
- Matcha Green Tea Macarons: Sift 1 teaspoon of culinary-grade matcha powder into the almond flour and powdered sugar mix. Fill with white chocolate matcha buttercream.
- Lemon Berry Macarons: Tint the shells soft yellow. Fill with vanilla buttercream surrounding a hidden spot of seedless raspberry jam in the center of each sandwich shell.
- Salted Caramel Macarons: Tint shells warm amber-brown. Fill with a swirl of salted caramel buttercream and a drop of dark caramel sauce in the center.
Serving Suggestions
Macarons are ideal for afternoon tea, holiday dessert platters, wedding dessert tables, or packaged in clear boxes as homemade gifts. Because they are individual bite-sized treats, they pair wonderfully with hot espresso, Earl Grey tea, or crisp sparkling champagne.
Storage and Maturation
The secret to authentic French macaron texture lies in a process called maturation. Once you pipe filling between two matched shells, place the assembled macarons into an airtight container and store them in the refrigerator for 24 hours before serving.
During this maturation period, moisture from the filling gently hydrates the crisp interior of the shells, softening the center into that signature chewy texture while keeping the outer crust delightfully delicate.
- Refrigeration: Assembled macarons stay fresh in an airtight container in the fridge for up to 7 days. Bring them to room temperature for 15-20 minutes before eating for best flavor.
- Freezing: Filled macarons freeze exceptionally well. Store them in an airtight container separated by parchment layers for up to 2 months. Thaw in the refrigerator overnight, then bring to room temperature before serving.
Nutrition Information
The following estimated nutrition information applies to one fully assembled vanilla buttercream macaron (based on a yield of 12 complete macarons).
| Nutrient | Amount Per Serving |
|---|---|
| Calories | Approx. 160 kcal |
| Protein | 3 g |
| Carbohydrates | 22 g |
| Fat | 7 g |
| Saturated Fat | 2.5 g |
| Fiber | 1 g |
| Sugar | 19 g |
| Sodium | 25 mg |
Frequently Asked Questions
Why did my macaron shells turn out hollow?
Hollow shells usually occur when the meringue is over-whipped, incorporating excess air that collapses during baking. Hollows can also stem from an oven that runs too hot, causing the batter to expand rapidly before the interior structure sets.
Can I make macarons without almond flour?
Yes, though almond flour is traditional. Fine sunflower seed flour or pumpkin seed flour can be substituted in equal weight measurements for almond-free or nut-free alternatives. Texture and flavor will vary slightly from classic almond-based shells.
Why are my macaron shells still sticky on the bottom?
Under-baking is the main cause of sticky bottoms. If your shells stick to the parchment or silicone mat when peeling, they need an extra 1 to 2 minutes in the oven. Additionally, always wait until shells have cooled completely before removing them.
Do I really need a kitchen scale for this macaron recipe?
While you can find cup-based recipes online, using a digital kitchen scale measuring in grams dramatically increases your chances of success. A single cup of almond flour can vary by up to 20 grams depending on how tightly packed it is, which ruins the delicate wet-to-dry ingredient ratio required for macarons.
Why didn’t my macarons develop feet?
Feet form when steam trapped inside the batter expands downward because the top surface has dried into a firm skin. If your shells don’t have feet, you either didn’t let them rest long enough before baking, or the batter was over-folded during macaronage, making it too liquid to rise vertically.
Conclusion
Baking delicious, delicate French macarons at home is a rewarding culinary skill that becomes easier every time you practice. By following this precise macaron recipe, weighing your ingredients in grams, carefully watching your macaronage folding stage, and giving your piped shells time to dry before baking, you will achieve smooth, glossy shells with beautiful ruffled feet. Don’t forget the crucial maturation step—resting your filled macarons in the fridge overnight transforms them into the soft, chewy delights you love. Gather your ingredients, prep your digital scale, and enjoy creating these classic French pastries right in your home kitchen!