Crispy Buttermilk Fried Chicken Recipe: The Ultimate Comfort Food

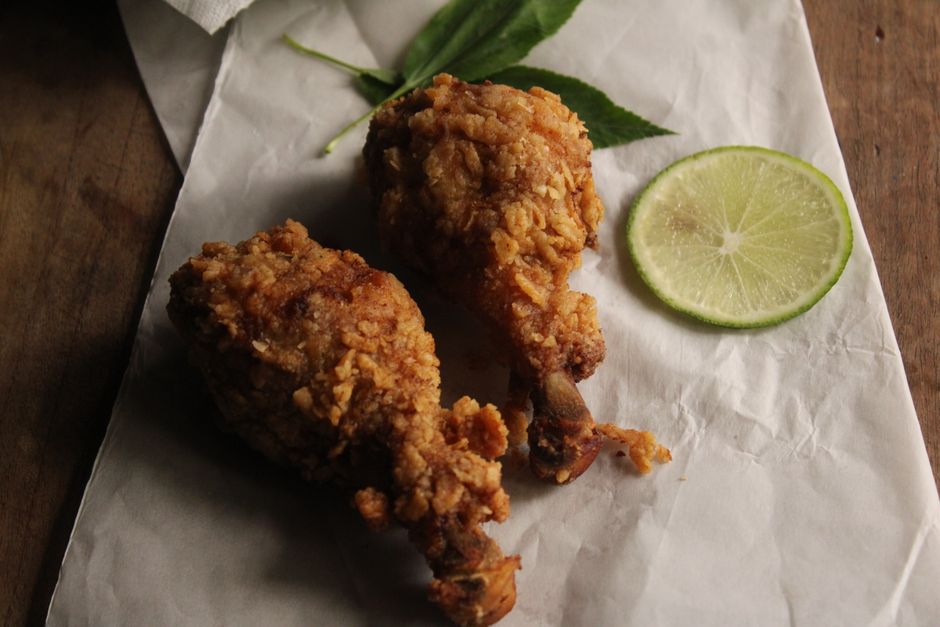
There’s something almost magical about perfect fried chicken. It’s the audible, satisfying crunch as you bite through a golden-brown crust that gives way to steaming, impossibly juicy meat. It’s the kind of food that makes you close your eyes for a second, a true comfort classic that feels like a warm hug. This recipe isn’t just another fried chicken recipe—it’s the one. Born from Southern tradition and perfected with a few modern tricks, it delivers that iconic crackle and tenderness every single time, whether you’re a weeknight cook or a weekend entertainer.






Recipe Overview
Nutrition Facts (per serving)
- Calories: 420 kcal
- Protein: 35g
- Fat: 22g
- Carbohydrates: 28g
- Fiber: 2g
- Sugar: 3g
- Sodium: 850mg
Ingredients
For the Marinade
- 2 lbs chicken pieces – I prefer a mix of bone-in, skin-on thighs and drumsticks for maximum flavor and juiciness. Breasts work too, cut in half.
- 2 cups buttermilk – The secret weapon. Its acidity tenderizes the meat like nothing else.
- 1 tablespoon hot sauce – Adds a subtle background warmth without overwhelming heat. Frank’s RedHot is classic.
For the Crispy Coating
- 2 cups all-purpose flour – The base of our shaggy crust.
- 1/3 cup cornstarch – The game-changer for an extra-crispy, light texture that stays crunchy.
- 2 teaspoons paprika – For color and a sweet, smoky note.
- 1 teaspoon garlic powder
- 1 teaspoon onion powder
- 1 teaspoon dried thyme – Herbal, earthy fragrance.
- 1/2 teaspoon cayenne pepper (optional) – For those who like a kick.
- 2 teaspoons salt – Seasoning the flour is non-negotiable.
- 1 teaspoon freshly ground black pepper
- 1 teaspoon baking powder – A little leavening creates tiny bubbles in the crust for ultimate crispiness.
For Frying
- Vegetable oil, for frying – You’ll need about 4-6 cups to get 1 1/2 inches of depth in your pot. Peanut, canola, or avocado oil are great high-smoke-point choices.
Instructions
Step 1: Marinate the Chicken (The Patience Payoff)
This is where the magic begins. In a large bowl, whisk together the buttermilk and hot sauce. Add your chicken pieces, making sure they’re fully submerged. Cover the bowl and tuck it into the refrigerator. Let it work its magic for at least 4 hours, but ideally overnight. This isn’t just about flavor—the acidic buttermilk breaks down proteins, resulting in chicken so tender it practically falls off the bone.
Step 2: Prep Your Station & Dredge
About 30 minutes before you plan to fry, take the chicken out of the fridge. Letting it warm up slightly ensures even cooking. In a large shallow dish, whisk together all the dry coating ingredients—flour, cornstarch, and all those spices. The cornstarch and baking powder are your crispiness guardians.
Now, the dredge: pull a piece of chicken from the buttermilk, letting the excess drip back into the bowl. Plunge it into the flour mixture. Press, flip, and really work the flour into all the wet spots until you have a thick, shaggy, uneven coating. That shagginess equals crunch. Place each coated piece on a wire rack. Let them all rest like this for 10-15 minutes. This lets the coating hydrate and set, so it won’t slide off in the fryer.
Step 3: Fry to Golden Perfection
Pour your oil into a heavy Dutch oven or deep pot. Attach your candy thermometer. Heat over medium-high until it hits a steady 350°F (175°C). The right temperature is everything. Too hot, and the outside burns before the inside cooks; too cool, and the chicken absorbs oil and gets greasy.
Carefully lower 3-4 pieces into the oil, skin-side down if applicable. Don’t crowd the pot! Fry for 12-15 minutes, turning occasionally with tongs, until it’s a deep, glorious golden brown. The real test? The internal temperature: 165°F (74°C) for white meat, 175°F (80°C) for dark meat. Transfer the finished chicken to a clean wire rack (not paper towels!) to drain. Let it rest for 5-10 minutes—this is when the juices settle back in.
Expert Tips & Tricks
- The Double-Dip: For an extra-thick, craggy crust (like the pros have!), after the first dredge and rest, dip each piece back in the buttermilk and give it a second coat of flour.
- Temperature is King: Keep that oil between 325°F and 350°F. Add chicken in batches and let the oil reheat fully between each one. A thermometer is your best friend here.
- The Wire Rack Advantage: Draining on a rack over a sheet pan keeps the bottom crust crisp. Paper towels trap steam and can make it soggy.
- Season Immediately: As soon as the chicken comes out of the oil, while it’s still glistening, hit it with a tiny pinch of flaky sea salt. It makes the flavor pop.
- Make-Ahead: You can marinate the chicken for up to 24 hours. You can also mix the dry coating a day ahead and store it in an airtight container.
- Oil Choice: Use a neutral oil with a high smoke point. Peanut oil gives fantastic flavor, while canola or avocado oil are great all-purpose choices.
Serving Suggestions
- The Classic Plate: Serve with creamy mashed potatoes, simple buttered corn, and a fluffy biscuit for the ultimate Southern feast.
- For a Lighter Touch: Pair with a tangy, crisp coleslaw and some quick-pickled red onions to cut through the richness.
- Sandwich Glory: Pile a piece of boneless thigh or breast onto a soft brioche bun with mayo, shredded lettuce, and a couple of dill pickle slices.
- Brunch Upgrade: Serve alongside fluffy waffles and hot maple syrup for a sweet-and-salty chicken and waffles situation.
Frequently Asked Questions
Can I use boneless, skinless chicken breasts?
Absolutely. They’ll cook faster—aim for 6-8 minutes frying time, or until they reach 165°F internally. Just know that bone-in, skin-on dark meat (thighs, drumsticks) is more forgiving and stays juicier.
How do I get the coating to stick better?
The key steps are 1) letting the excess buttermilk drip off before dredging, 2) pressing the flour on firmly, and 3) letting the coated chicken rest on the rack for 10-15 minutes before frying. This lets the coating “glue” itself to the chicken.
Can I bake this instead of frying?
For a healthier version, you can. Preheat your oven to 400°F (200°C). Place the dredged chicken on a wire rack set over a baking sheet. Spray generously with cooking oil and bake for 40-50 minutes, flipping halfway, until golden and cooked through. It won’t be quite the same as deep-fried, but it will still be delicious.
How should I store leftovers?
Let the chicken cool completely, then store in an airtight container in the refrigerator for up to 3-4 days. To reheat and restore the crunch, avoid the microwave. Use a toaster oven, air fryer, or regular oven at 375°F (190°C) for 8-12 minutes.
Can I freeze cooked fried chicken?
Yes! Cool it completely, wrap each piece individually in foil, then place in a freezer bag. Freeze for up to 2 months. Reheat from frozen in a 350°F (175°C) oven for 20-25 minutes, until hot throughout.
There you have it—your new go-to recipe for fried chicken that’s guaranteed to impress. The secret isn’t one thing; it’s the combination of the buttermilk marinade, the cornstarch-enhanced coating, and the precise frying temperature. Once you hear that first incredible crunch, you’ll know it was all worth it. I’d love to hear how yours turns out!